Body and Paint
Windshield. Removal and Installation
In this manual: Body and Paint
37steps
~222min
5/5difficulty
Done 0 of 37
Special Service Tools / General Equipment
 |
300-AST1770E Deluxe Air Knife |
| Glass Removal Suction Cup | |
| Wood block | |
Materials
| Name | Specification |
|---|---|
| Sika® SikaTack® MACH 60 / Sika® SikaTack® MACH 30 / Dow® BETASEAL™ Express | - |
| Sika Tack ASAP Urethane Adhesive | - |
| Dow One-Step Urethane Primer for Glass Betaprime™ 5500/5500A/5500SA |
- |
| Sika Urethane Primer for Metal and Glass Sika 206 G+P |
- |
| Motorcraft® Ultra Clean Glass Cleaner Spray ZC-23 |
ESR-M14P5-A |
Removal
- Remove the interior rearview mirror.
Refer to: Interior Rearview Mirror (501-09 Rearview Mirrors, Removal and Installation). - Remove the hood panel grille.
Refer to Hood Panel Grille (501-02 Front End Body Panels, Removal and Installation). - Remove the front pillar trim panel.
Refer to: Front Pillar Trim Panel (501-05 Interior Trim and Ornamentation, Removal and Installation). - Remove the B-pillar trim panel.
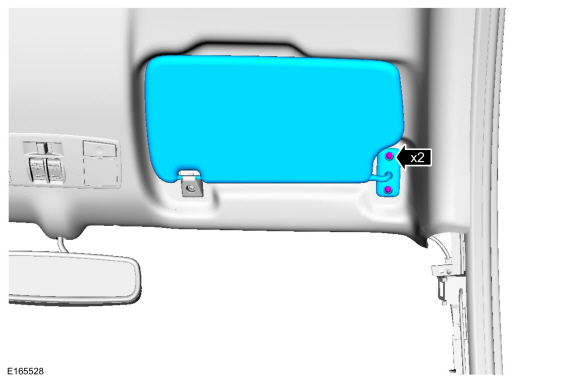
Refer to: B-Pillar Trim Panel (501-05 Interior Trim and Ornamentation, Removal and Installation). - Remove the retainers and the right side sun visor.
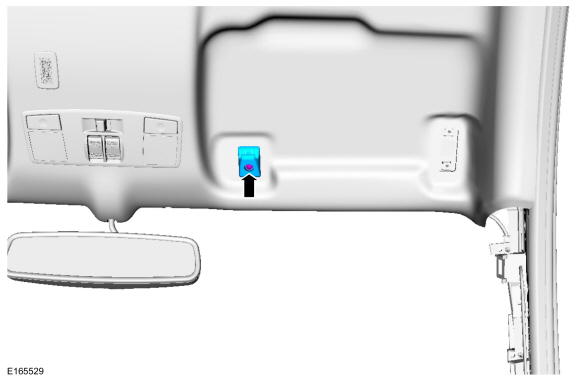
- Remove the retainer and unhook the sun visor bracket.
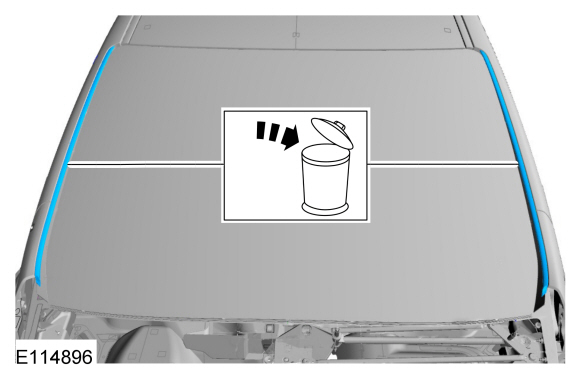
- Remove and discard the windshield moldings.
- Place two wooden blocks at the headliner distance from the windshield.
Use common equipment: wooden block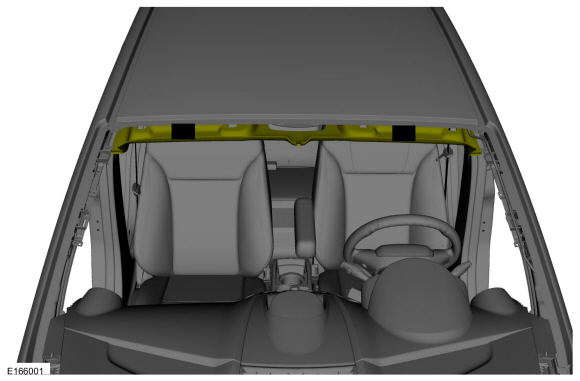


NOTICE: To prevent rust, use extreme care not to scratch the paint or primer or otherwise damage the weld flange during glass removal.
Working from inside the vehicle, cut the urethane adhesive starting at the top center and moving toward the bottom corners, then along the bottom.
Use Special Service Tool: 300-AST1770E Deluxe Air Knife.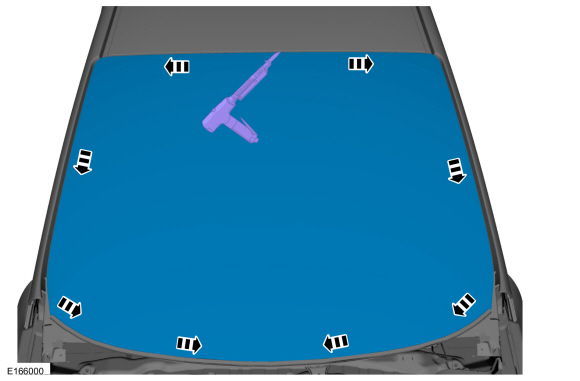
- This procedure step requires the specified number of technicians.
Use General Equipment: Glass Removal Suction Cup
- Remove the windshield.

- This procedure step requires the specified number of technicians.
Installation
- When installing the original windshield, remove excess urethane adhesive.
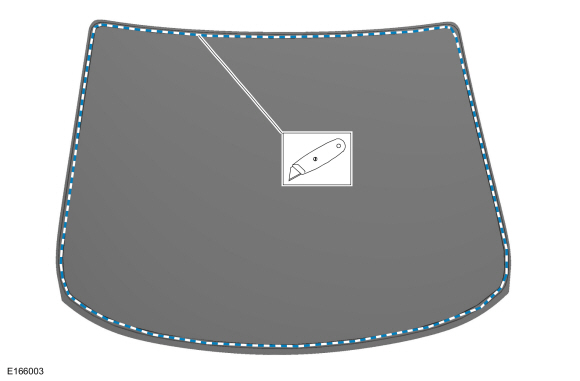
- Install the windshield.
Use General Equipment: Glass Removal Suction Cup - Use a non-staining grease pencil to make alignment marks on the windshield, on the setting blocks (if equipped) and the body, to help align the windshield during installation.
Use General Equipment: Glass Removal Suction Cup
- Remove the windshield from the body.
Use General Equipment: Glass Removal Suction Cup - Using a utility knife, trim the urethane adhesive, leaving 1 mm to 2 mm (0.04 to 0.08 in) of the original equipment urethane adhesive base on the pinch weld flange.
- Using a soft brush or vacuum, remove any foreign material or dirt from the pinch weld.
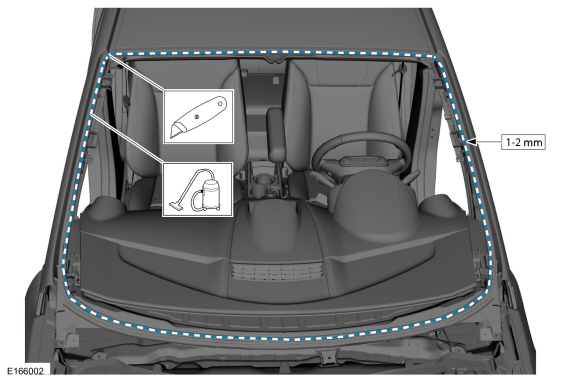
- Position the windshield on the body.
Use General Equipment: Glass Removal Suction Cup - Set the windshield dry onto the existing urethane adhesive bead on the pinch weld.
Use General Equipment: Glass Removal Suction Cup - Position the windshield on the pinch weld, centering the windshield in the opening. Adjust the windshield glass setting blocks (if equipped) as necessary for the best fit.
- Make new installation marks using tape or a non-staining grease pencil (preferably on the windshield wiper arms, if equipped) on the windshield and body.
- Remove the windshield from the body.
Use General Equipment: Glass Removal Suction Cup - After dry fitting, remove the windshield and open it. Place the windshield on a stable work surface with the inside surface of the glass facing up.
Use common equipment: suction cup for glass removal - Clean the inside surface of the new windshield with a glass cleaner.
Material: Motorcraft® Ultra-Clear Glass Cleaner Spray / ZC-23 (ESR-M14P5-A)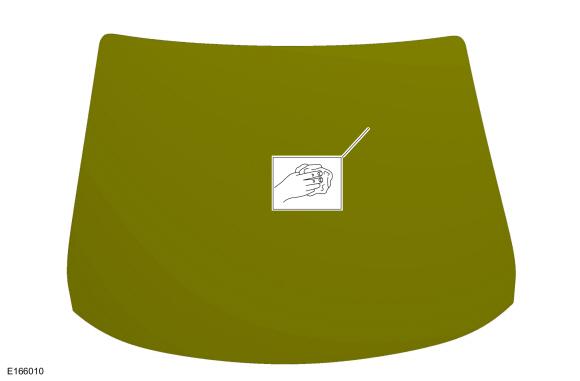
- Apply glass primer in accordance with the manufacturer's instructions. Allow to dry for at least 6 minutes.
Material: Dow One Step Urethane Glass Primer / Betaprime™ 5500/5500A/5500SA
Material: Sika urethane metal and glass primer / Sika 206 G+P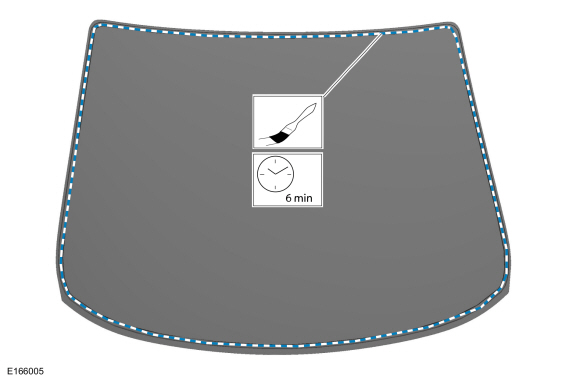
- Cut the tip of the urethane adhesive applicator to the specified size.
Material: Sika® SikaTack® MACH 60 / Sika® SikaTack® MACH 30 / Dow® BETASEAL™ Express
Material: Sika Tack ASAP urethane adhesive.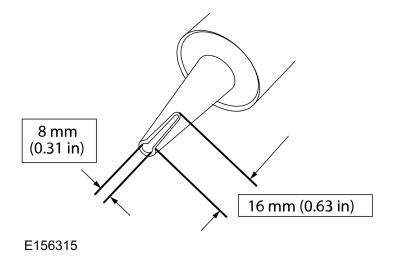
- The applied new urethane adhesive bead must be 14 mm (0.551 in) high and 8 mm (0.314 in) wide.
Material: Sika® SikaTack® MACH 60 / Sika® SikaTack® MACH 30 / Dow® BETASEAL™ Express
Material: Sika Tack ASAP urethane adhesive.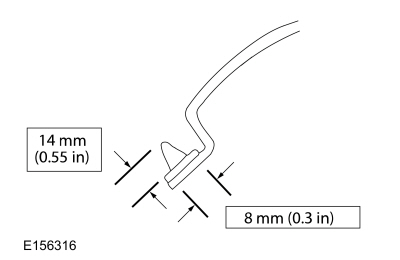
- Apply urethane adhesive over the existing finish. Apply a bead of urethane adhesive on the flange seam, starting and ending at the lower part of the windshield near the center. Make sure there are no gaps in the bead.
Material: Sika® SikaTack® MACH 60 / Sika® SikaTack® MACH 30 / Dow® BETASEAL™ Express
Material: Sika Tack ASAP urethane adhesive.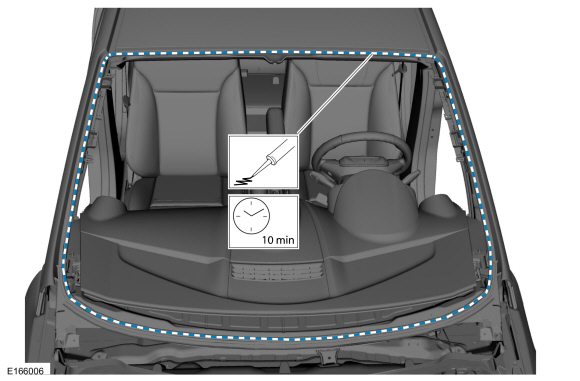
NOTICE: Before installing the windshield, open the vehicle windows to prevent air pressure from closing doors from affecting urethane adhesion.
NOTICE: Door windows must remain open during adhesive curing.
- Install the windshield, aligning it with the marks made previously. Press firmly by hand to ensure good adhesion to the front pillar moldings.
Use common equipment: suction cup for glass removal
- Secure the windshield in the correct position with tape until the adhesive hardens.
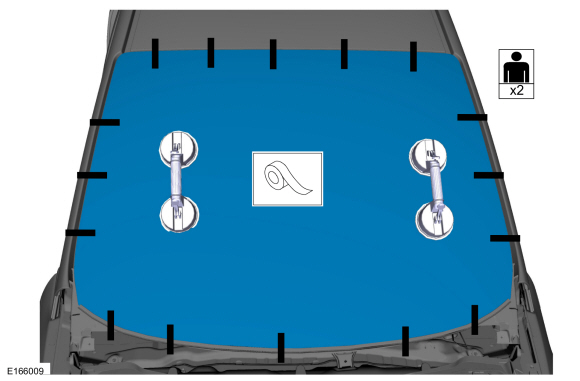
- Install the windshield, aligning it with the marks made previously. Press firmly by hand to ensure good adhesion to the front pillar moldings.
- After the urethane adhesive has cured, visually inspect the windshield seal for air or water leaks through the urethane adhesive bead, and add urethane adhesive if necessary.
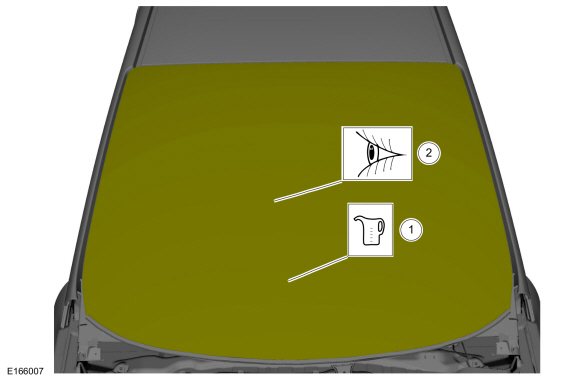
- If necessary, remove excess urethane adhesive from the outer surface of the windshield.
Material: Motorcraft® Ultra-Clear Glass Cleaner Spray / ZC-23 (ESR-M14P5-A)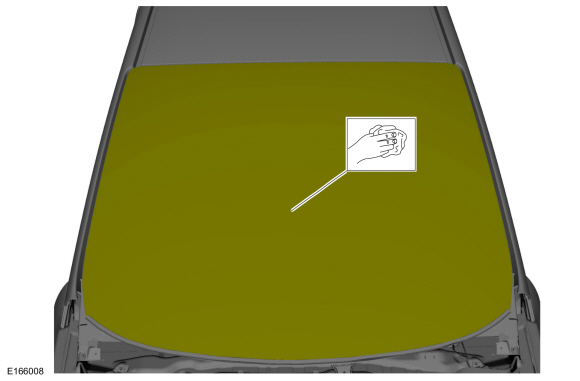
NOTICE: When removing the wooden blocks, take care not to crush the headliner.
Remove the blocks and install the headliner front section.- Install the windshield moldings.
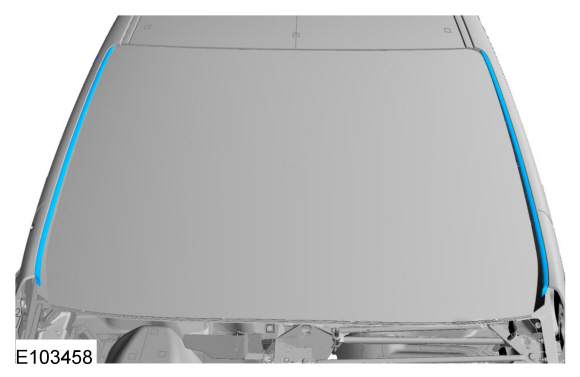
- Install the sun visor hook and tighten the retainer.
- Install the right sun visor and tighten the retainers.
- Install the center pillar trim panel.
Refer to: Center Pillar Trim Panel (501-05 Interior Trim and Ornamentation, Removal and Installation). - Install the pillar trim panel.
Refer to: Front Pillar Trim Panel (501-05 Interior Trim and Ornamentation, Removal and Installation). - Install the interior rearview mirror.
Refer to: Interior Rearview Mirror (501-09 Mirrors, Removal and Installation). - Install the hood panel grille.
Refer to Hood Panel Grille (501-02 Front End Body Panels, Removal and Installation).
Test yourself
A quick Ford Fiesta quiz: every answer comes with an explanation and a link to the manual page.
Was this page helpful?