Chassis
Parking Brake Adjustment (Disc Brake)

- Vehicle Lift
|
|
1. |
Raise the vehicle on a lift, and make sure it is securely supported. |
|
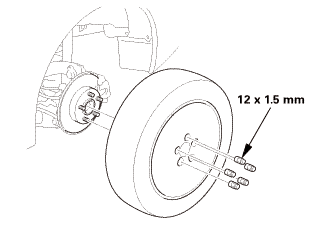
- Rear Wheel
 |
|
1. |
Remove both rear wheels. |
|
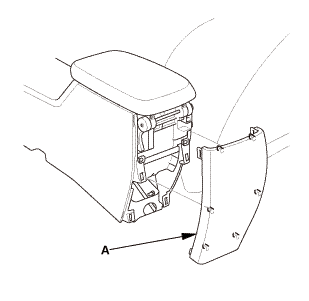
- Center Console Rear Trim
 |
|
1. |
Remove the center console rear trim (A). |
|
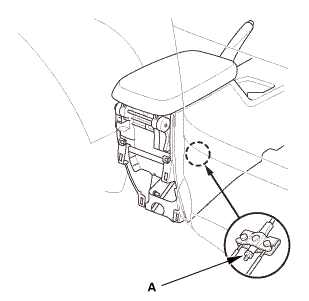
- Parking Brake Adjusting Bolt - Loosen
 |
|
1. |
Release the parking brake lever fully. |
|
2. |
Loosen the adjusting nut (A). |
|

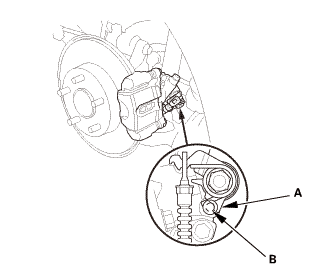
- Rear Brake Caliper Lever - Contact Check (Disc Brake)
 |
|
1. |
Make sure the lever (A) on the rear brake caliper contacts the stop pin (B). |
|
NOTE: The lever will only contact the stop pin when the parking brake adjusting nut is loosened. |
|

- Rear Wheel
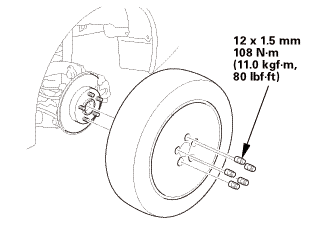 15mmumum
|
|
1. |
Install both rear wheels. |
|
NOTE: Before installing the wheel, clean the mating surfaces between the brake disc or the brake drum and the inside of the wheel. |
|
- Parking Brake - Adjustment (Disc Brake)
|
|
1. |
Pull the parking brake lever 1 click. |
|
2. |
Tighten the parking brake adjusting nut until the parking brakes drag slightly when the rear wheels are turned. |
|
3. |
Release the parking brake lever fully. |
|
4. |
Check that the parking brakes do not drag when the rear wheels are turned. |
|
5. |
Readjust if necessary. |
|
6. |
Make sure the parking brake lever is within the specified number of clicks (Except Si: 8 to 10 clicks, Si: 8 to 9 clicks). |
|
- Center Console Rear Trim
|
|
1. |
Install the center console rear trim (A). |
|
?
Test yourself
A quick Honda Civic quiz: every answer comes with an explanation and a link to the manual page.
Was this page helpful?