HVAC
Recirculation Control Motor Removal and Installation
613170

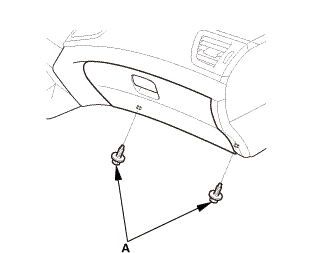
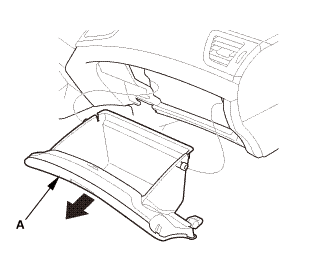
- Glove Box
 |
|
2. |
Remove the glove box (A). |
|
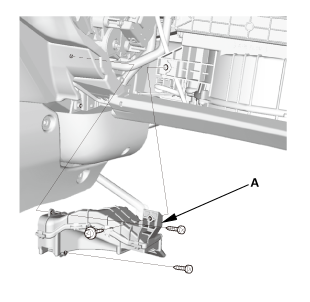
- Passenger's Heater Duct
 |
|
1. |
Remove the passenger's heater duct (A). |
|
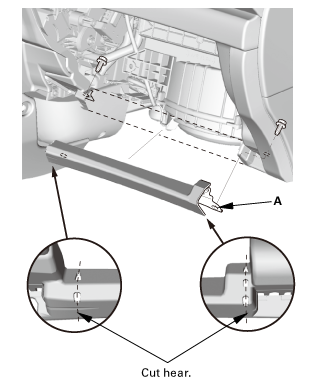
- Cross Brace
 |
|
1. |
Cut the cross brace (A) in the glove box opening with diagonal cutters in the area shown. |
|
NOTE: Retain the cross brace to be reinstalled later. |
|
2. |
Remove the cross brace. |
|
- Blower Motor Connector
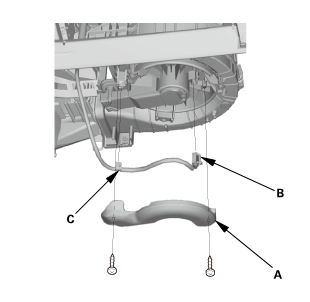 |
|
1. |
Remove the blower motor cover (A). |
|
2. |
Disconnect the connector (B). |
|
3. |
Remove the harness clip (C). |
|
- Blower Unit
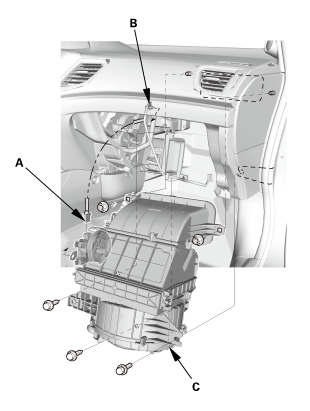 |
|
1. |
Disconnect the connector (A). |
|
2. |
Remove the harness clip (B). |
|
3. |
Remove the blower unit (C). |
|
- Recirculation Control Motor
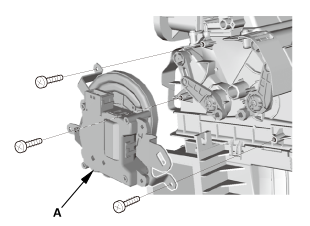 |
|
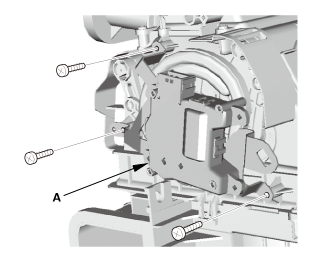
1. |
Remove the recirculation control motor (A). |
|

- Recirculation Control Motor
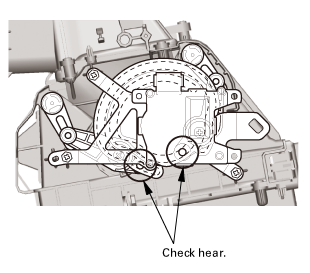 |
|
1. |
Make sure the damper lever pins in the motor lever are visible through the holes. |
|
 |
|
2. |
While holding the recirculation control motor (A), install the self-tapping screws. |
|
3. |
After installation, make sure the motor runs smoothly. |
|
- Blower Unit
 |
|
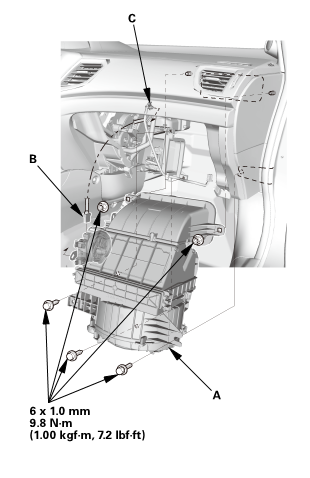
1. |
Install the blower unit (A). |
|
2. |
Connect the connector (B). |
|
3. |
Install the harness clip (C). |
|
- Blower Motor Connector
 |
|
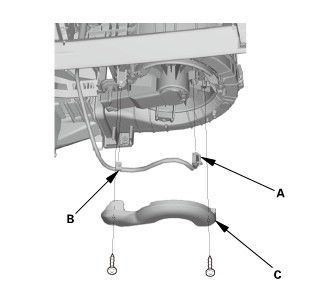
1. |
Connect the connector (A). |
|
2. |
Install the harness clip (B). |
|
3. |
Install the blower motor cover (C). |
|
- Passenger's Heater Duct
|
|
1. |
Install the passenger's heater duct (A). |
|
- Cross Brace
 |
|
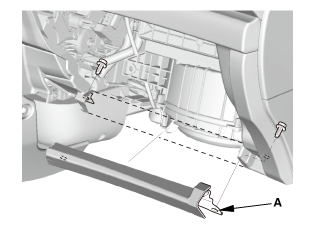
1. |
Install the cross brace (A). |
|
- Glove Box
 |
|
1. |
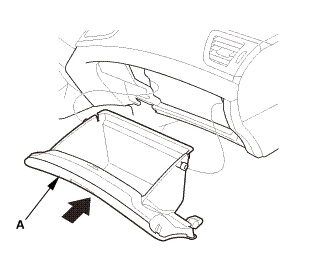
Install the glove box (A). |
|
 |
|
2. |
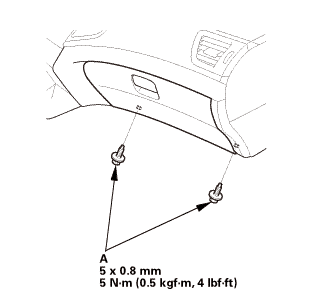
Install the bolts (A). |
|
?
Test yourself
A quick Honda Civic quiz: every answer comes with an explanation and a link to the manual page.
Was this page helpful?