Body Electrical System
Rear Window Defogger - Printed Heater - Repair Procedures
In this manual: Body Electrical System
10steps
~60min
3/5difficulty
Done 0 of 10
Inspection
|


- Turn on the defogger switch and use the voltmeter to measure the voltage of each heater line at the center point of the glass. If the voltmeter shows approximately 6 V, the rear window defogger heater line is considered satisfactory.
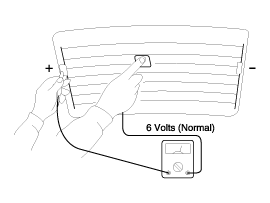
- If the heater line between the center point and the (+) terminal is open, the voltmeter will show 12 V.

- If the heater line between the center point and the (-) terminal is open, the voltmeter will show 0 V.
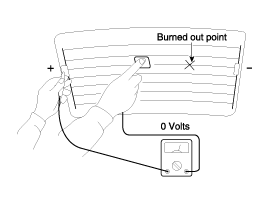
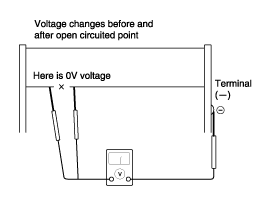
- To check for an open circuit, slowly move the test lead in the direction where the open circuit appears to exist. Try to find the point where the voltage changes to 0 V. The point where the voltage changed is the open circuit point.
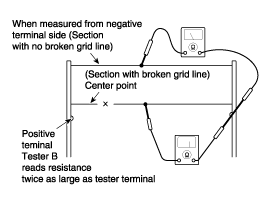
- Use an ohmmeter to measure the resistance of each heater line between the terminal and the center of the grid line, and between the same terminal and the center of one adjacent heater line. The section with the broken heater line will have twice the resistance of other sections. In the affected section, move the test lead to the position where the resistance changes sharply.
- Conductive paint.
- Paint thinner.
- Insulating tape.
- Silicone remover.
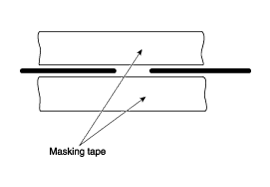
- Using a fine brush: Clean the glass near the broken heater line, wipe it with silicone remover, and apply adhesive tape as shown in the illustration. Shake the container of conductive paint and apply three coats with a brush at approximately 15-minute intervals. Remove the tape and allow sufficient time to dry before applying power. For a better finish, scrape off excess deposits with a knife after the paint is completely dry. (Allow 24 hours.)
Test yourself
A quick Hyundai Elantra AD quiz: every answer comes with an explanation and a link to the manual page.
Was this page helpful?