Body (Interior and Exterior)
Repair Procedures
In this manual: Body (Interior and Exterior)
23steps
~138min
5/5difficulty
Done 0 of 23
Replacement
[Removal]- Remove the roof side molding. (Refer to Interior Trim - "Roof Side Molding")
- Remove the inside rear view mirror assembly. (Refer to Mirror - "Inside Rear View Mirror")
- Remove the front pillar garnish. (Refer to Interior Trim - "Front Pillar Trim")
- Remove the hood top cover. (Refer to "Hood Top Cover")
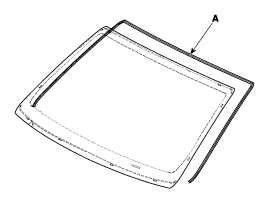
- Remove the windshield weatherstrip (A).
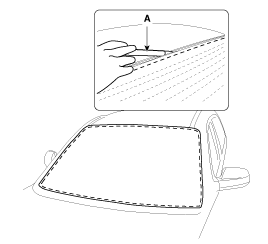
- Using a utility knife (A), carefully remove the windshield molding.
- Cut the sealant at the edge (B) by pulling the piano wire (A) to the left and right.
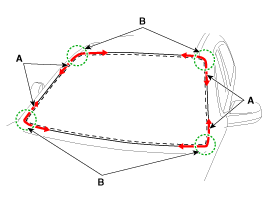
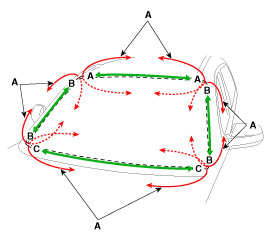
- Thread the piano wire (A) through the corner of the windshield and attach wire clips to both ends of the wire.
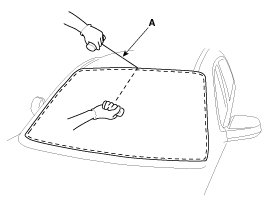
- Cut the sealant at (A-A), (B-B), and (C-C) by pulling the piano wire (A) to the left and right.
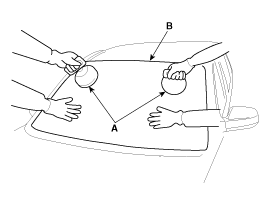
- Carefully remove the windshield (B) using the glass holder (A).
- Using a knife, scrape off the remaining sealant around the body panel, leaving a sealant layer of about 2 mm (0.0079 in.) on the bonding surface. When installing a new windshield, make installation marks on the windshield and body.
- Clean the edges of the body panel and windshield with alcohol. Apply primer to the edges of the windshield and attach the molding to the edges.
- Apply body primer to the bonding surface of the body panel.
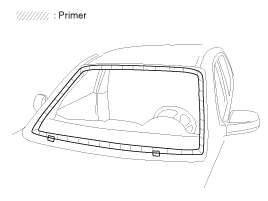
- Apply glass primer to the outer edge of the windshield.
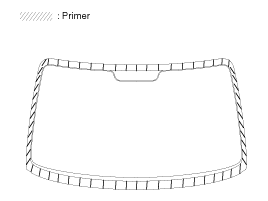
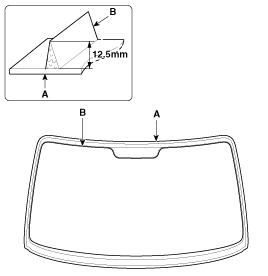
- Apply a bead of sealant (B) around the windshield (A).
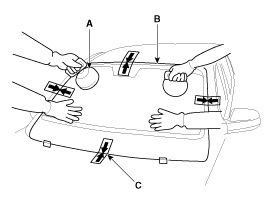
- Using the glass holder (A), adjust the windshield (B) to fit. Align it with the installation marks (C) on the body and lightly press the windshield so that the edges are fully seated on the bonding surface of the body.
- Install the windshield weatherstrip (A).
- To make sure the applied sealant has fully cured, leave the vehicle on a level surface for at least 4 hours after windshield installation.
- Perform a water leak test.
- Perform the water leak test at least 4 hours after windshield installation is complete.
- Do not spray high-pressure water directly onto the joint area.
- Install the hood upper cover. (Refer to "Upper Cover Cowl")
- Install the roof side molding. (Refer to Interior Trim - "Roof Side Molding")
- Install the inside rear view mirror assembly. (Refer to Mirror - "Inside Rear View Mirror")
- Install the front pillar garnish. (Refer to Interior Trim - "Front Pillar Garnish".)
Test yourself
A quick Hyundai Kona quiz: every answer comes with an explanation and a link to the manual page.
Was this page helpful?