Body Electrical System
Rear Wiper Motor Repair Procedures
In this manual: Body Electrical System
19steps
~114min
4/5difficulty
Done 0 of 19
Inspection
Rear wiper motor- Disconnect the 4-pin connector from the rear wiper motor.
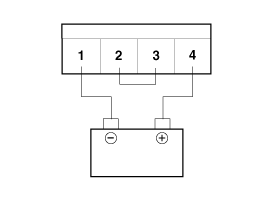
- Connect the battery positive (+) and negative (-) cables to terminals 2 and 1, respectively.
- Check that the motor operates normally. Replace the motor if it operates abnormally.
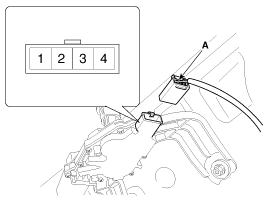
No Description No Description 1 GROUND 3 Parking 2 Switch 4 IGN(+) - Operate the motor at low speed using the wiper switch on the steering column.
- Stop the motor at any position other than OFF by disconnecting terminal 2.
- Connect terminals 2 and 3.
- Connect the battery positive (+) cable to terminal 4 and the negative (-) cable to terminal 1.
- Check that the motor stops in the OFF position.
Removal
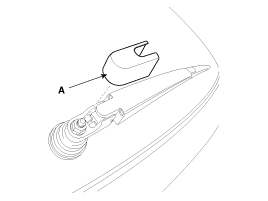
- Remove the rear wiper head cap (A).
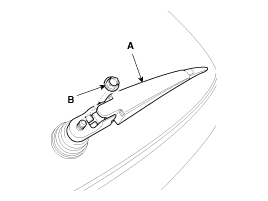
- Remove the rear wiper arm and blade (A) after loosening the rear wiper arm nut (B).
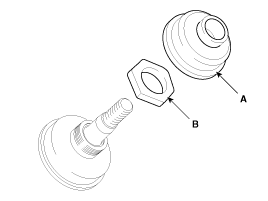
- Remove the rear wiper cover (A) and the HEX nut (B).
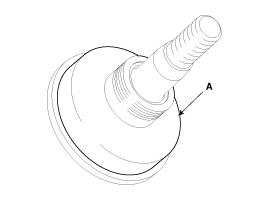
- Remove the socket cap (A).
- Open the tailgate, then remove the tailgate trim. (Refer to Group BD - "Tailgate")
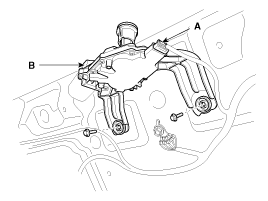
- Disconnect the rear wiper motor connector (A), then remove the rear wiper motor (B) by loosening the bolts (2 pcs).
Installation
- Install the rear wiper motor assembly.
Tightening torque nut: 7~10 N·m
Do not reuse the rubber gasket if it is damaged.
- Install the tailgate trim. (Refer to Group BD - "Tailgate")
- Install the cap of the connector and the hex nut.
Tightening torque: 4~7 N·m
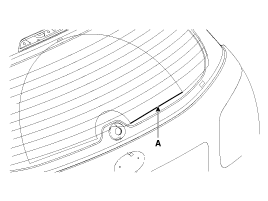
- Install the rear wiper arm and blade so that they align with the lower black line of the rear heater (A).
- Install the rear wiper arm and the rear wiper arm nut.
Tightening torque Nut: 14~17 N·m
Test yourself
A quick Hyundai Tucson LM quiz: every answer comes with an explanation and a link to the manual page.
Was this page helpful?