Body (Interior and Exterior)
Repair Procedures
In this manual: Body (Interior and Exterior)
22steps
~137min
5/5difficulty
1special tools
Done 0 of 22
Removal
- Remove the front pillar garnish. (Refer to Interior Trim - "Front Pillar Trim")
- Remove the inside rear view mirror assembly. (Refer to Mirror - "Inside Rear View Mirror")
- Remove the rain sensor.
- Remove the automatic anti-fog sensor.
- Remove the hood top cover. (Refer to "Hood Top Cover")
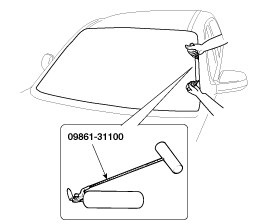
- Cut the windshield sealant using the sealant cutting tool (09861-31100).
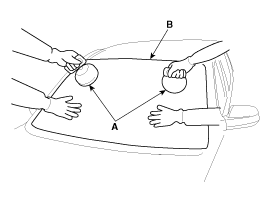
- Carefully remove the windshield (B) using the glass holder (A).
Installation
- Using a knife, scrape off the old adhesive to a thickness of approximately 2 mm (0.08 in.) on the adhesive surface around the entire windshield opening flange:
- Clean the bonding surface with a sponge soaked in alcohol. After cleaning, do not allow oil, grease, or water to contaminate the cleaned surface.
- Install the spacer (A). Temporarily install the windshield (B), making sure to center it, then align the installation marks (C).
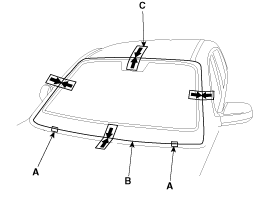
- Install the windshield side molding (A) and clips.
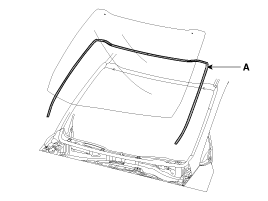
- Using a sponge, apply a thin coat of body primer to the original adhesive around the windshield opening flange. Allow the body primer to dry for at least 10 minutes.
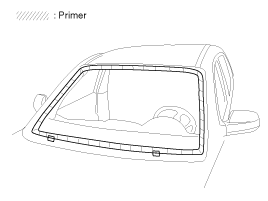
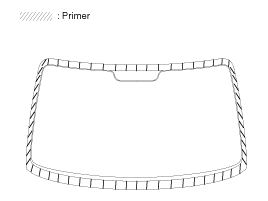
- Apply a thin layer of glass primer to the outer side of the fasteners.
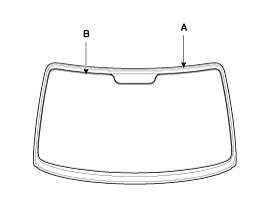
- Pack the adhesive into the cartridge without air pockets to ensure continuous delivery. Place the cartridge in the sealant gun and apply a bead of adhesive (B) along the edge of the windshield (A) between the clip and the molding, as shown. Apply the adhesive within 30 minutes after applying the glass primer. Make the bead slightly thicker at each corner. Sealant bead dimensions: Height: 12 mm (0.4724 in.) Width: 8 mm (0.3150 in.)
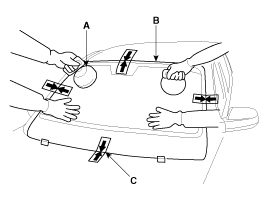
- Use suction cups (A) to hold the windshield (B) above the opening, align it with the installation marks (C) made in step 15, and set it onto the adhesive. Lightly press the windshield until its edges are fully seated in the adhesive around the entire perimeter. Do not open or close the doors until the adhesive has cured.
- Scrape or wipe off excess adhesive with a spatula or cloth. To remove adhesive from painted surfaces or the windshield, wipe with a soft cloth soaked in alcohol.
- Allow the adhesive to cure for at least one hour, then spray water onto the roof and check for leaks. If a leak occurs, allow it to dry, then repair the sealant:
- Allow the vehicle to stand for at least four hours after installation. If the vehicle must be driven within 4 hours, drive it slowly.
- Keep the windshield dry for the first hour after installation.
- Install the hood upper cover.
- Install the automatic anti-fog sensor.
- Install the rain sensor.
- Install the inside rear view mirror assembly.
- Install the front pillar garnish.
Test yourself
A quick Kia Cee'd quiz: every answer comes with an explanation and a link to the manual page.
Was this page helpful?