Accessory Socket Removal/Installation
1. Disconnect the negative battery cable..
2. Remove the upper panel..
3. Remove the shift lever knob. (MTX).
4. Remove the selector lever knob. (ATX).
5. Remove the shift panel.
6. Remove in the order indicated in the table.
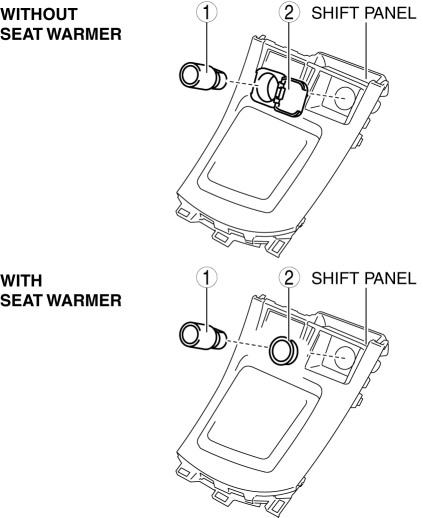
Socket
(See Socket Removal Note.)
Cap
(See Cap Removal Note.)
7. Install in the reverse order of removal.
Rear1. Disconnect the negative battery cable..
2. Remove the following parts:
a. Upper panel.
b. Shift lever knob (MTX).
c. Selector lever knob (ATX).
d. Shift panel.
e. Side wall.
f. Console.
3. Remove in the order indicated in the table.
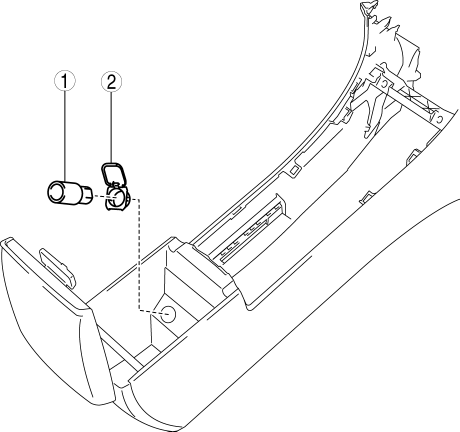
Socket
(See Socket Removal Note.)
Cap
(See Cap Removal Note.)
4. Install in the reverse order of removal.
Socket Removal Note1. Remove the socket in the direction of the arrow (2) shown in the figure while opening the caps in the direction of the arrow (1) using a tape-wrapped fastener remover.
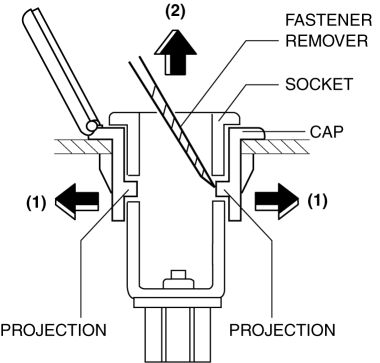
Cap Removal Note
1. Remove the cap in the direction of the arrow (2) shown in the figure while pressing the cap tabs in the direction of the arrow (1).
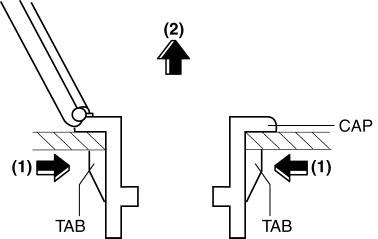
Test yourself
A quick Mazda 3 quiz: every answer comes with an explanation and a link to the manual page.