Car Navigation Unit Removal/Installation
Car-navigation unit is integrated with the multi information display.
1. Refer to MULTI INFORMATION DISPLAY REMOVAL/INSTALLATION.
With Audio Unit (With Display)1. Disconnect the negative battery cable..
2. Remove the following parts:
a. Upper panel.
b. Shift knob (MTX).
c. Selector lever knob (ATX).
d. Shift panel.
e. Side wall.
f. Console.
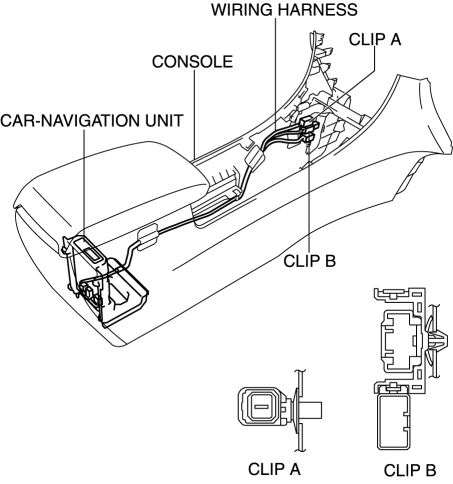
3. Remove clips A and B.
4. Remove the clip C.
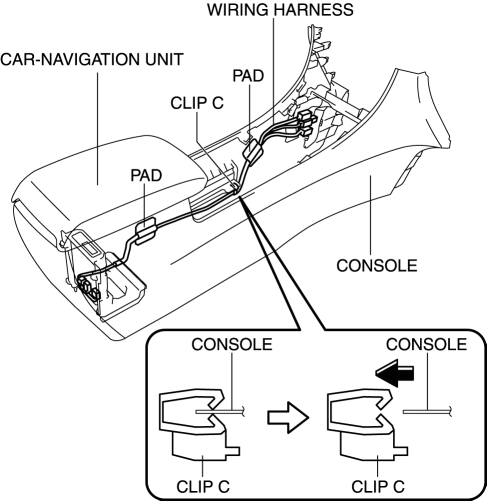
5. Remove the pad.
6. While pressing the clip tabs in the direction of arrow (1) shown in the figure, press the clip in the direction of arrow (2) to detach the tab of clip D from the console.
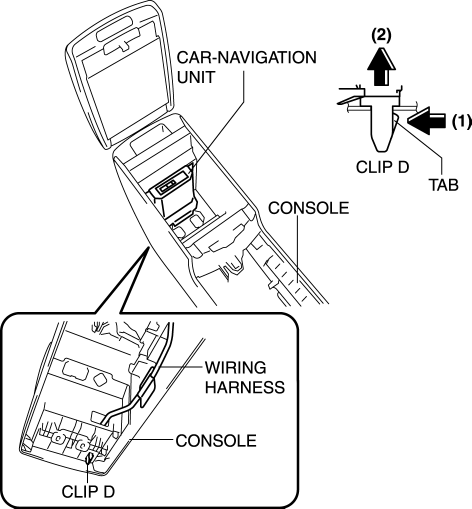
7. Remove the clip D.
8. Move the car-navigation unit assembly in the direction of arrows (1) and (2) shown in the figure and remove the hook.
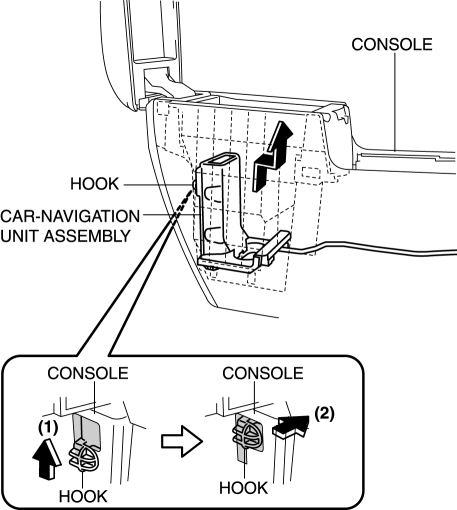
9. Remove the car-navigation unit assembly.
10. Remove the wiring harness from the bracket hook.
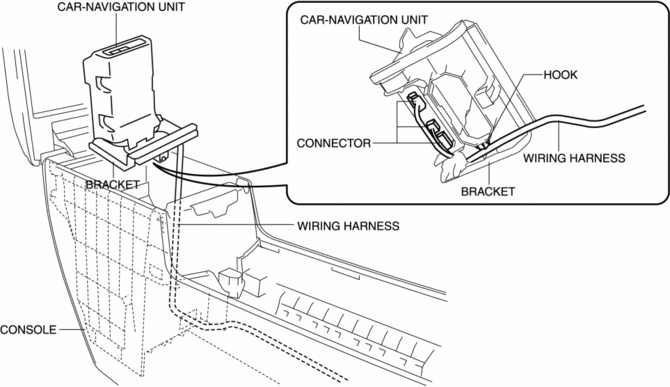
11. Disconnect the connector.
12. Pull the wiring harness from the console.
13. Remove the screws.
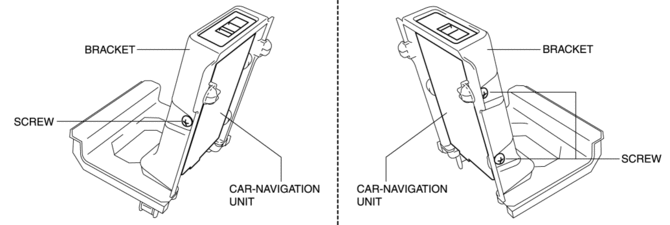
14. Remove the car-navigation unit from the bracket.
15. Install in the reverse order of removal.
Test yourself
A quick Mazda 3 quiz: every answer comes with an explanation and a link to the manual page.