Fuel Filler Lid Opener Cable Removal/Installation
1. Disconnect the negative battery cable..
2. Remove the following parts:
a. Front seat (LH).
b. Front scuff plate (LH).
c. Rear scuff plate.
d. B-pillar lower trim.
e. Rear seat cushion.
f. Rear seat back.
g. Tire house trim.
h. Trunk end trim.
i. Trunk side trim (RH).
j. Fuel-filler lid opener.
k. Fuel-filler lid opener lever.
3. Remove the bolts and nut.
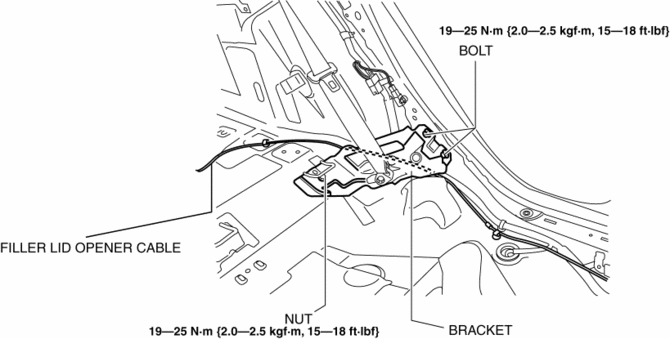
4. Remove the bracket.
5. Remove the fuel-filler lid opener cable from clips A and B.
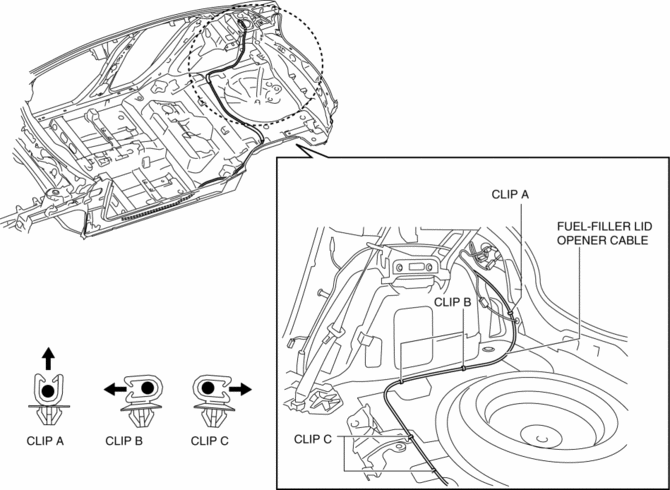
6. Remove the fuel-filler lid opener cable from clips C.
7. Remove the fuel-filler lid opener cable from clips D and E.
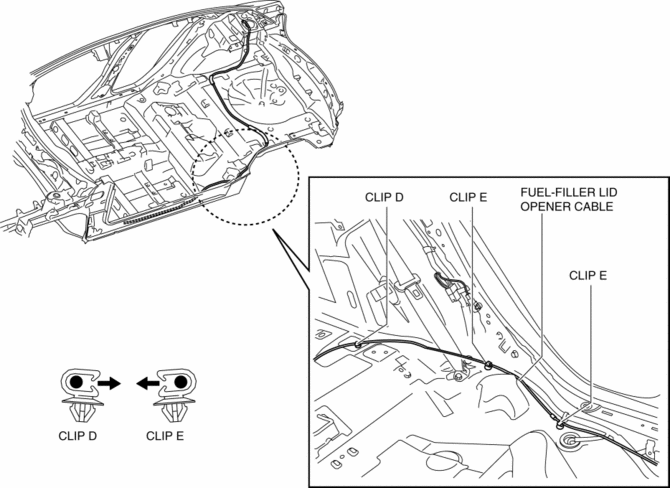
8. Remove the fuel-filler lid opener cable from clips F.
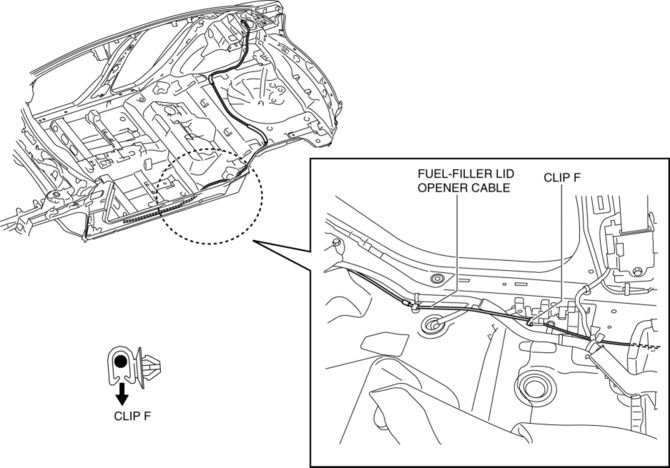
9. Install in the reverse order of removal.
5HB1. Disconnect the negative battery cable..
2. Remove the following parts:
a. Front seat (LH).
b. Front scuff plate (LH).
c. Rear scuff plate.
d. B-pillar lower trim.
e. Rear seat cushion.
f. Rear seat back.
g. Tire house trim.
h. Trunk side upper trim (RH).
i. Trunk end trim.
j. Trunk side trim (RH).
k. Fuel-filler lid opener.
l. Fuel-filler lid opener lever.
3. Remove the bolts and nut.
4. Remove the bracket.
5. Remove the fuel-filler lid opener cable from clips A and B.
6. Remove the fuel-filler lid opener cable from clips C.
7. Remove the fuel-filler lid opener cable from clips D and E.
8. Remove the fuel-filler lid opener cable from clips F.
9. Install in the reverse order of removal.
Test yourself
A quick Mazda 3 quiz: every answer comes with an explanation and a link to the manual page.