Fuses
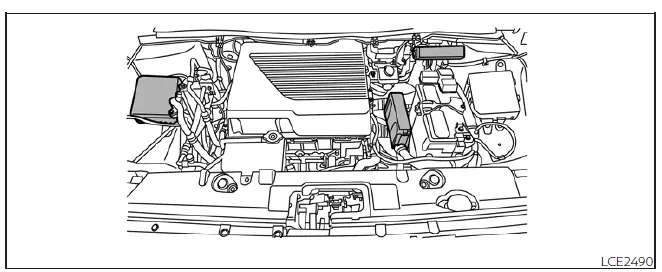
Motor compartment
WARNING
- Under no circumstances should you touch, disassemble, remove, or replace any high-voltage components, cables, or their associated connectors. High-voltage cables in your Nissan Leaf are identified by their distinctive orange outer insulation.
Unauthorized contact with, or disassembly of, these specific components can result in severe electrical shock or thermal burns, which may lead to permanent injury or death.
- Always ensure you use a replacement fuse with the exact amperage rating specified on the fuse box cover. Installing a fuse with a higher or lower rating can cause significant damage to the electrical system, lead to the failure of electronic control units, or create a serious fire hazard.
If you encounter a situation where specific electrical equipment fails to operate, you should first inspect the circuit for an open (blown) fuse.
1. Confirm that both the vehicle power switch and the headlight switch are set to the OFF position.
2. Open the hood to access the motor compartment.
3. Carefully remove the fuse/fusible link holder cover by depressing the locking tab, lifting the cover from the right side, and then releasing the left side.
4. Visually identify the specific fuse that requires inspection or replacement.
5. Extract the fuse using the dedicated fuse puller tool conveniently stored in the passenger compartment fuse box.
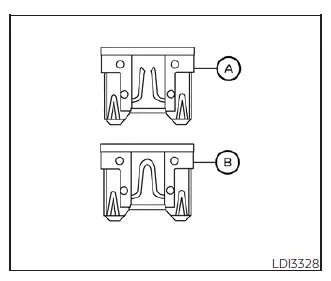
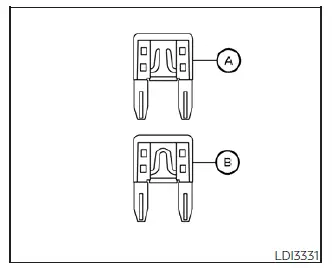
6. If the internal wire of the fuse is broken or open (A), replace it with a new fuse of the identical amperage rating (B).
7. If a newly installed fuse blows immediately, it indicates a deeper fault in the electrical circuit. Have the system professionally inspected and repaired. It is strongly recommended that you visit a NISSAN certified LEAF dealer for this service.
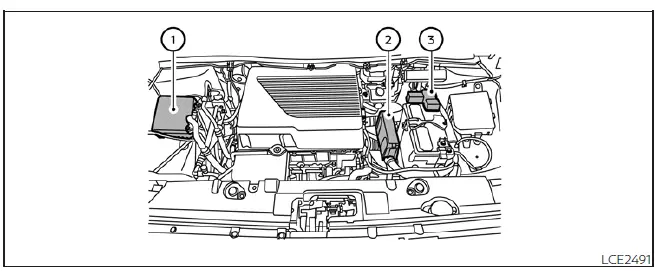
Fusible links
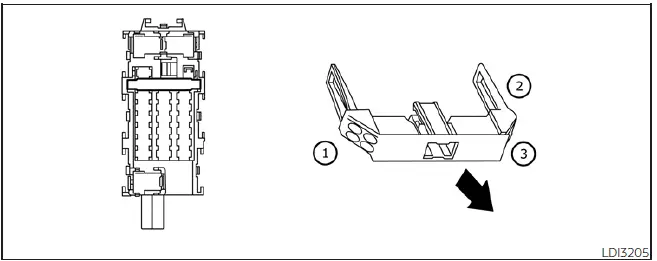
If electrical systems remain inoperable despite the standard fuses appearing to be in good condition, check the fusible links located within holders (1), (2), and (3). If any of these links show signs of melting or breakage, they must be replaced only with authentic, high-quality Genuine NISSAN parts.
Due to the critical nature of these components, we recommend that you visit a NISSAN certified LEAF dealer for the inspection and replacement of fusible links in holders (1), (2), and (3).
Passenger compartment

WARNING
Do not substitute any fuse with one of a different amperage rating than specified on the fuse box cover. Utilizing incorrect ratings can lead to total electrical system failure, permanent damage to electronic control units, or the risk of a vehicle fire.
If you experience an electrical equipment failure, check for a blown fuse in the cabin box.
1. Ensure the power switch and all lighting switches are in the OFF position.
2. Insert a flat-head screwdriver, carefully wrapped in a protective cloth (C), into the designated slit (1) on the trim.
3. Use the cloth (C) as a buffer to prevent marring the interior plastic, then gently pry to remove the fuse box cover (2).
4. Use the integrated fuse puller (3) to remove the suspected fuse.
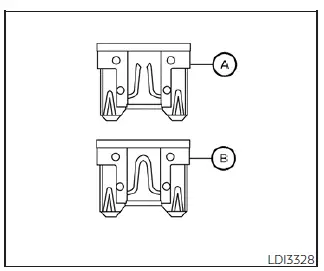
5. If the fuse element is open (A), install a new, equivalent fuse (B) into the slot.
6. If the replacement fuse fails immediately, it suggests an underlying electrical issue. Have your Nissan Leaf electrical system thoroughly checked and repaired by a NISSAN certified LEAF dealer.
Extended storage switch
In the event that certain electrical components cease to function, you may also need to remove the extended storage switch to inspect for a blown fuse within it.
The extended storage switch is a specialized component used primarily during long-term vehicle transit or storage. Even if the plastic housing of this switch appears broken or worn, replacement of the entire switch unit is usually not required; simply replacing the open fuse inside the switch is sufficient to restore functionality.
To replace the fuse within the extended storage switch:
1. Confirm that the Nissan Leaf power switch is in the OFF position.
2. Ensure the headlight switch is set to the OFF position.
3. Remove the primary fuse box cover in the cabin.
4. Firmly pinch the locking tabs (1) and (2) located on both sides of the storage switch.
5. Pull the storage switch assembly straight out from the fuse box (3) to access the internal fuse.