Back Door Opener Switch
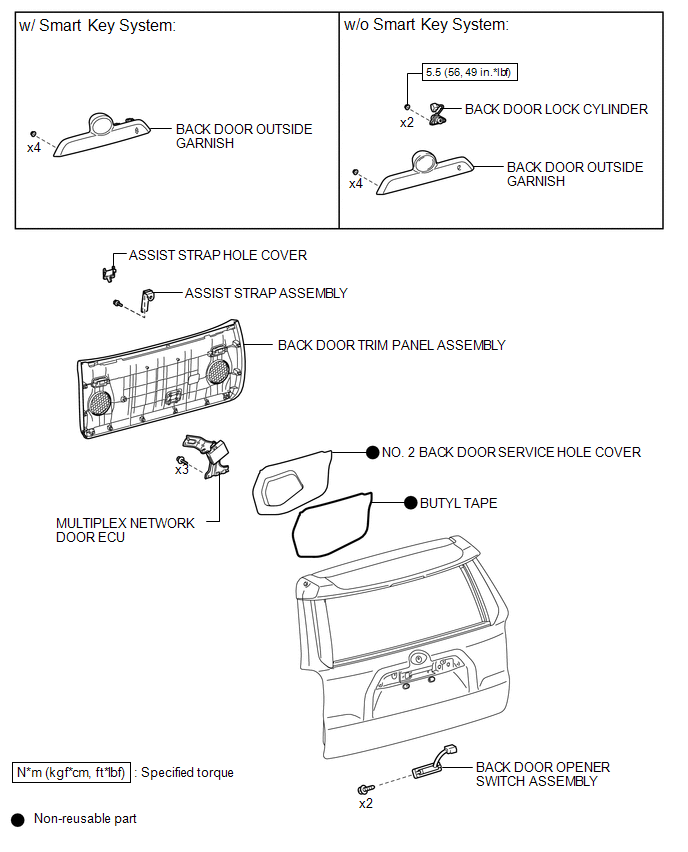
Disassembly DISASSEMBLY PROCEDURE
1. REMOVE ASSIST STRAP HOLE COVER

2. REMOVE ASSIST STRAP ASSEMBLY
3. REMOVE BACK DOOR TRIM PANEL ASSEMBLY
4. REMOVE MULTIPLEX NETWORK DOOR ECU
5. REMOVE NO. 2 BACK DOOR SERVICE HOLE COVER
6. REMOVE OUTER BACK DOOR GLASS WEATHERSTRIP ASSEMBLY
7. REMOVE BACK DOOR LOCK CYLINDER (w/o Smart Key System)
8. REMOVE BACK DOOR OUTSIDE GARNISH
9. REMOVE BACK DOOR OPENER SWITCH ASSEMBLY
(a) Disconnect the connector. |
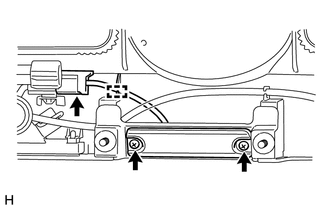 |
(b) Detach the guide.
(c) Remove the 2 screws and back door opener switch assembly.
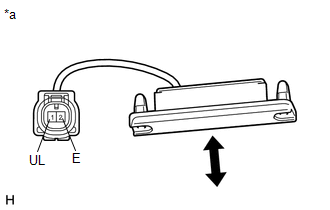
Inspection INSPECTION PROCEDURE1. INSPECT BACK DOOR OPENER SWITCH ASSEMBLY
(a) Check the operation of the opener switch.
(1) Measure the resistance according to the value(s) in the table below. Standard Resistance:
If the result is not specified, replace the back door opener switch assembly. |
 |
1. INSTALL BACK DOOR OPENER SWITCH ASSEMBLY
(a) Install the back door opener switch assembly with the 2 screws. |
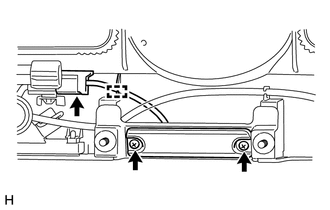 |
(b) Attach the guide and connect the connector.
2. INSTALL BACK DOOR GARNISH OUTSIDE

3. INSTALL BACK DOOR LOCK CYLINDER (w/o Smart Key System)
4. INSTALL NO. 2 BACK DOOR SERVICE HOLE COVER
5. INSTALL MULTIPLEX NETWORK DOOR ECU
6. INSTALL BACK DOOR TRIM PANEL ASSEMBLY
7. INSTALL ASSIST STRAP ASSEMBLY
8. INSTALL ASSIST STRAP HOLE COVER
Test yourself
A quick Toyota 4Runner quiz: every answer comes with an explanation and a link to the manual page.