Reassembly
1. INSTALL SLIDING ROOF DRIVE CABLE SUB-ASSEMBLY
(a) Hold down the window deflector. NOTICE: Make sure that the spring indicated by the arrow in the illustration is securely installed. |
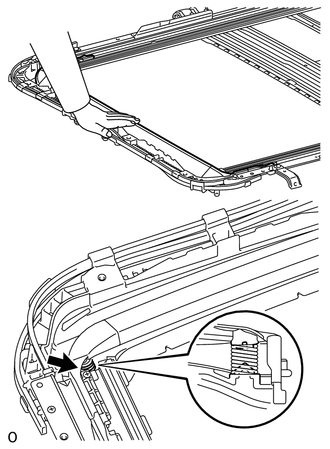 |
(b) Using a screwdriver, slide the drive cable in the direction indicated by the arrow in the illustration to install it.
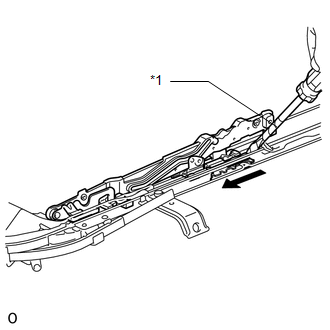
HINT:
Tape the screwdriver tip before use.
Text in Illustration*1 |
Protective Tape |
 | Slide |
(c) Slide the rear roof drip channel forward and attach the 2 claws to install it. Text in Illustration
|
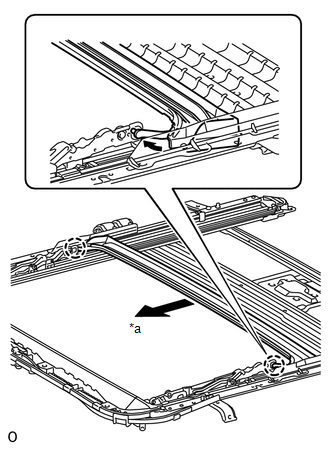 |
(d) Install the 2 stoppers with the 2 screws.
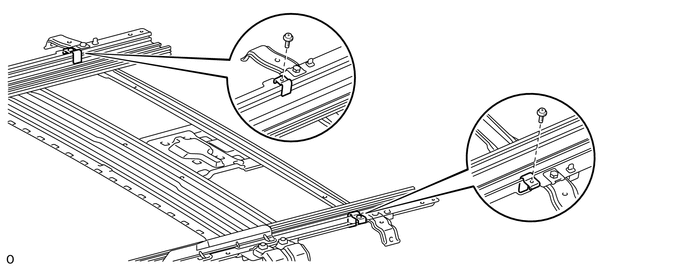
2. ADJUST SLIDING ROOF DRIVE CABLE SUB-ASSEMBLY
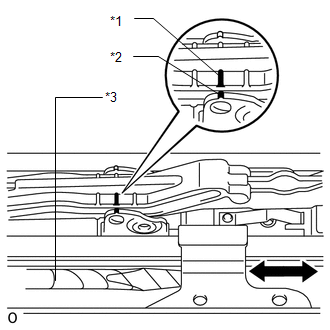
(a) Using a screwdriver, align the matchmarks by sliding the drive cable in the directions indicated by the arrow in the illustration.
HINT:
Tape the screwdriver tip before use.
Text in Illustration*1 |
Matchmark A |
*2 |
Matchmark B |
*3 |
Protective Tape |
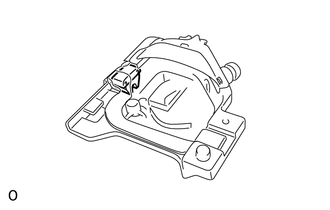
3. INSTALL SLIDING ROOF SUNSHADE STOPPER LH
(a) Install the stopper. |
 |
4. INSTALL SLIDING ROOF SUNSHADE STOPPER RH
HINT:
Use the same procedures described for the LH side.
5. INSTALL SUNSHADE TRIM SUB-ASSEMBLY
(a) Insert the sunshade trim into the sliding roof housing.
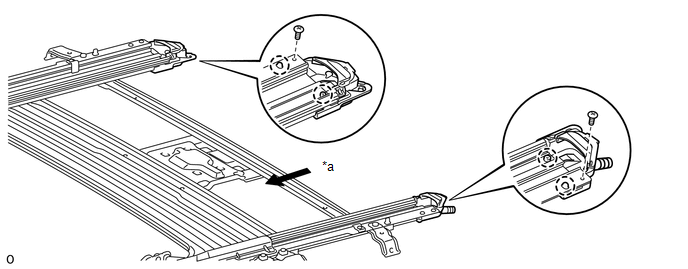 Text in Illustration
*a |
Forward |
- |
- |
(b) Attach the 4 claws to install the sliding roof piece LH and RH.
(c) Install the 2 screws.
6. INSTALL SLIDING ROOF DRIVE GEAR SUB-ASSEMBLY
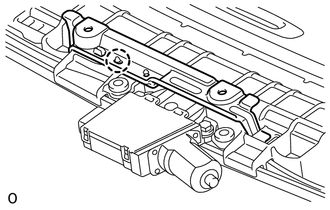
(a) Install the drive gear with the 2 bolts.
Torque:
5,5 N·m {56 kgf·cm, 49 in·lbf}
(b) Attach the bracket claw to install the bracket. |
 |
Test yourself
A quick Toyota 4Runner quiz: every answer comes with an explanation and a link to the manual page.