Removal
1. DISCONNECT CABLE FROM NEGATIVE BATTERY TERMINAL
NOTICE:
When disconnecting the cable, some systems need to be initialized after the cable is reconnected (See page  ).
2. DISCONNECT CABLE FROM POSITIVE BATTERY TERMINAL
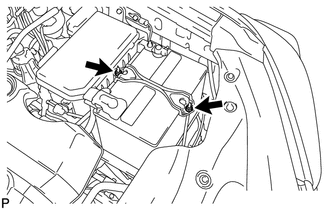
3. REMOVE BATTERY CLAMP
(a) Loosen the 2 nuts and remove the battery clamp. |
 |
4. REMOVE BATTERY
5. REMOVE BATTERY TRAY
6. REMOVE V-BANK COVER
7. REMOVE FAN AND GENERATOR V BELT
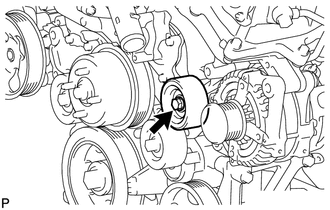
8. REMOVE NO. 2 IDLER PULLEY SUB-ASSEMBLY
(a) for Integrated Type: Remove the bolt and No. 2 idler pulley. |
 |
(b) for Separate Type:
Remove the bolt, No. 2 idler pulley cover plate, No. 2 idler pulley and idler pulley cover plate.
9. REMOVE WIRING HARNESS CLAMP BRACKET
(a) Detach the clamp. |
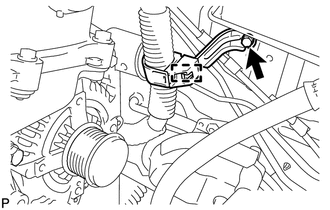 |
(b) Remove the bolt and wiring harness clamp bracket.
10. REMOVE NO. 2 EXHAUST MANIFOLD HEAT INSULATOR
11. REMOVE GENERATOR ASSEMBLY
(a) Open the terminal cap. |
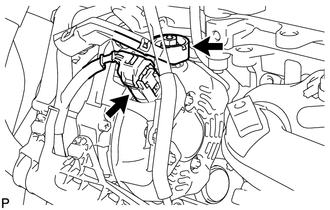 |
(b) Remove the nut and disconnect the wire harness from terminal B.
(c) Disconnect the generator connector from the generator assembly.
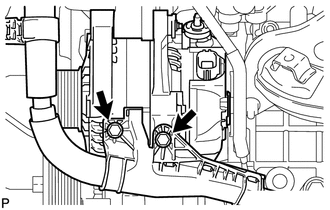
(d) Remove the 2 bolts and disconnect the wire harness. |
 |
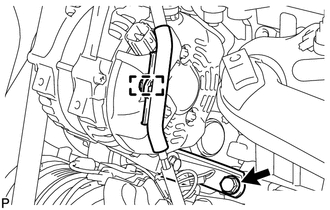
(e) Disconnect the wire harness clamp. |
 |
(f) Remove the bolt and disconnect the generator bracket.
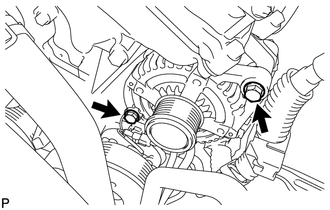
(g) Remove the 2 bolts and generator assembly. |
 |
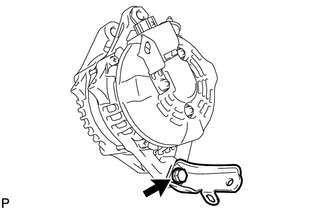
(h) Remove the bolt and generator bracket. |
 |
Test yourself
A quick Toyota 4Runner quiz: every answer comes with an explanation and a link to the manual page.