Seat Memory Switch
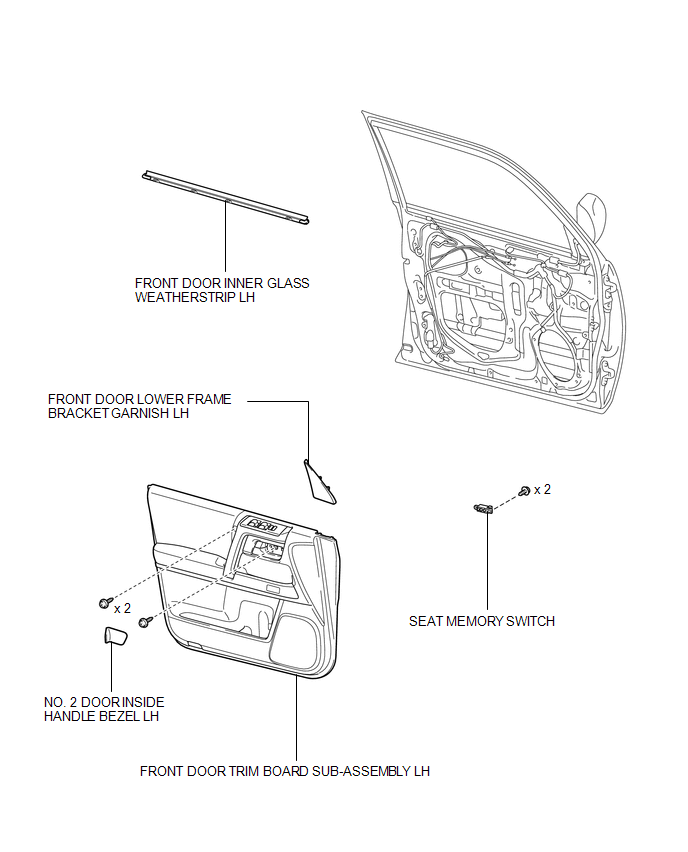
Removal REMOVAL PROCEDURE
1. REMOVE FRONT DOOR LOWER FRAME BRACKET GARNISH LH

2. REMOVE NO. 2 DOOR INSIDE HANDLE BEZEL LH
3. REMOVE FRONT DOOR TRIM BOARD SUB-ASSEMBLY LH
4. REMOVE FRONT DOOR INNER GLASS WEATHERSTRIP LH
5. REMOVE SEAT MEMORY SWITCH
(a) Disconnect the connector. |
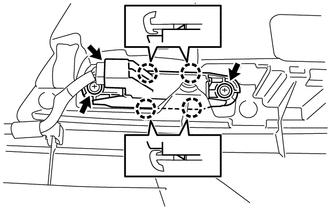 |
(b) Remove the 2 screws.
(c) Detach the 4 claws to remove the seat memory switch.
Inspection INSPECTION PROCEDURE1. INSPECT SEAT MEMORY SWITCH
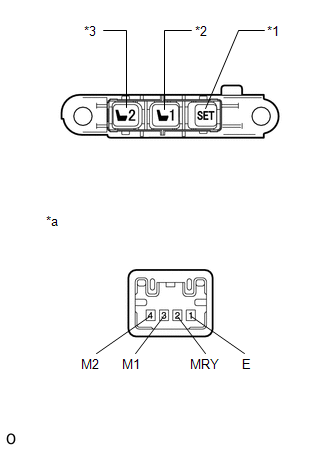
(a) Measure the resistance according to the value(s) in the table below.
Standard Resistance:
Tester Connection | Switch Condition | Specified Condition |
|---|---|---|
3 (M1) - 1 (E) |
1 switch pressed |
Below 1 Ω |
4 (M2) - 1 (E) |
2 switch pressed |
|
2 (MRY) - 1 (E) |
SET switch pressed |
If the result is not as specified, replace the seat memory switch.
Text in Illustration*1 |
SET Switch |
*2 |
1 Switch |
*3 |
2 Switch |
*a |
Component without harness connected (Seat Memory Switch) |
1. INSTALL SEAT MEMORY SWITCH
(a) Attach the 4 claws to install the seat memory switch.
(b) Install the 2 screws.
(c) Connect the connector.
2. INSTALL FRONT DOOR INNER GLASS WEATHERSTRIP LH

3. INSTALL FRONT DOOR TRIM BOARD SUB-ASSEMBLY LH
4. INSTALL NO. 2 DOOR INSIDE HANDLE BEZEL LH
5. INSTALL FRONT DOOR LOWER FRAME BRACKET GARNISH LH
Test yourself
A quick Toyota 4Runner quiz: every answer comes with an explanation and a link to the manual page.