Speed Sensor
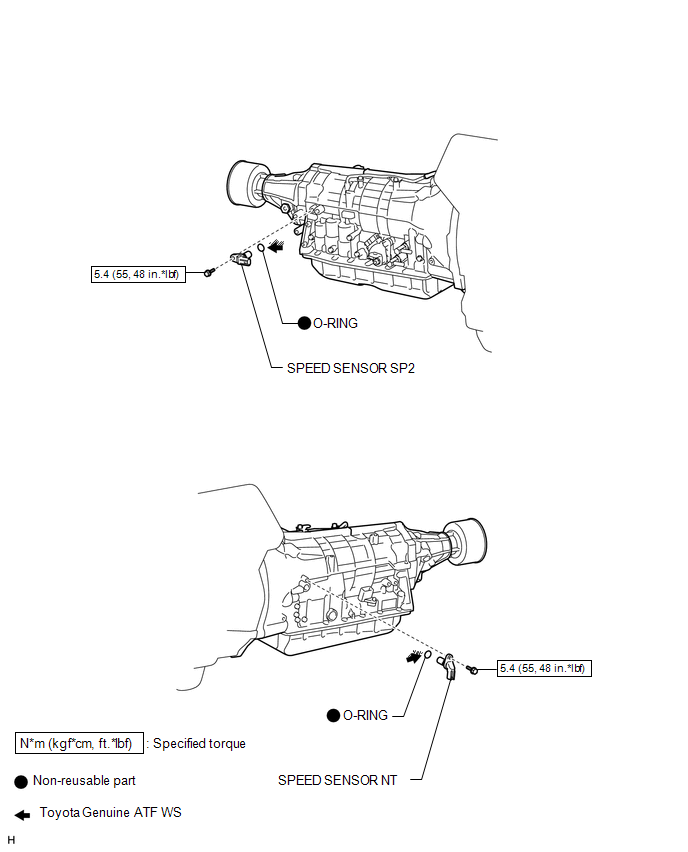
Removal REMOVAL PROCEDURE
1. REMOVE SPEED SENSOR NT
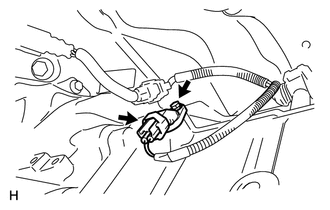
(a) Disconnect the sensor connector.
(b) Remove the bolt and sensor.
(c) Remove the O-ring from the sensor.
2. REMOVE SPEED SENSOR SP2
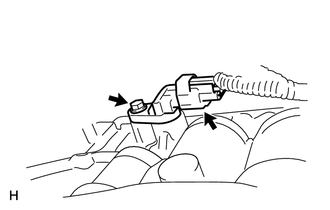
(a) Disconnect the sensor connector.
(b) Remove the bolt and sensor.
(c) Remove the O-ring from the sensor.
Inspection INSPECTION PROCEDURE1. INSPECT SPEED SENSOR NT AND SP2
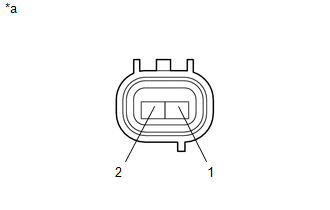
(a) Measure the resistance according to the value(s) in the table below.
Standard Resistance:
Tester Connection | Condition | Specified Condition |
|---|---|---|
1 - 2 |
20 °C |
560 to 680 Ω |
*a |
Component without harness connected (Speed Sensor) |
If the result is not as specified, replace the sensor.
Installation INSTALLATION PROCEDURE1. INSTALL SPEED SENSOR SP2
(a) Coat a new O-ring with ATF and install it to the sensor.
(b) Install the sensor with the bolt.
Torque:
5,4 N·m {55 kgf·cm, 48 in·lbf}
(c) Connect the sensor connector.
2. INSTALL SPEED SENSOR NT
(a) Coat a new O-ring with ATF and install it to the sensor.
(b) Install the sensor with the bolt.
Torque:
5,4 N·m {55 kgf·cm, 48 in·lbf}
(c) Connect the sensor connector.
Test yourself
A quick Toyota 4Runner quiz: every answer comes with an explanation and a link to the manual page.