Install a new gasket between the pipe center and pipe tail.
Install the pipe center to the 2 exhaust pipe supports.
Install the pipe center with the 2 nuts. Torque: 56 N·m
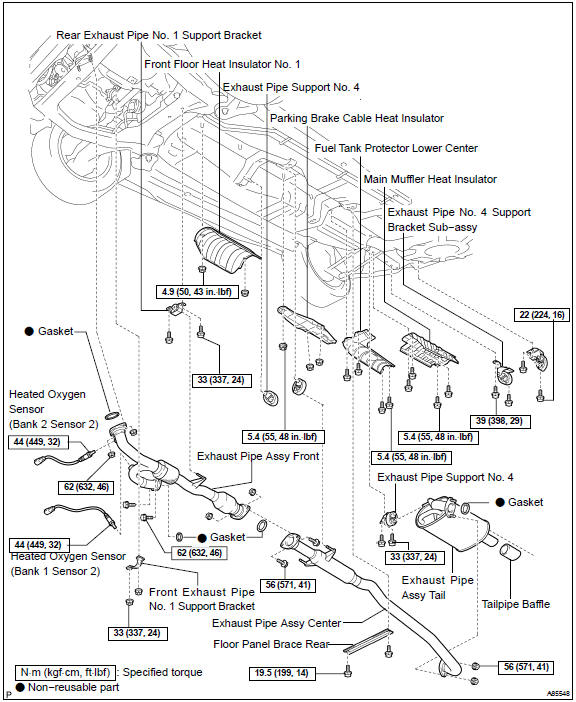
12. INSTALL EXHAUST PIPE ASSY FRONT
Install 3 new gaskets to the pipe front.
Install the pipe front to the manifold converter RH with the 2 bolts. Torque: 62 N·m
Install the pipe front to the manifold converter No. 2 Ωith the 2 nuts. Torque: 62 N·m
Install the pipe front to the pipe center with the 2 bolts and 2 nuts. Torque: 56 N·m
13. INSTALL REAR EXHAUST PIPE No. 1 SUPPORT BRACKET a. Install the rear support bracket with the 2 bolts.Torque: 33 N·mNOTICE: Do not install the bracket facing the wrong direction. Install rear exhaust pipe No. 1 Support bracket14. INSTALL FLOOR PANEL BRACE REAR a. Install the floor panel brace with the 2 bolts.Torque: 19,5 N·m15. INSTALL FRONT EXHAUST PIPE No. 1 SUPPORT BRACKET a. Install the front support bracket with the 2 nuts.Torque: 33 N·mNOTICE: Do not install the support bracket facing the wrong direction.Install front exhaust pipe No. 1 Support bracket16. Bank 1 sensor 2 and bank 2 sensor 2: INSTALL HEATED OXYGEN SENSOR
Install the 2 sensors. Torque: 44 N·m
Connect the 2 sensor connectors.
17. CHECK FOR EXHAUST GAS LEAKS If the exhaust pipe is loose, tighten it.
If damaged, replace it.
?
Test yourself
A quick Toyota Camry quiz: every answer comes with an explanation and a link to the manual page.
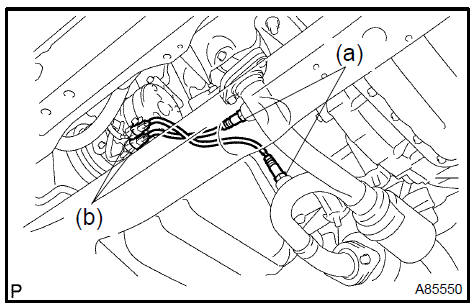 Remove heated oxygen sensor 2. REMOVE FRONT EXHAUST PIPE No. 1 SUPPORT BRACKET
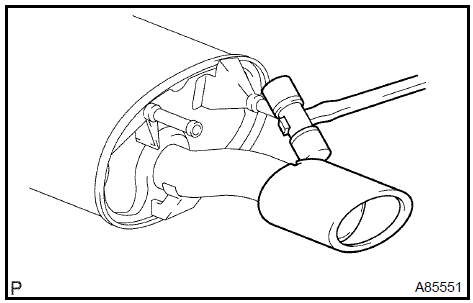 Remove tail pipe baffle 9. INSTALL TAIL PIPE BAFFLE
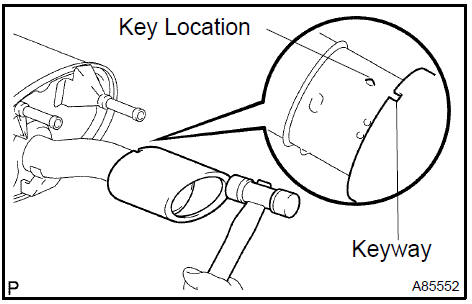 Install tail pipe baffle 10. INSTALL EXHAUST PIPE ASSY TAIL
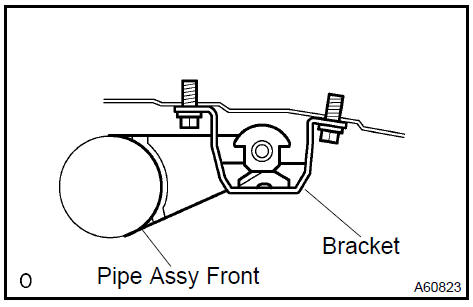 Install rear exhaust pipe No. 1 Support bracket 14. INSTALL FLOOR PANEL BRACE REAR a. Install the floor panel brace with the 2 bolts.Torque: 19,5 N·m 15. INSTALL FRONT EXHAUST PIPE No. 1 SUPPORT BRACKET a. Install the front support bracket with the 2 nuts.Torque: 33 N·m NOTICE: Do not install the support bracket facing the wrong direction.
 Install front exhaust pipe No. 1 Support bracket 16. Bank 1 sensor 2 and bank 2 sensor 2: INSTALL HEATED OXYGEN SENSOR