Installation
INSTALLATION
COMPONENTS (INSTALLATION)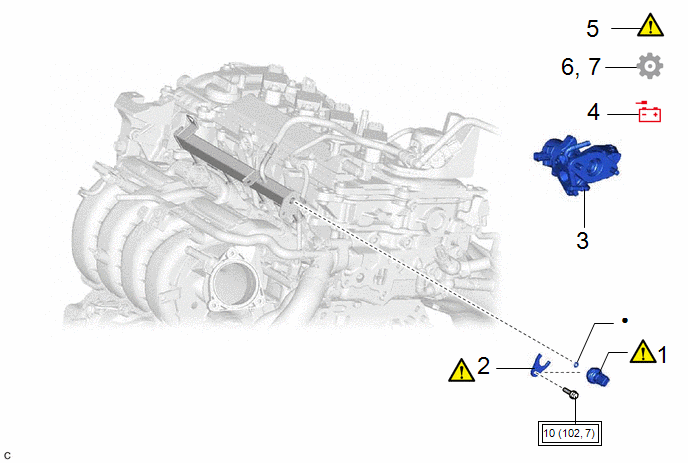
Procedure | Part Name Code |  |  |  |
|
|---|---|---|---|---|---|
1 |
NO. 2 FUEL PRESSURE SENSOR |
89458H |
 |
- |
- |
2 |
NO. 2 FUEL PRESSURE SENSOR HOLDER |
23851A |
|
- |
- |
3 |
EGR VALVE ASSEMBLY |
25620 |
- |
- |
- |
4 |
CONNECT CABLE TO NEGATIVE AUXILIARY BATTERY TERMINAL |
- |
- |
- |
- |
5 |
INSPECT FOR FUEL LEAK |
- |
|
- |
- |
6 |
INITIALIZATION AFTER RECONNECTING AUXILIARY BATTERY TERMINAL |
- |
- |
- |
|
7 |
PERFORM INITIALIZATION |
- |
- |
- |
|
 |
Tightening torque for "Major areas involving basic vehicle performance such as moving/turning/stopping" : N*m (kgf*cm, ft.*lbf) |
● |
Non-reusable part |
NOTICE:
This procedure includes the installation of small-head bolts. Refer to Small-Head Bolts of Basic Repair Hint to identify the small-head bolts.
Click here
PROCEDURE
1. INSTALL NO. 2 FUEL PRESSURE SENSOR
|
NOTICE: Perform "Inspection After Repair" after replacing the No. 2 fuel pressure sensor. Click here |
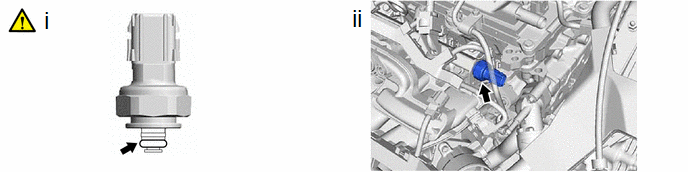
(1) Install a new O-ring to the No. 2 fuel pressure sensor.
(2) Install the No. 2 fuel pressure sensor to the fuel delivery pipe sub-assembly.
2. INSTALL NO. 2 FUEL PRESSURE SENSOR HOLDER
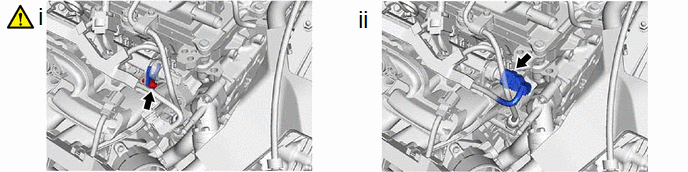
(1) Using an 8 mm socket wrench, install the No. 2 fuel pressure sensor holder to the fuel delivery pipe sub-assembly with the bolt.
Torque:
10 N·m {102 kgf·cm, 7 ft·lbf}
(2) Connect the No. 2 fuel pressure sensor connector.
3. INSTALL EGR VALVE ASSEMBLY
Click here
4. CONNECT CABLE TO NEGATIVE AUXILIARY BATTERY TERMINAL
Click here
5. INSPECT FOR FUEL LEAK
Click here
6. INITIALIZATION AFTER RECONNECTING AUXILIARY BATTERY TERMINAL
HINT:
When disconnecting and reconnecting the auxiliary battery, there is an automatic learning function that completes learning when the respective system is used.
Click here
7. PERFORM INITIALIZATION
(a) Perform "Inspection After Repair" after replacing the No. 2 fuel pressure sensor.
Click here