Installation
INSTALLATION
COMPONENTS (INSTALLATION)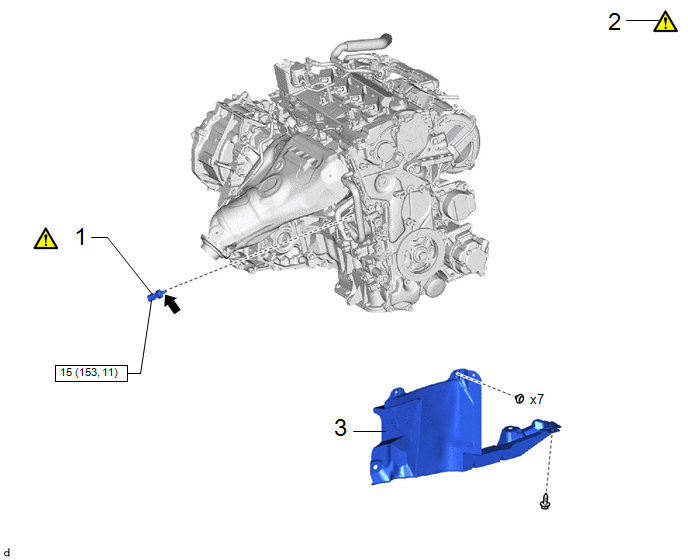
Procedure | Part Name Code |  |  |  |
|
|---|---|---|---|---|---|
1 |
OIL PRESSURE AND TEMPERATURE SENSOR |
89448D |
 |
- |
- |
2 |
INSPECT FOR ENGINE OIL LEAK |
- |
|
- |
- |
3 |
REAR ENGINE UNDER COVER RH |
51443C |
- |
- |
- |
 |
N*m (kgf*cm, ft.*lbf): Specified torque |
 |
Adhesive 1344 |
★ |
Precoated part |
- |
- |
PROCEDURE
1. INSTALL OIL PRESSURE AND TEMPERATURE SENSOR
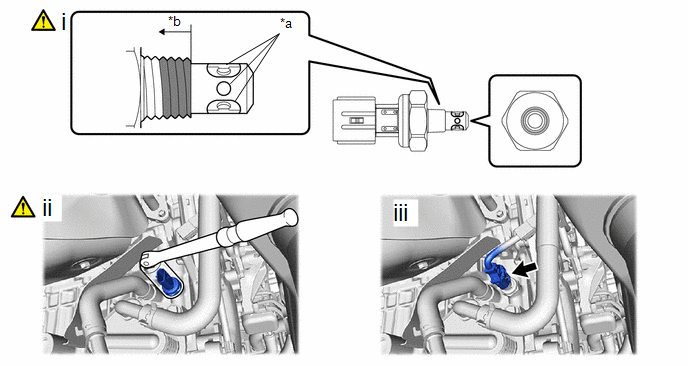
*a |
Oil Inlet Port |
*b |
3 Threads or More |
 |
Adhesive Application Area |
- |
- |
(1) Apply adhesive to the area shown in the illustration.
Adhesive:
Toyota Genuine Adhesive 1344, Three Bond 1344 or equivalent
NOTICE:
- Do not apply adhesive to the oil inlet port of the oil pressure and temperature sensor.
- Apply the adhesive to the first 3 threads or more of the oil pressure and temperature sensor.
- Apply adhesive to the entire circumference of the thread.
- To prevent contamination by foreign matter, install immediately after applying adhesive.
(2) Using a 24 mm deep socket wrench, install the oil pressure and temperature sensor.
Torque:
15 N·m {153 kgf·cm, 11 ft·lbf}
NOTICE:
Do not start the engine within 1 hour of installation.
(3) Connect the oil pressure and temperature sensor connector.
2. INSPECT FOR ENGINE OIL LEAK
|
Click here |
3. INSTALL REAR ENGINE UNDER COVER RH
Click here