Installation
INSTALLATION
COMPONENTS (INSTALLATION)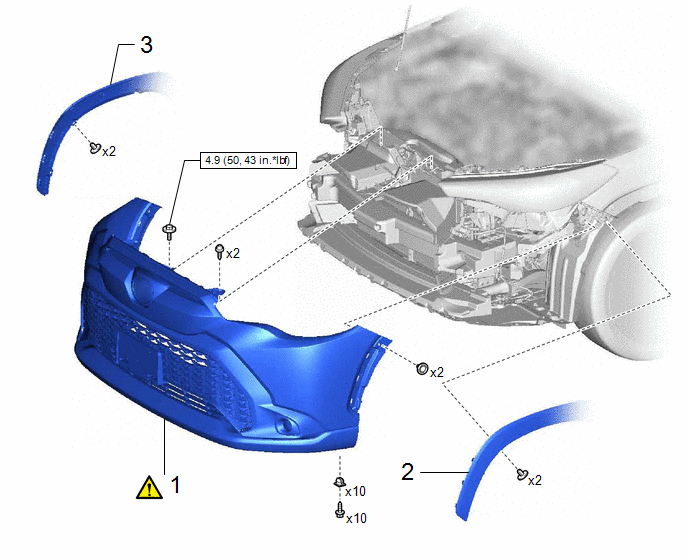
Procedure | Part Name Code |  |  |  |
|
|---|---|---|---|---|---|
1 |
FRONT BUMPER ASSEMBLY |
- |
 |
- |
- |
2 |
FRONT FENDER MOULDING SUB-ASSEMBLY LH |
75602A |
- |
- |
- |
3 |
FRONT FENDER MOULDING SUB-ASSEMBLY RH |
75601A |
- |
- |
- |
 |
N*m (kgf*cm, ft.*lbf): Specified torque |
- |
- |
PROCEDURE
1. INSTALL FRONT BUMPER ASSEMBLY
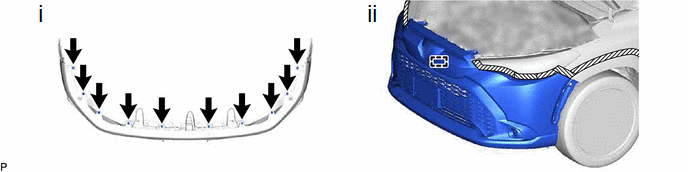
(1) Install the 10 grommets.
(2) Engage the guide to temporarily install the front bumper assembly.
*A |
w/ Panoramic View Monitor System |
*B |
w/ Fog Light |
 |
Pull |
- |
- |
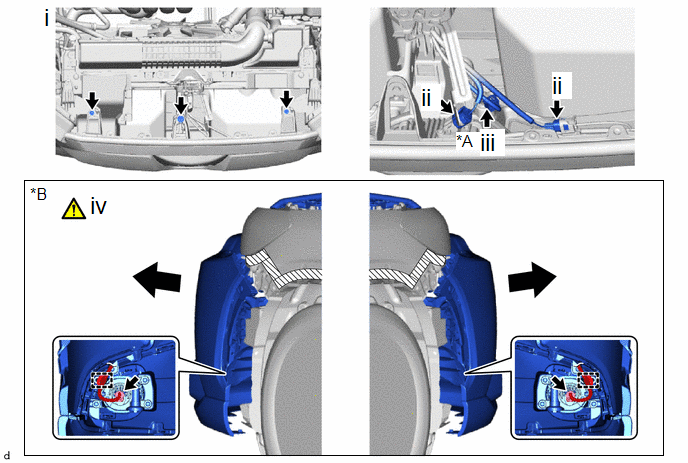
(1) Install the 2 screws and bolt.
Torque:
Bolt :
4,9 N·m {50 kgf·cm, 43 in·lbf}
(2) Connect the 2 connectors.
(3) w/ Pre-collision System:
1. Connect the connector.
(4) w/ Fog Light:
1. Pull back the side of the front bumper assembly as shown in the illustration.
NOTICE:
Do not apply excessive force when pulling back the front bumper assembly.
2. Engage the clamps and connect the 2 connectors.
 |
Install in this Direction |
- |
- |
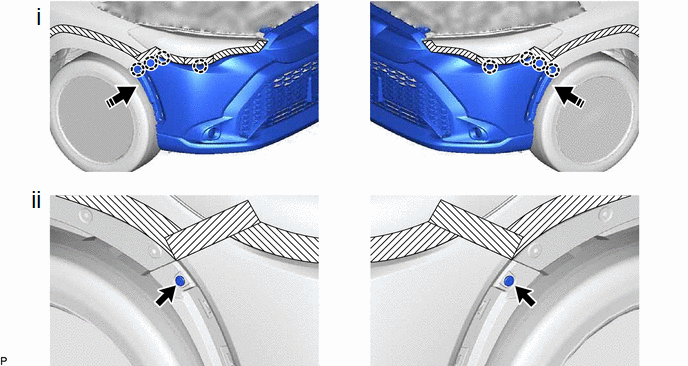
(1) Engage the claws as shown in the illustration.
(2) Install the 2 clips.
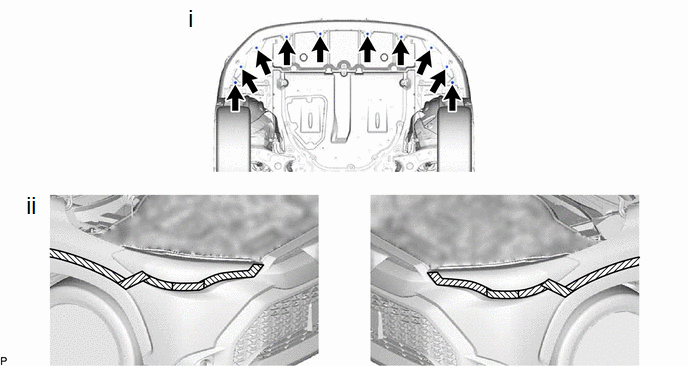
(1) Install the 10 screws.
(2) Remove the protective tape.
2. INSTALL FRONT FENDER MOULDING SUB-ASSEMBLY LH
3. INSTALL FRONT FENDER MOULDING SUB-ASSEMBLY RH