Removal
REMOVAL
COMPONENTS (REOVAL)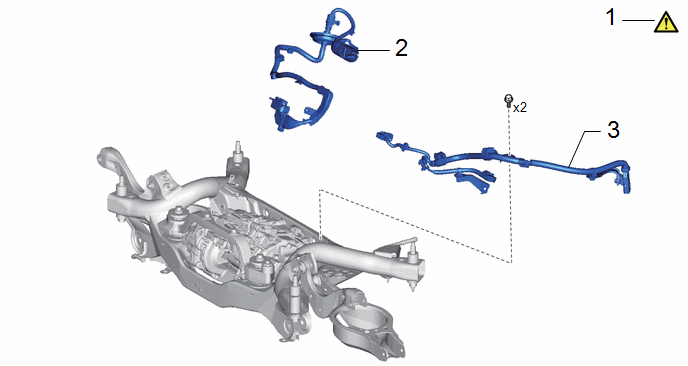
Procedure | Part Name Code |  |  |  |
|
|---|---|---|---|---|---|
1 |
PERFORM RESOLVER INITIALIZATION |
- |
 |
- |
- |
2 |
REAR TRACTION MOTOR CABLE |
G1149 |
- |
- |
- |
3 |
NO. 9 FLOOR WIRE |
8216C |
- |
- |
- |
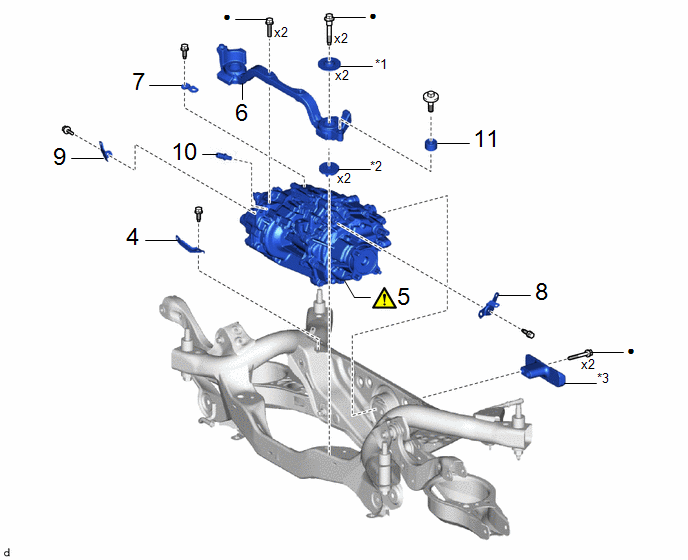
Procedure | Part Name Code | | | |
|
|---|---|---|---|---|---|
4 |
NO. 3 WIRING HARNESS CLAMP BRACKET |
82715T |
- |
- |
- |
5 |
REAR TRACTION MOTOR WITH TRANSAXLE ASSEMBLY |
G1050 |
|
- |
- |
6 |
FRONT DIFFERENTIAL SUPPORT ASSEMBLY |
52380F |
- |
- |
- |
7 |
NO. 3 MOTOR CABLE BRACKET |
G1143G |
- |
- |
- |
8 |
NO. 2 MOTOR CABLE BRACKET |
G1143F |
- |
- |
- |
9 |
NO. 2 WIRING HARNESS CLAMP BRACKET |
82715S |
- |
- |
- |
10 |
REAR TRACTION MOTOR BREATHER PLUG |
30900T |
- |
- |
- |
11 |
DIFFERENTIAL DYNAMIC DAMPER |
41196B |
- |
- |
- |
*1 |
UPPER DIFFERENTIAL MOUNT STOPPER |
*2 |
LOWER DIFFERENTIAL MOUNT STOPPER |
*3 |
DIFFERENTIAL MASS DAMPER |
- |
- |
● |
Non-reusable part |
- |
- |
The necessary procedures (adjustment, calibration, initialization, or registration) that must be performed after parts are removed and installed, or replaced during the front flexible hose removal/installation are shown below.
Necessary Procedures After Parts Removed/Installed/ReplacedReplaced Part or Performed Procedure | Necessary Procedure | Effect/Inoperative Function when Necessary Procedure not Performed | Link |
|---|---|---|---|
Rear traction motor with transaxle assembly |
|
|
|
Rear wheel alignment adjustment |
|
|
|
NOTICE:
If both left and right front flexible hoses are disconnected at the same time, be sure to place an identification mark on each hose to indicate its installation position.
HINT:
- When the cable is disconnected/reconnected to the auxiliary battery terminal, systems temporarily stop operating. However, each system has a function that completes learning the first time the system is used.
- Learning completes when vehicle is driven
Effect/Inoperative Function When Necessary Procedures are not Performed
Necessary Procedures
Link
Front Camera System
Drive the vehicle straight ahead at 15 km/h or more for 5 second or more.
- Learning completes when vehicle is operated normally
Effect/Inoperative Function When Necessary Procedures are not Performed
Necessary Procedures
Link
Power door lock control system
- Back door opener
Perform door unlock operation with door control switch or electrical key transmitter sub-assembly switch.
Power back door system
Fully close the back door by hand.
HINT:
Initialization is not necessary if the above procedures are performed while the back door is closed.
Air conditioning system
After the ignition switch is turned to ON, the servo motor standard position is recognized.
-
- Learning completes when vehicle is driven
- Use the same procedure for the RH side and LH side.
- The following procedure is for the LH side.
PROCEDURE
1. PERFORM RESOLVER INITIALIZATION
|
NOTICE: If it is necessary to replace the rear traction motor with transaxle assembly, make sure to perform resolver initialization before starting work. Click here |
2. REMOVE REAR TRACTION MOTOR CABLE
Click here
3. SEPARATE NO. 9 FLOOR WIRE

4. REMOVE NO. 3 WIRING HARNESS CLAMP BRACKET

5. REMOVE REAR TRACTION MOTOR WITH TRANSAXLE ASSEMBLY
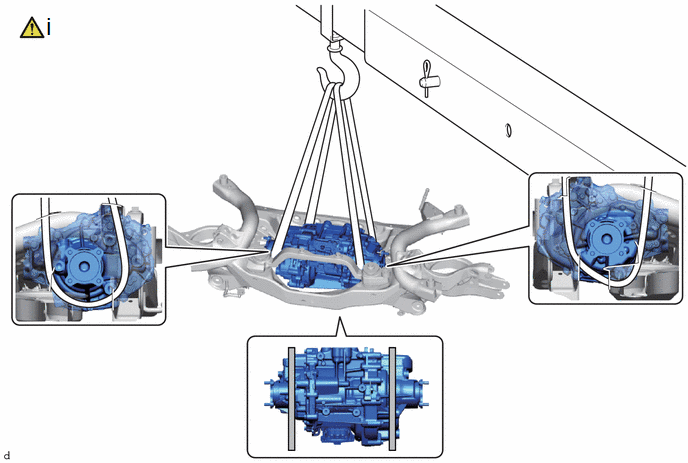
 |
Support Positions |
- |
- |
(1) Using an engine sling device and belts, support the rear traction motor with transaxle assembly in the position shown in the illustration.
NOTICE:
- Do not lift the rear traction motor with transaxle assembly any higher than is necessary.
- When lifting the rear traction motor with transaxle assembly, check the location of the center of gravity while lifting it.
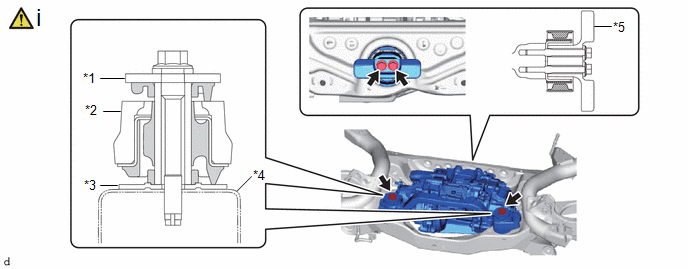
*1 |
UPPER DIFFERENTIAL MOUNT STOPPER |
*2 |
FRONT DIFFERENTIAL SUPPORT ASSEMBLY |
*3 |
LOWER DIFFERENTIAL MOUNT STOPPER |
*4 |
REAR SUSPENSION MEMBER SUB-ASSEMBLY |
*5 |
DIFFERENTIAL MASS DAMPER |
- |
- |
(1) Remove the 4 bolts, the 2 upper differential mount stoppers and the 2 lower differential mount stoppers, and remove the differential mass damper and rear traction motor with transaxle assembly from the rear suspension member sub-assembly.
NOTICE:
- Do not allow the rear traction motor with transaxle assembly to fall.
- When removing the rear traction motor with transaxle assembly, make sure not to damage the installation surfaces.
6. REMOVE FRONT DIFFERENTIAL SUPPORT ASSEMBLY
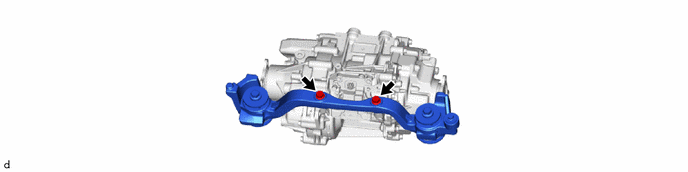
7. REMOVE NO. 3 MOTOR CABLE BRACKET
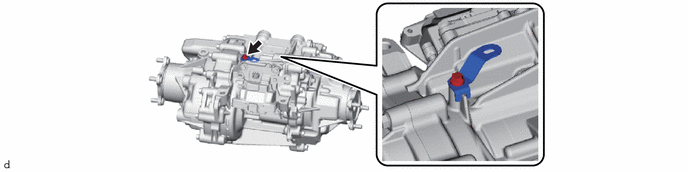
8. REMOVE NO. 2 MOTOR CABLE BRACKET
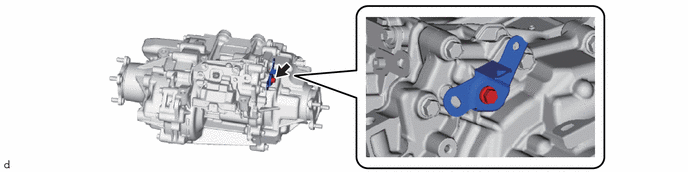
9. REMOVE NO. 2 WIRING HARNESS CLAMP BRACKET
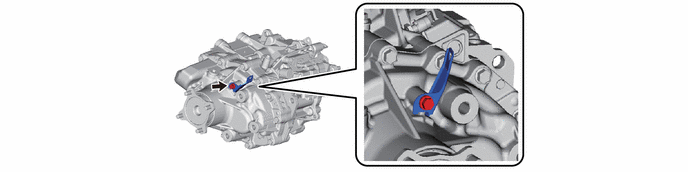
10. REMOVE REAR TRACTION MOTOR BREATHER PLUG
HINT:
Perform this procedure only when replacement of the rear traction motor breather plug is necessary.
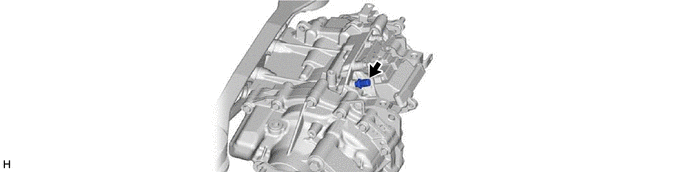
11. REMOVE DIFFERENTIAL DYNAMIC DAMPER
HINT:
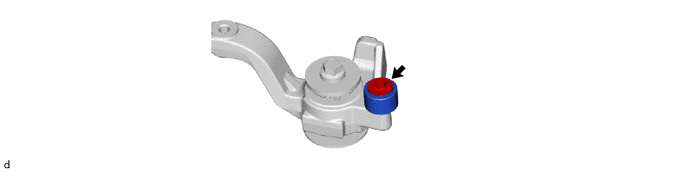
Perform this procedure only when replacement of the differential dynamic damper is necessary.