Removal
REMOVAL
COMPONENTS (REMOVAL)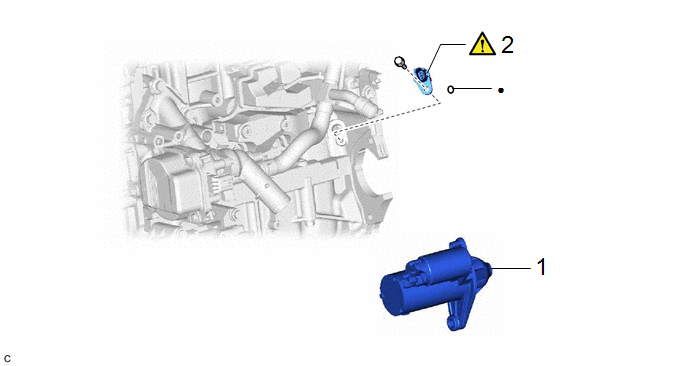
Procedure | Part Name Code |  |  |  |
|
|---|---|---|---|---|---|
1 |
STARTER ASSEMBLY |
28100 |
- |
- |
- |
2 |
CRANKSHAFT POSITION SENSOR |
11401G |
 |
- |
- |
NOTICE:
- After the ignition switch is turned off, the radio and display receiver assembly records various types of memory and settings. As a result, after turning the ignition switch off, make sure to wait at least 120 seconds before disconnecting the cable from the negative (-) auxiliary battery terminal.
- This procedure includes the removal of small-head bolts. Refer to Small-Head Bolts of Basic Repair Hint to identify the small-head bolts.
Click here
HINT:
When the cable is disconnected/reconnected to the auxiliary battery terminal, systems temporarily stop operating. However, each system has a function that completes learning the first time the system is used.
- Learning completes when vehicle is driven.
Effect/Inoperative Function When Necessary Procedures are not Performed
Necessary Procedures
Link
Front camera system
Drive the vehicle straight ahead at 15 km/h or more for 1 second or more.
Stop and start system
Drive the vehicle until stop and start control is permitted (approximately 5 to 60 minutes)
- Learning completes when vehicle is operated normally
Effect/Inoperative Function When Necessary Procedures are not Performed
Necessary Procedures
Link
Power door lock control system
- Back door opener
Perform door unlock operation with door control switch or electrical key transmitter sub-assembly switch.
Power back door system
Fully close the back door by hand.
HINT:
Initialization is not necessary if the above procedures are performed while the back door is closed.
Air conditioning system
After the ignition switch is turned to ON, the servo motor standard position is recognized.
-
PROCEDURE
1. REMOVE STARTER ASSEMBLY
Click here
2. REMOVE CRANKSHAFT POSITION SENSOR
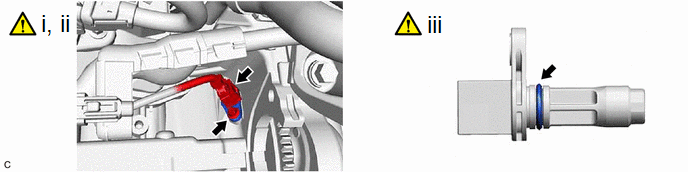
(1) Disconnect the crankshaft position sensor connector.
(2) Using an 8 mm socket wrench, remove the bolt and crankshaft position sensor from the cylinder block sub-assembly.
NOTICE:
If the crankshaft position sensor has been struck or dropped, replace it.
(3) Perform this procedure only when reusing the crankshaft position sensor.
1. Remove the O-ring from the crankshaft position sensor.
NOTICE:
- Make sure to only remove the O-ring with bare hands.
- When removing the O-ring, be careful not to damage the O-ring groove of the crankshaft position sensor.
- If the O-ring groove of the crankshaft position sensor is damaged, replace the crankshaft position sensor with a new one.