Removal
REMOVAL
COMPONENTS (REMOVAL)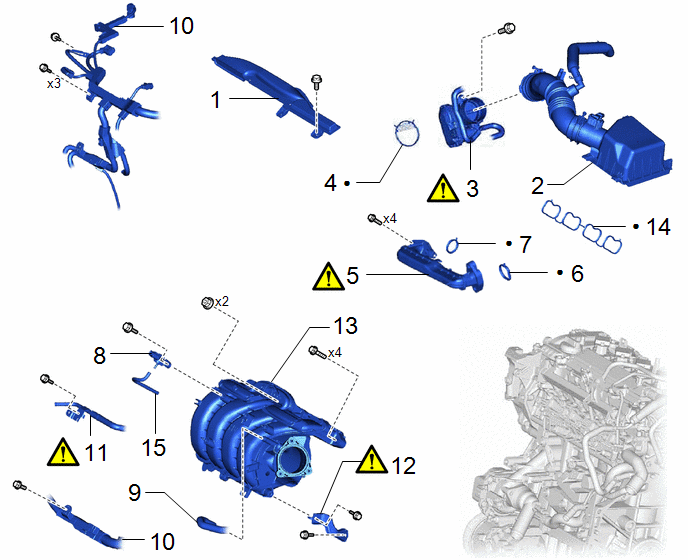
Procedure | Part Name Code |  |  |  |
|
|---|---|---|---|---|---|
1 |
INLET NO. 1 AIR CLEANER |
17751 |
- |
- |
- |
2 |
AIR CLEANER CAP WITH AIR CLEANER HOSE |
- |
- |
- |
- |
3 |
THROTTLE BODY WITH MOTOR ASSEMBLY |
22030 |
 |
- |
- |
4 |
THROTTLE BODY GASKET |
22271 |
- |
- |
- |
5 |
NO. 1 EGR PIPE SUB-ASSEMBLY |
25601 |
|
- |
- |
6 |
EGR VALVE ADAPTER GASKET |
25629 |
- |
- |
- |
7 |
EGR INLET GASKET |
25628 |
- |
- |
- |
8 |
E.F.I. VACUUM SENSOR ASSEMBLY (MANIFOLD ABSOLUTE PRESSURE SENSOR) |
89421 |
- |
- |
- |
9 |
NO. 1 FUEL VAPOR FEED HOSE |
23826 |
- |
- |
- |
10 |
ENGINE WIRE |
82121 |
- |
- |
- |
11 |
NO. 3 WATER BY-PASS PIPE |
16279 |
|
- |
- |
12 |
INTAKE MANIFOLD STAY |
17138B |
|
- |
- |
13 |
INTAKE MANIFOLD |
17111 |
- |
- |
- |
14 |
NO. 1 INTAKE MANIFOLD TO HEAD GASKET |
17177 |
- |
- |
- |
15 |
VACUUM HOSE |
- |
- |
- |
- |
● |
Non-reusable part |
- |
- |
The necessary procedures (adjustment, calibration, initialization or registration) that must be performed after parts are removed and installed, or replaced during intake manifold removal/installation are shown below.
Necessary Procedures After Parts Removed/Installed/ReplacedReplaced Part or Performed Procedure | Necessary Procedure | Effect/Inoperative Function when Necessary Procedure not Performed | Link |
|---|---|---|---|
|
Inspection After Repair |
|
|
CAUTION:
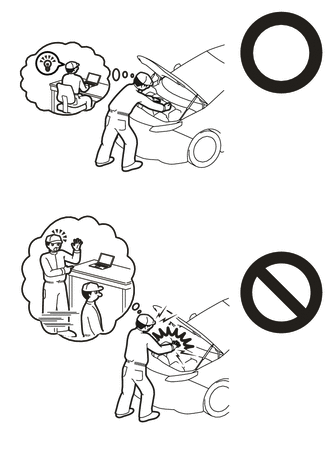
- Orange wire harnesses and connectors indicate high-voltage circuits. To prevent electric shock, always follow the procedure described in the repair manual.
Click here
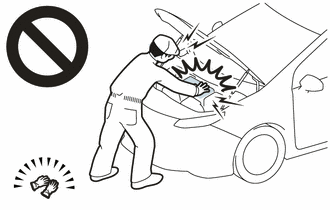
- To prevent electric shock, wear insulated gloves when working on wire harnesses and components of the high voltage system.
NOTICE:
- After the power switch is turned off, the radio and display receiver assembly records various types of memory and settings. As a result, after turning the power switch off, make sure to wait at least 85 seconds before disconnecting the cable from the negative (-) auxiliary battery terminal. (for Audio and Visual System (for HEV Model))
- After the ignition switch is turned off, the navigation system records various types of memory and settings. As a result, after turning the ignition switch off, make sure to wait at least 3 minutes before disconnecting the cable from the negative (-) battery terminal. (for Navigation System (for HEV Model))
- This procedure includes the removal of small-head bolts. Refer to Small-Head Bolts of Basic Repair Hint to identify the small-head bolts.
Click here
PROCEDURE
1. REMOVE INLET NO. 1 AIR CLEANER
Click here
2. REMOVE AIR CLEANER CAP WITH AIR CLEANER HOSE
Click here
3. REMOVE THROTTLE BODY WITH MOTOR ASSEMBLY
Click here
4. REMOVE THROTTLE BODY GASKET
Click here
5. REMOVE NO. 1 EGR PIPE SUB-ASSEMBLY
Click here
6. REMOVE EGR VALVE ADAPTER GASKET
Click here
7. REMOVE EGR INLET GASKET
Click here
8. REMOVE E.F.I. VACUUM SENSOR ASSEMBLY (MANIFOLD ABSOLUTE PRESSURE SENSOR)
Click here
9. REMOVE NO. 1 FUEL VAPOR FEED HOSE

10. DISCONNECT ENGINE WIRE
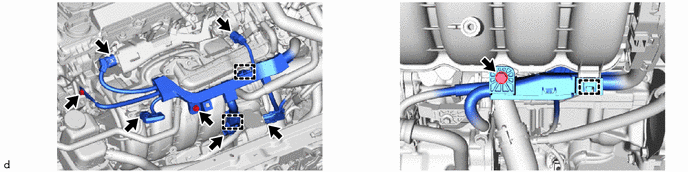
11. DISCONNECT NO. 3 WATER BY-PASS PIPE
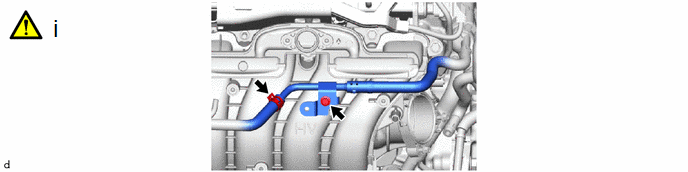
(1) Using an 8 mm socket wrench, remove the bolt and separate the No. 3 water by-pass pipe from the intake manifold.
12. REMOVE INTAKE MANIFOLD STAY

(1) Using an 8 mm socket wrench, remove the bolt (A).
(2) Remove the bolt (B).
(3) Disengage the guide and remove the intake manifold stay.
13. REMOVE INTAKE MANIFOLD

14. REMOVE NO. 1 INTAKE MANIFOLD TO HEAD GASKET

15. REMOVE VACUUM HOSE