Rear wiper rubber
REPLACEMENT
HINT: Installation is in the reverse order of removal.
1. REMOVE REAR WIPER BLADE ASSY
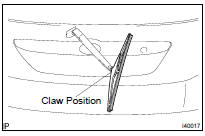
(a) Raise the rear wiper blade assy to the position where the claw disengages with a click sound as shown in the illustration.
NOTICE: Be careful not to damage the claw.
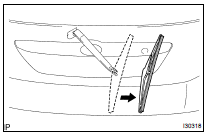
(b) Pull the rear wiper blade straight toward the left side of the vehicle to remove it from the rear wiper arm.
NOTICE: Do not fold down the rear wiper arm with the rear wiper blade removed from it.
2. REMOVE REAR WIPER RUBBER

(a) Make the rear wiper rubber protrude from the base end stopper of the rear wiper blade.
NOTICE: Do not forcibly pull out the wiper rubber as the backing plates may be deformed or blade claws may be damaged.
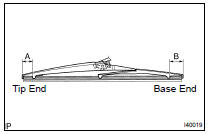
HINT:
- When removing the wiper rubber, pull it out from the base end, as the wiper blade has more space at the base end (section B as shown in the illustration).
- Slightly pushing the wiper blade claw and the surrounding central area will allow the rubber to be pulled out more easily.
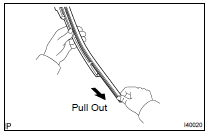
(b) Pull out the rear wiper rubber from the rear wiper blade completely.
3. INSTALL REAR WIPER RUBBER
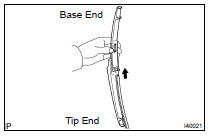
(a) Insert the rear wiper rubber from the claw position in the middle of the rear wiper blade to the base end.
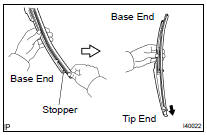
b) After passing the rear wiper rubber through the base end claw, make it stick out from the base end stopper to pass it through the tip end claw.
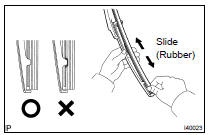
(c) Make sure that the rear wiper blade claws are fit in the rear wiper rubber groove.
HINT:
- If the blade claws are not fit in the rubber groove, slide the rubber several times to make the blade claw fit.
- Applying a small amount of the window washer fluid to the rubber makes the blade claws fit easily.
- Raise the middle part of the wiper rubber as shown in the illustration to maintain a longer stroke length for sliding the rubber.
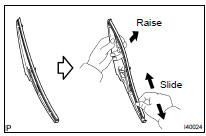
NOTICE: Do not forcibly slide the wiper rubber as the backing plates may be deformed or the blade claw may be damaged.