Door lock
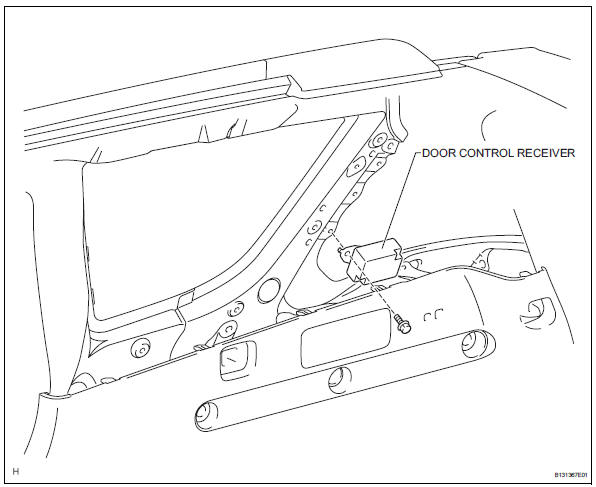
Door control receiver
In this manual: Door lock
54steps
~324min
4/5difficulty
Done 0 of 54
Components
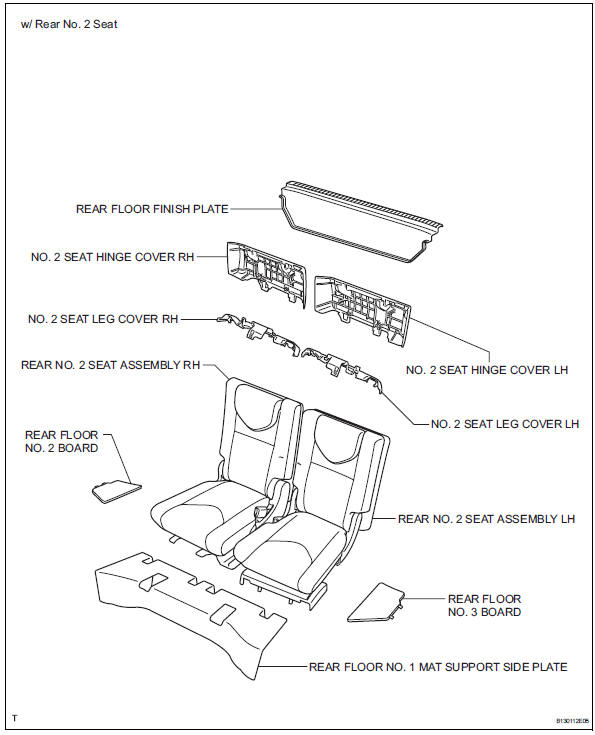
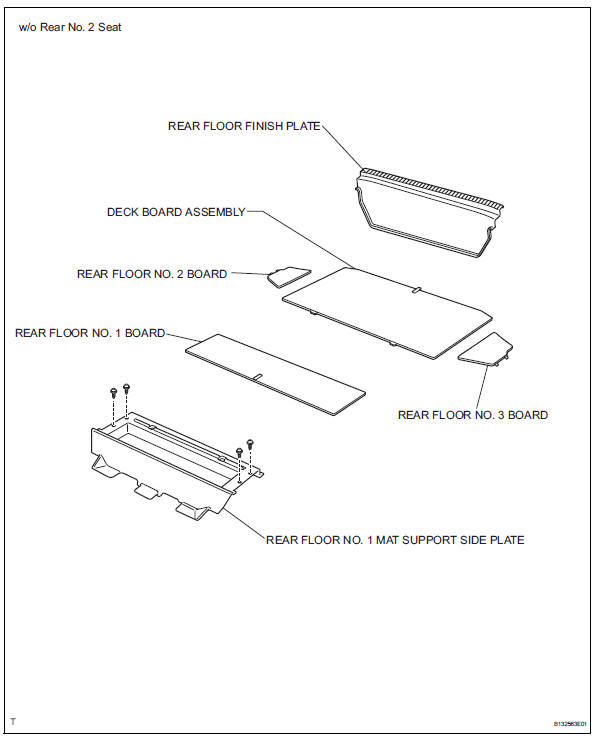
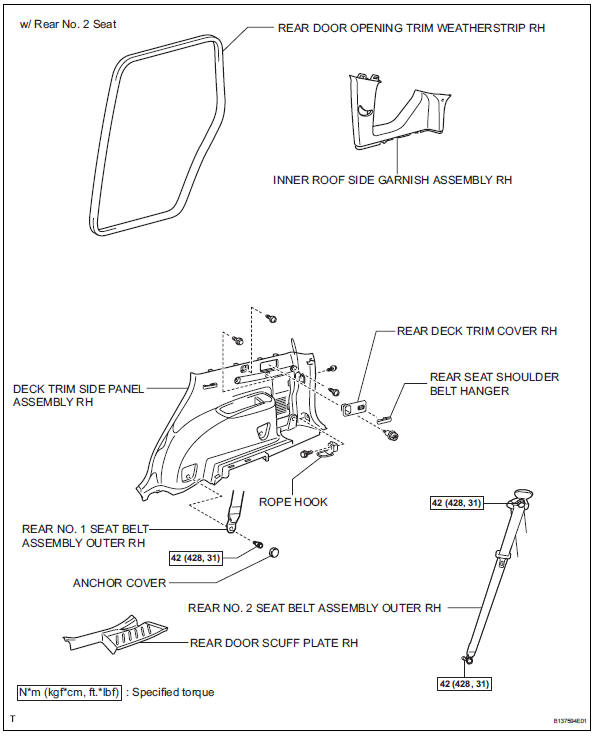

Removal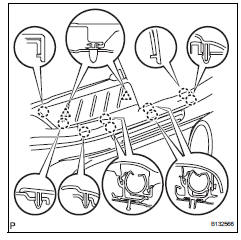
Remove deck board assembly (w/o rear no. 2 Seat)
Remove no. 2 Seat hinge cover lh (w/ rear no. 2 Seat) (see page se-109)Remove no. 2 Seat hinge cover rh (w/ rear no. 2 Seat) Hint:
Attach the claws to close the seat belt anchor cover.
Install no. 2 Seat hinge cover rh (w/ rear no. 2 Seat) Hint:
Install rear door opening trim weatherstrip rh
Install rear door scuff plate rh
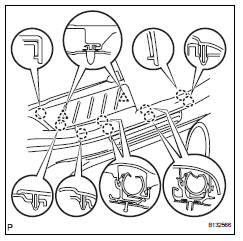
Removal
- Remove rear door scuff plate rh
- Using a screwdriver, detach the 9 claws.
Tape the screwdriver tip before use.
- Using a clip remover, detach the 2 clips and remove the garnish.
- Remove rear door opening trim weatherstrip rh
- Remove rear floor no. 1 Board (w/o rear no.
Use the same procedures described for the lh side.
- Remove no. 2 Seat leg cover lh (w/ rear no. 2 Seat) (see page se-109)
- Remove no. 2 Seat leg cover rh (w/ rear no. 2 Seat)
Use the same procedures described for the lh side.
- Remove rear no. 2 Seat assembly lh (w/ rear no. 2 Seat) (see page se-110)
- Remove rear no. 2 Seat assembly rh (w/ rear no. 2 Seat)
- Remove rear floor no. 3 Board
- Remove rear floor no. 2 Board
- Remove rear floor no. 1 Mat support side plate (see page ir-31)
- Remove rear floor finish plate (see page ir- 31)
- Remove rear deck trim cover rh (w/ rear no.
- Remove the bolt.
- Using a screwdriver, detach the 4 claws and remove the trim cover.
Tape the screwdriver tip before use.
- Remove reclining remote control lever bezel rh (w/o rear no. 2 Seat) (see page se-80)
- Remove tether anchor bracket subassembly (w/o rear no. 2 Seat)
- Remove the bolt and tether anchor bracket.
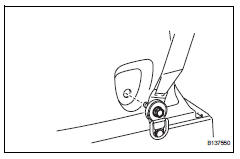
- Remove deck trim side panel assembly rh (w/o rear no. 2 Seat) (see page ir-33)
- Remove deck trim side panel assembly rh (w/ rear no. 2 Seat) (see page ir-34)
- Remove inner roof side garnish assembly rh (w/o rear no. 2 Seat)

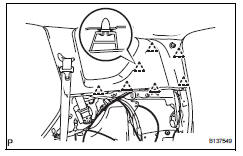
- Using a clip remover, detach the 7 clips and remove the garnish.
- Remove inner roof side garnish assembly rh (w/ rear no. 2 Seat)

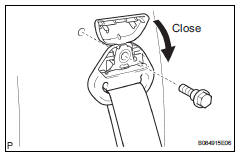
- Disconnect the rear no. 2 Seat outer belt's shoulder anchor.
- Using a screwdriver, detach the 2 claws and open the seat belt anchor cover.
Tape the screwdriver tip before use.
- Remove the bolt and disconnect the shoulder anchor.
- Using a clip remover, detach the 7 clips and remove the garnish.
- Remove door control receiver

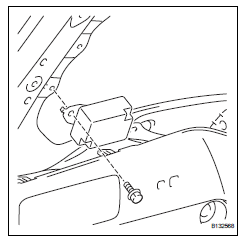
- Disconnect the receiver connector.
- Remove the bolt and receiver.
- Install door control receiver
- Install the receiver with the bolt.
- Connect the receiver connector.
- Install inner roof side garnish assembly rh (w/o rear no. 2 Seat)

- Attach the 7 clips to install the garnish.
- Install inner roof side garnish assembly Rh (w/ rear no. 2 Seat)
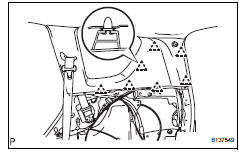
- Attach the 7 slips to install the garnish.
- Connect the rear no. 2 Seat belt's shoulder anchor.
- Connect the shoulder anchor with the bolt.
- Install deck trim side panel assembly rh (w/o rear no. Seat) (see page ir-53)
- Install deck trim side panel assembly rh (w/ rear no. 2 Seat) (see page ir-54)
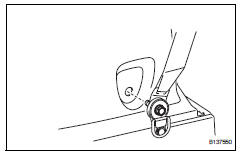
- Install tether anchor bracket subassembly (w/o rear no. 2 Seat)
- Install the tether anchor bracket with the bolt.
- Install reclining remote control lever bezel rh (w/o rear no. 2 Seat) (see page se-105)
- Install rear deck trim cover rh (w/ rear no.
- Attach the 4 claws to install the trim cover.
- Install the belt.
- Install rear floor finish plate (see page ir- 55)
- Install rear floor no. 1 Mat support side plate (see page ir-55)
- Install rear floor no. 3 Board
- Install rear floor no. 2 Board
- Install rear no. 2 Seat assembly lh (w/ rear no. 2 Seat) (see page se-121)
- Install rear no. 2 Seat assembly rh (w/ rear no. 2 Seat)
Use the same procedures described for the lh side.
- Install no. 2 Seat leg cover lh (w/ rear no. 2 Seat) (see page se-123)
- Install no. 2 Seat leg cover rh (w/ rear no. 2 Seat)
Use the same procedures described for the lh side.
- Install no. 2 Seat hinge cover lh (w/ rear no.
Use the same procedures described for the lh side.
- Install deck board assembly (w/o rear no. 2 Seat)
- Install rear floor no. 1 Board (w/o rear no.
- Attach the 9 claws and 2 clips to install the scuff plate.
Test yourself
A quick Toyota RAV4 quiz: every answer comes with an explanation and a link to the manual page.
Was this page helpful?