Engine
Inspection
In this manual: Engine
~1min read
1. Inspect no. 3 Intake air control valve assembly

(A) inspect actuator operation.
(1) With 26.7 Kpa (200 mm hg, 7.9 In. Hg) of vacuum applied to the actuator, check that the actuator rod moves.
(2) One minute after applying the vacuum, check that the actuator rod does not return.
(3) If the operation is not as specified, replace the no. 3 Intake air control valve.
Installation
1. INSTALL NO. 3 INTAKE AIR CONTROL VALVE ASSEMBLY
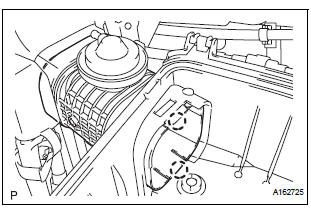
(a) Engage the 2 claws and install the No. 3 intake air control valve assembly.
2. INSTALL AIR CLEANER CAP SUB-ASSEMBLY
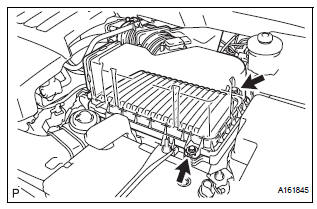
(a) Install the air cleaner filter element, and air cleaner cap sub-assembly with the 2 bolts.
Torque: 5.0 N*m (50 kgf*cm, 44 in.*lbf)
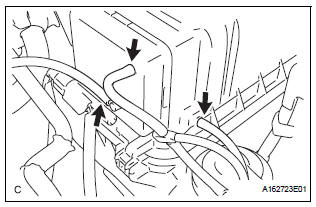
(b) Connect the 3 vacuum hoses.
(c) Tighten the bolt, connect the 2 connectors, and install the 2 vacuum hoses.
3. INSTALL NO. 2 AIR CLEANER INLET (See page EM- 60)

Test yourself
A quick Toyota Sienna quiz: every answer comes with an explanation and a link to the manual page.
Was this page helpful?