Rear Console Box
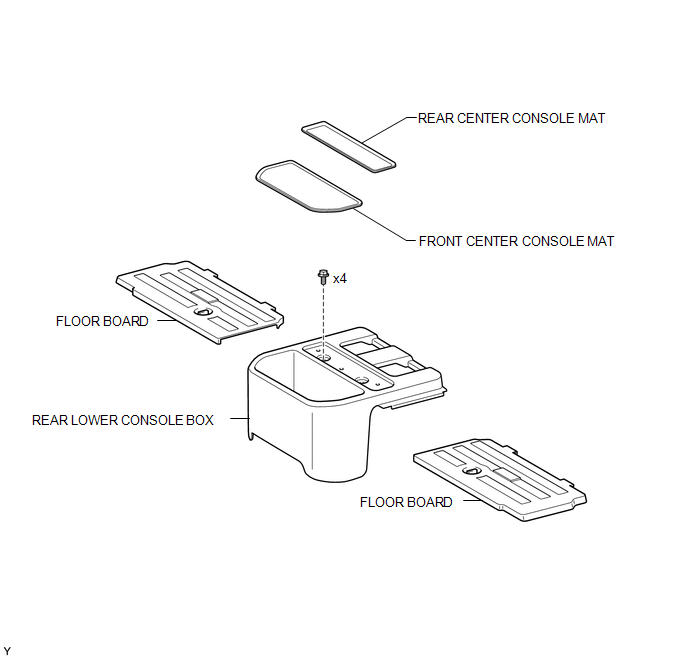 ILLUSTRATION
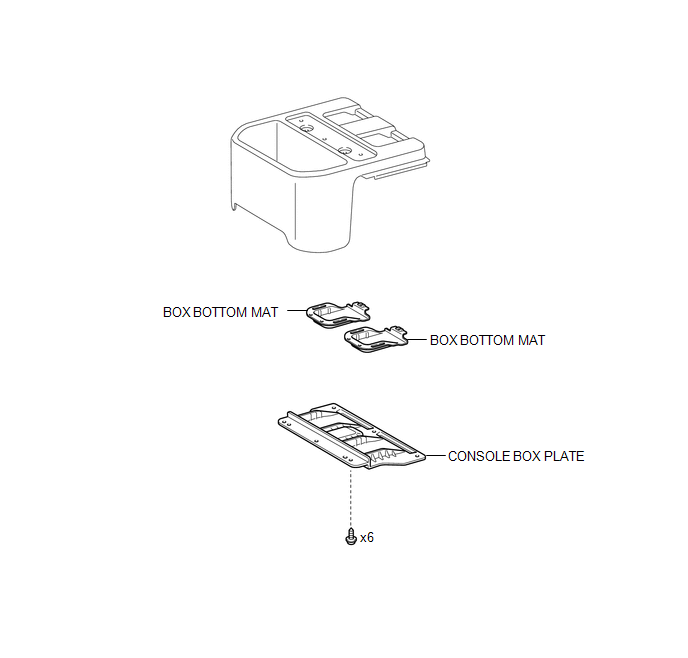 Installation INSTALLATION PROCEDURE
1. INSTALL BOX BOTTOM MAT
(a) Engage the 10 guides and install the 2 box bottom mats.
2. INSTALL CONSOLE BOX PLATE
(a) Engage the 2 guides and install the console box plate.
(b) Install the 6 screws.
3. INSTALL REAR LOWER CONSOLE BOX
(a) Engage the 2 guides and install the lower console box.
(b) Install the 4 bolts.
4. INSTALL FRONT CENTER CONSOLE MAT
(a) Install the front center console mat.
5. INSTALL REAR CENTER CONSOLE MAT
(a) Install the rear center console mat.
6. INSTALL FLOOR BOARD
(a) Return the floor board and engage the lock. HINT: Use the same procedure for both sides. |
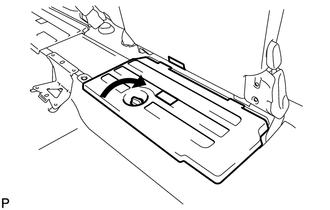 |
1. REMOVE FLOOR BOARD
(a) Release the lock and fasten the floor board to the seat bottom. HINT: Use the same procedure for both sides. |
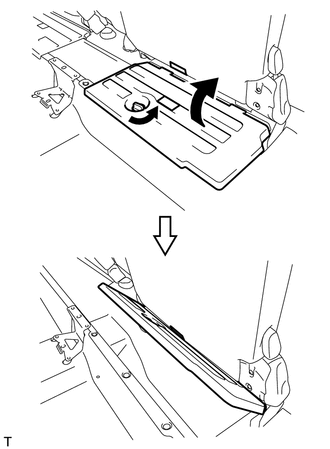 |
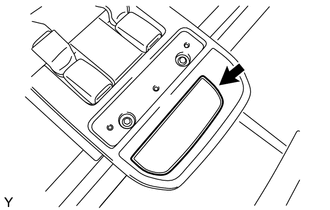
2. REMOVE REAR CENTER CONSOLE MAT
(a) Remove the front center console mat. |
 |
3. REMOVE FRONT CENTER CONSOLE MAT
(a) Remove the rear center console mat. |
 |
4. REMOVE REAR LOWER CONSOLE BOX
(a) Remove the 4 bolts. |
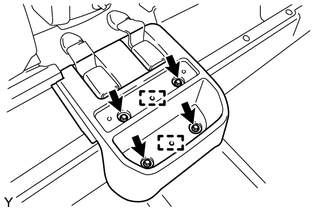 |
(b) Disengage the 2 guides and remove the lower console box.
5. REMOVE CONSOLE BOX PLATE
(a) Remove the 6 screws. |
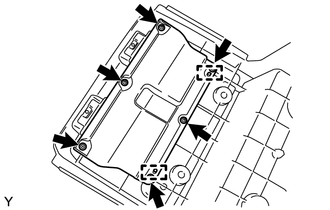 |
(b) Disengage the 2 guides and remove the console box plate.
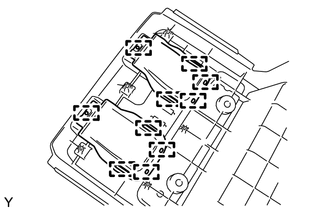
6. REMOVE BOX BOTTOM MAT
(a) Disengage the 10 guides and remove the 2 box bottom mats. |
 |
Test yourself
A quick Toyota Tacoma quiz: every answer comes with an explanation and a link to the manual page.