Vacuum Warning Switch
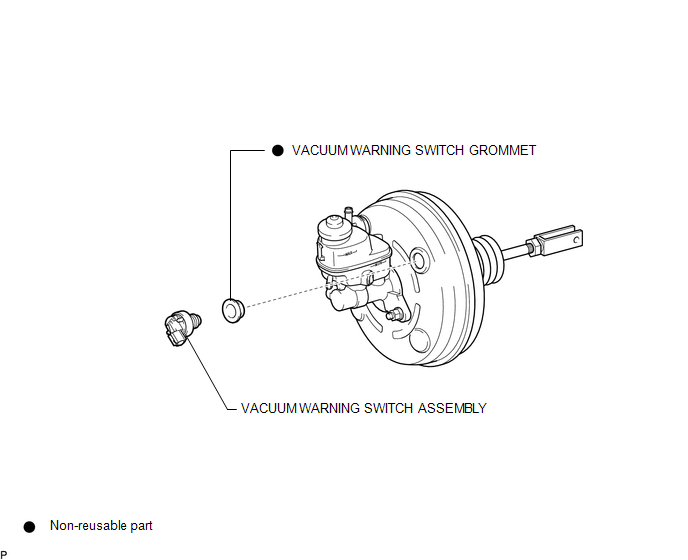 On-vehicle Inspection ON-VEHICLE INSPECTION PROCEDURE
1. INSPECT BRAKE FLUID LEVEL IN RESERVOIR
2. INSPECT BRAKE BOOSTER ASSEMBLY

3. INSPECT VACUUM WARNING SWITCH ASSEMBLY
(a) Start the engine and stop it after 1 or 2 minutes.
(b) Disconnect the connector from the vacuum warning switch assembly.
(c) Measure the resistance of the vacuum warning switch assembly.
Standard Resistance:
10 kΩ or higher
(d) With the engine stopped, depress the brake pedal several times to release vacuum from the brake booster assembly, and measure the resistance of the vacuum warning switch assembly.
Standard Resistance:
Below 1 Ω
(e) Connect the connector to the vacuum warning switch assembly.
Installation INSTALLATION PROCEDURE1. INSTALL VACUUM WARNING SWITCH GROMMET
(a) Install a new vacuum warning switch grommet to the brake booster assembly.
2. INSTALL VACUUM WARNING SWITCH ASSEMBLY
(a) Install the vacuum warning switch assembly to the brake booster assembly as shown in the illustration.
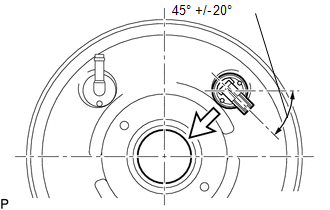 Text in Illustration
 |
Center of the Brake Booster Assembly |
(b) Connect the connector to the vacuum warning switch assembly.
Removal REMOVAL PROCEDURE1. REMOVE VACUUM WARNING SWITCH ASSEMBLY
(a) Disconnect the connector from the vacuum warning switch assembly.
(b) Remove the vacuum warning switch assembly from the brake booster assembly.
2. REMOVE VACUUM WARNING SWITCH GROMMET
(a) Remove the vacuum warning switch grommet from the brake booster assembly.
Test yourself
A quick Toyota Tacoma quiz: every answer comes with an explanation and a link to the manual page.