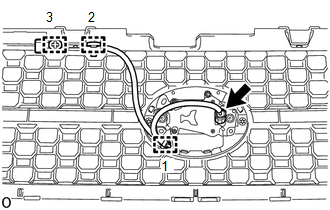
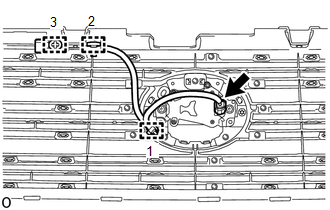
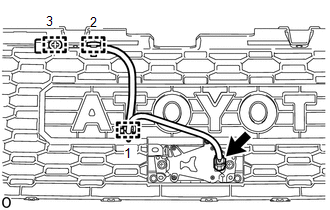
Installation
INSTALLATIONNOTICE: If the millimeter wave radar sensor assembly has been struck or dropped, replace the millimeter wave radar sensor assembly with a new one. PROCEDURE1. INSTALL MILLIMETER WAVE RADAR SENSOR ASSEMBLY (a) for Type A: 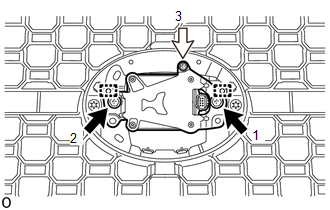
(1) Attach the 2 guides. (2) Temporarily install the millimeter wave radar sensor assembly with the 2 bolts and screw. (3) Tighten the 2 bolts and screw in the order shown in the illustration. Torque: Bolt : 2,5 N·m {25 kgf·cm, 22 in·lbf} (b) for Type B: 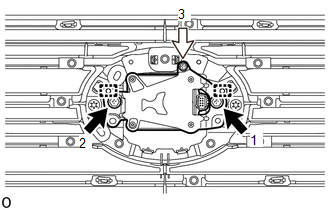
(1) Attach the 2 guides. (2) Temporarily install the millimeter wave radar sensor assembly with the 2 bolts and screw. (3) Tighten the 2 bolts and screw in the order shown in the illustration. Torque: Bolt : 2,5 N·m {25 kgf·cm, 22 in·lbf} (c) for Type C: 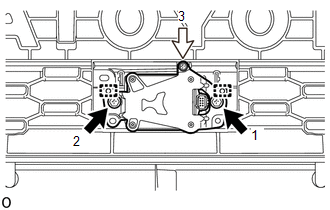
(1) Attach the 2 guides. (2) Temporarily install the millimeter wave radar sensor assembly with the 2 bolts and screw. (3) Tighten the 2 bolts and screw in the order shown in the illustration. Torque: Bolt : 2,5 N·m {25 kgf·cm, 22 in·lbf} 2. INSTALL MILLIMETER WAVE RADAR WIRE
3. INSTALL RADIATOR GRILLE Click here 4. ADJUST MILLIMETER WAVE RADAR SENSOR ASSEMBLY (a) When the millimeter wave radar sensor assembly is replaced, adjust the millimeter wave radar sensor assembly. Click here |