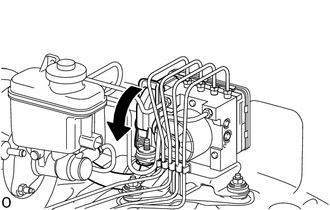
In case of replacing the skid control ECU, perform the zero point calibration of the steering angle sensor, master cylinder pressure sensor, and yaw rate and deceleration sensor (See page ).
PROCEDURE
1. INSTALL BRAKE ACTUATOR ASSEMBLY
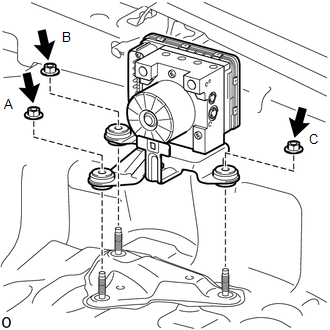
(a) Tighten the 3 nuts uniformly in alphabetical order.
NOTICE:
Do not drop the actuator. If dropped, replace it.
Torque:
22 N·m {224 kgf·cm, 16 ft·lbf}
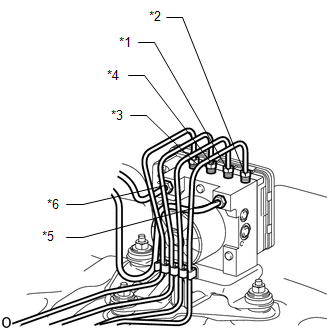
(b) Set each brake line to the correct position on the brake actuator as shown in the illustration.
HINT:
*1: FR RH
*2: FR LH
*3: RR RH
*4: RR LH
*5: FR Master Cylinder
*6: RR Master Cylinder
(c) Attach the clamp.
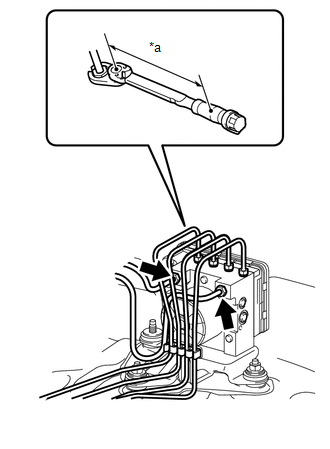
(d) Using a union nut wrench, tighten the 2 brake tubes.
Torque:
Specified tightening torque :
19,5 N·m {199 kgf·cm, 14 ft·lbf}
HINT:
Calculate the torque wrench reading when changing the fulcrum length of the torque wrench.
Click here
When using a union nut wrench (fulcrum length of 20 mm (0.787 in.)) + torque wrench (fulcrum length of 180 mm (7.087 in.)): 17.6 N*m (179 kgf*cm, 13 ft.*lbf)
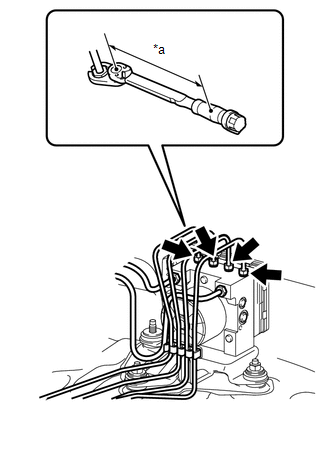
*a
Torque Wrench Fulcrum Length
(e) Using a union nut wrench, tighten the 4 brake tubes.
Torque:
Specified tightening torque :
15,2 N·m {155 kgf·cm, 11 ft·lbf}
HINT:
Calculate the torque wrench reading when changing the fulcrum length of the torque wrench.
Click here
When using a union nut wrench (fulcrum length of 22 mm (0.866 in.)) + torque wrench (fulcrum length of 162 mm (6.378 in.)): 13.4 N*m (137 kgf*cm, 10 ft.*lbf)