Disassembly
1. REMOVE NO. 1 CONSOLE BOX CARPET
(a) Remove the No. 1 console box carpet. |
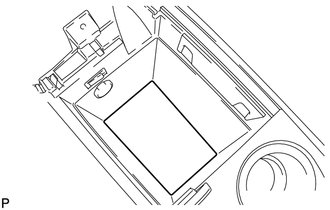 |
2. REMOVE INSTRUMENT PANEL CUP HOLDER DAMPER
(a) Pull the instrument panel cup holder damper in the direction indicated by the arrow to remove the instrument panel cup holder damper. |
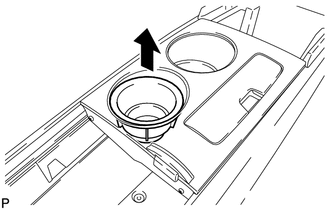 |
3. REMOVE CONSOLE BOX POCKET
(a) Pull the console box pocket in the direction indicated by the arrow to disengage the 2 guides and remove the console box pocket. |
 |
4. REMOVE FRONT CONSOLE BOX COVER
(a) Disengage the clamp. |
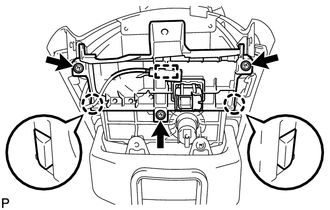 |
(b) Remove the 3 screws.
(c) Disengage the 2 claws and remove the front console box cover.
5. REMOVE STEREO JACK ADAPTER ASSEMBLY

6. REMOVE REAR CONSOLE UPPER PANEL SUB-ASSEMBLY
(a) Slide the rear console upper panel sub-assembly in the direction indicated by the arrow and remove the rear console upper panel sub-assembly. |
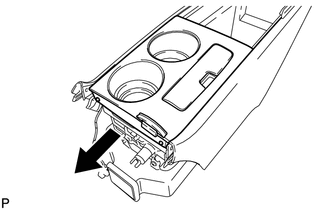 |
7. REMOVE NO. 2 CONSOLE BOX DUCT
(a) Remove the 2 screws and the No. 2 console box duct. |
 |
8. REMOVE CONSOLE MOUNTING RETAINER ASSEMBLY
(a) Using a moulding remover, disengage the 5 claws and remove the console mounting retainer assembly. |
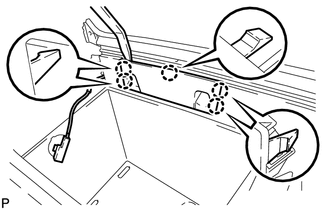 |
9. REMOVE CONSOLE BOX WIRE
(a) Disconnect the connectors to remove the console box wire. |
 |
10. REMOVE CONSOLE BOX ILLUMINATION LIGHT ASSEMBLY
11. REMOVE CENTER POWER POINT SOCKET ASSEMBLY
12. REMOVE CENTER POWER OUTLET SOCKET COVER
13. REMOVE REAR CONSOLE END PANEL SUB-ASSEMBLY
(a) Disengage the 4 clips and remove the rear console end panel sub-assembly. |
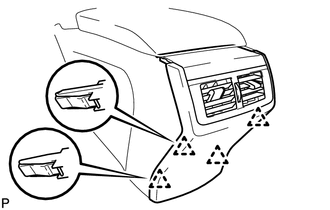 |
14. REMOVE REAR CONSOLE ARMREST ASSEMBLY
(a) Using a screwdriver, remove the 2 E-rings. NOTICE: Be careful not to allow the E-rings to pop out when removing them. |
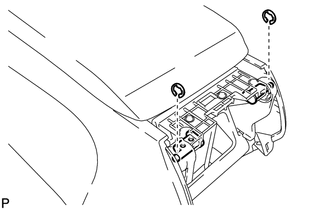 |
(b) Using a screwdriver, pull out the box door hinge shafts. Text in Illustration
HINT:
|
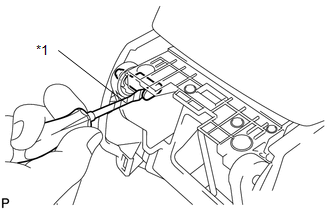 |
(c) Remove the rear console armrest assembly.
Test yourself
A quick Toyota Venza quiz: every answer comes with an explanation and a link to the manual page.