Removal
1. REMOVE REAR WHEELS
2. SEPARATE REAR STABILIZER LINK ASSEMBLY LH
(a) Remove the nut and separate the rear stabilizer link assembly LH from the rear stabilizer bar. Text in Illustration
HINT: If the ball joint turns together with the nut, use a hexagon wrench (5 mm) to hold the stud bolt. |
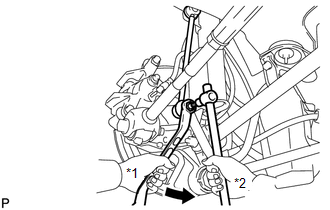 |
3. SEPARATE REAR STABILIZER LINK ASSEMBLY RH
HINT:
Perform the same procedure as the LH side.
4. REMOVE REAR STABILIZER BAR

5. SEPARATE REAR HEIGHT CONTROL SENSOR SUB-ASSEMBLY (w/ HID Headlight System)
(a) Remove the nut and separate the rear height control sensor sub-assembly from the rear No. 2 suspension arm assembly RH. NOTICE: Use wire or an equivalent tool to keep the rear height control sensor link from hanging down. |
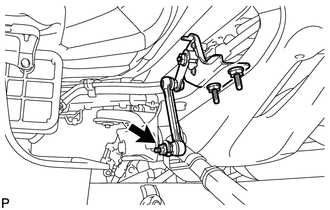 |
6. REMOVE REAR NO. 2 SUSPENSION ARM ASSEMBLY LH
(a) Remove the bolt (A) and the nut, and separate the rear No. 2 suspension arm assembly LH from the rear axle carrier sub-assembly LH. NOTICE: Since a stopper nut is used, loosen the bolt. |
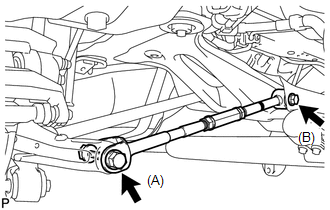 |
(b) Remove the bolt (B) and the rear No. 2 suspension arm assembly LH.
7. REMOVE REAR NO. 2 SUSPENSION ARM ASSEMBLY RH
HINT:
Perform the same procedure as the LH side.
8. REMOVE REAR NO. 1 SUSPENSION ARM ASSEMBLY LH
(a) Remove the bolt and the nut, and separate the rear No. 1 suspension arm assembly LH from the rear axle carrier sub-assembly. NOTICE: Since a stopper nut is used, loosen the bolt. |
 |
(b) Remove the bolt and the rear No. 1 suspension arm assembly LH.
9. REMOVE REAR NO. 1 SUSPENSION ARM ASSEMBLY RH
HINT:
Perform the same procedure as the LH side.
Test yourself
A quick Toyota Venza quiz: every answer comes with an explanation and a link to the manual page.