Sliding Roof Switch Assembly
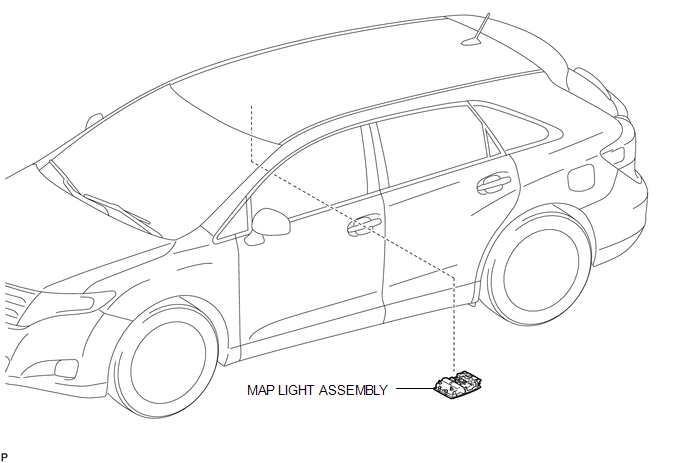
Removal REMOVAL PROCEDURE
1. REMOVE MAP LIGHT ASSEMBLY

Inspection INSPECTION PROCEDURE
1. INSPECT SLIDING ROOF SWITCH (ROOF CONSOLE BOX ASSEMBLY)
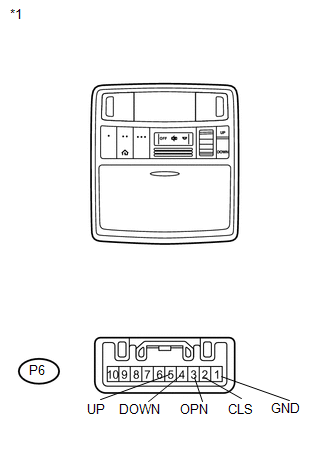
(a) Measure the resistance according to the value(s) in the table below.
Standard Resistance:
Tester Connection | Switch Condition | Specified Condition |
|---|---|---|
P6-4 (DOWN) - P6-1 (GND) |
TILT DOWN switch is pressed |
Below 1 Ω |
P6-4 (DOWN) - P6-1 (GND) |
TILT DOWN switch is not pressed |
10 kΩ or higher |
P6-5 (UP) - P6-1 (GND) |
TILT UP switch is pressed |
Below 1 Ω |
P6-5 (UP) - P6-1 (GND) |
TILT UP switch is not pressed |
10 kΩ or higher |
P6-2 (CLS) - P6-1 (GND) |
SLIDE CLOSE switch is pressed |
Below 1 Ω |
P6-2 (CLS) - P6-1 (GND) |
SLIDE CLOSE switch is not pressed |
10 kΩ or higher |
P6-3 (OPN) - P6-1 (GND) |
SLIDE OPEN switch is pressed |
Below 1 Ω |
P6-3 (OPN) - P6-1 (GND) |
SLIDE OPEN switch is not pressed |
10 kΩ or higher |
*1 |
Component without harness connected Sliding Roof Switch (Roof Console Box Assembly) |
If the result is not as specified, replace the sliding roof switch (roof console box assembly).
Installation INSTALLATION PROCEDURE1. INSTALL MAP LIGHT ASSEMBLY

Test yourself
A quick Toyota Venza quiz: every answer comes with an explanation and a link to the manual page.