Fiber-Optic Cables, Repairing
Fiber-Optic Cable, Assembling
Special tools and workshop equipment required
- Fiber-Optic Conductor Repair Set -VAS6223A-
- Hose Cutting Pliers -VAS6228-
- Vehicle Diagnostic Tester
It is very difficult to find the exact location of the problem. Replace the damaged fiber-optic cable and lay a new wire parallel to the defective fiber-optic cable.
Note
- Select the damaged fiber-optic cable components with the "Guided Fault Finding" or "Guided Functions" from the Vehicle Diagnostic Tester menu options.
- A fiber-optic cable that needs repair is represented by a "yellow" color.
Procedure
- Choose "Guided Fault Finding" or "Guided Functions" in the Vehicle Diagnostic Tester. Refer to Vehicle Diagnostic Tester.
- Assemble the fiber-optic cable.
Caution
Do not bend the fiber-optic cable too much. The bending radius must be no less than 25 mm.Fiber optic cables must not be routed over sharp edges.
The fiber-optic cable must not be dirty or touched with bare fingers.Fiber optic cables may not be heated.
It is not permitted to twist together 2 fiber optic cables or one fiber optic cable with a copper wire.Protect the connector and the connection box from dust. Place the cap on the trunk.
Caution
Do not bend the fiber-optic cable too much. The bending radius must be no less than 25 mm.Fiber optic cables must not be routed over sharp edges.
The fiber-optic cable must not be dirty or touched with bare fingers.Fiber optic cables may not be heated.
It is not permitted to twist together 2 fiber optic cables or one fiber optic cable with a copper wire.Protect the connector and the connection box from dust. Place the cap on the trunk.
- Mount the Tool Head for the Fiber-Optic Repair Set - Pliers -VAS6223/1-.
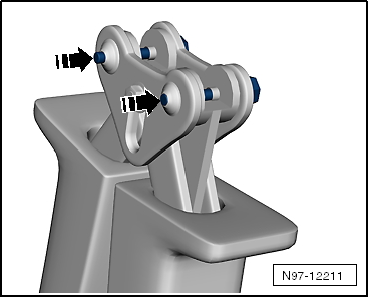
- Remove the locking pin -arrows-.
- Remove the tool set -arrow- and pull the locking pin back.
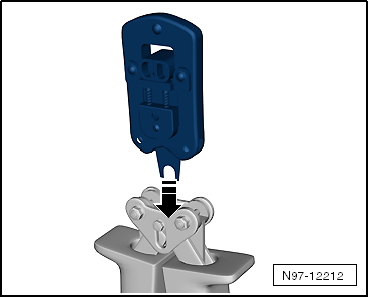
Fiber Optic Cable, Cutting to Length
- Establish length of fiber optic cable required.
- Open the Fiber-Optic Repair Set - Pliers -VAS6223/1- and lay the fiber-optic cable -1- in the mount.
- Close the Fiber-Optic Repair Set - Pliers -VAS6223/1- to cut the fiber-optic cable lengths.
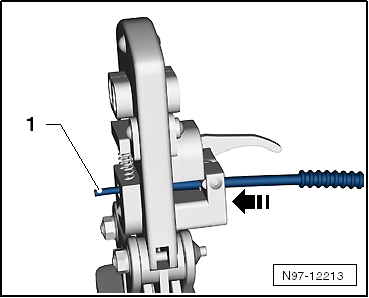
Stripping
- Open the Fiber-Optic Repair Set - Pliers -VAS6223/1-.
- Position the wire stripper in the lower position -arrow-.
- Insert fiber-optic cable into the stripping station.
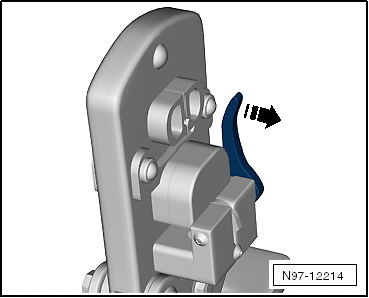
The end of the fiber-optic cable must be flush with the rear side of the cutting pliers.
- Close the Fiber-Optic Repair Set - Pliers -VAS6223/1- until the stop and keep closed.
- Bend the wire stripper upward -arrow- and remove the fiber-optic cable.
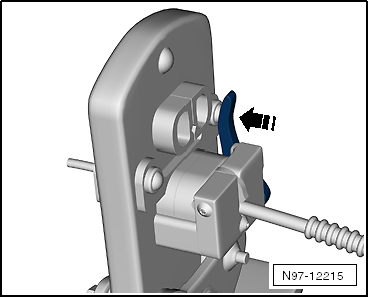
Precision Cutting (Production of Optical End Face)
- Push the fiber-optic cable -1- into the cutting station.
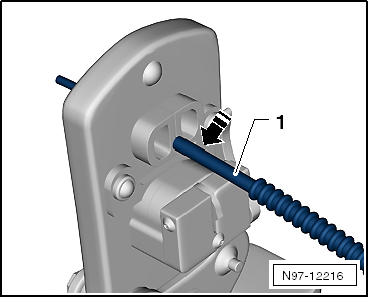
Insulation must make contact with cutting point stop.
- Close the Fiber-Optic Repair Set - Pliers -VAS6223/1- and remove the wire.
- Visually inspect the wire -1- to make sure that it was cut correctly and that there are no burrs on the front surface.
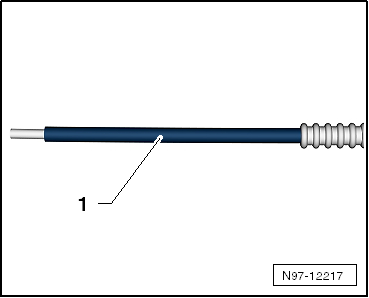
Note
- Fiber-optic cable is only to be placed on an absolutely clean surface or held in hand.
- Use the cap if there is a risk of the fiber-optic cable surface becoming dirty.
Attaching Brass Pin Contact to Fiber-Optic Cable
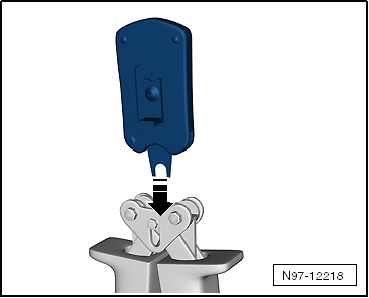
- Change tool head -arrow-.
- Slide the safeguard on the Fiber-Optic Repair Set - Pliers -VAS6223/1- in direction of -arrow- so that the word "Stift" (pin) is legible.
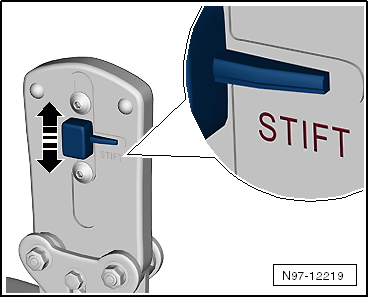
- Insert a brass pin contact -1- in the mount.
- Close the securing lever on the Fiber-Optic Repair Set - Pliers -VAS6223/1- in direction of -arrow-.
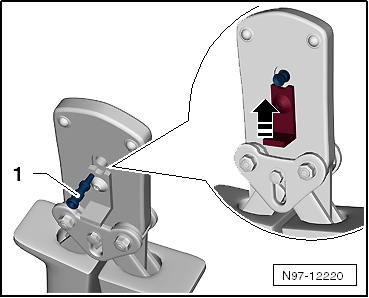
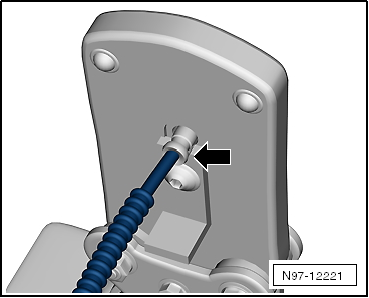
- Insert the fiber-optic cable into the brass pin contact -arrow- all the way up to the threaded stop and then close the Fiber-Optic Repair Set - Pliers -VAS6223/1-.
- Open the fiber-optic cable pliers and remove the fiber-optic cable along with the brass contact pin.
Caution
Do not excessively bend or kink the fiber-optic cables (minimum bending radius 25 mm).
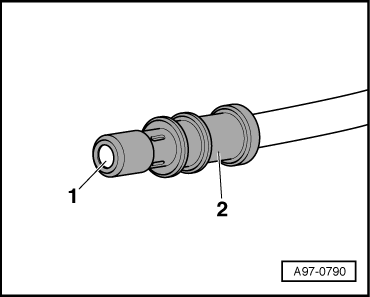
- Make sure the brass pin contact -2- is secured properly on the fiber-optic cable -1-.
- 4 crimped points must be visible on the brass connecting pin.
- The brass pin contact must not be able to be removed by hand from fiber-optic cable.
- The front surface of the fiber-optic cable is 0.01 to 0.1 mm behind the brass pin contact (visual check).
Note
- Connector couplings are available for connecting the fiber-optic cables. Refer to Parts Catalog.
- To install the new fiber optic cable in wiring harness connector.
Corrugated Tube, Install on Fiber Optic Cable
- Cut corrugated tube to appropriate length.
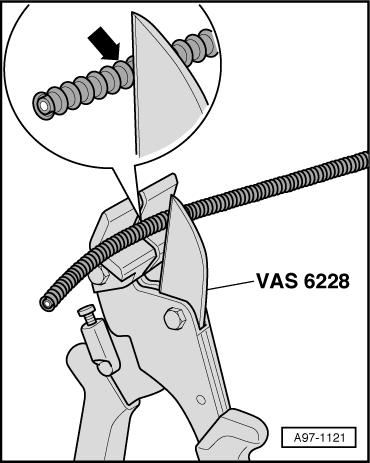
- Use the Hose Cutting Pliers -VAS6228- or a sharp knife for cutting.
- The corrugated tube must not be cut through using a side cutter under any circumstances
- The corrugated tube must be cut on the wave peak -arrow-, not in the wave trough.
- The corrugated tube must audibly engage in the fiber-optic cable housing when installing.
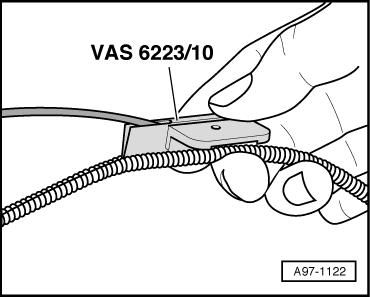
- Guide the fiber-optic cable into the Fiber-Optic Repair Set - Tube Tool -VAS6223/10- as shown.
- Position corrugated tube assembly pliers on slot on the tube.
- Position crimping pliers for fiber-optic cable at slot of corrugated tube. The fiber optic cable is then routed in the corrugated tube.
Fiber-Optic Cable, Disconnecting from Wiring Harness Connector
Removing
- Unplug connector for fiber optic cable from appropriate control unit.
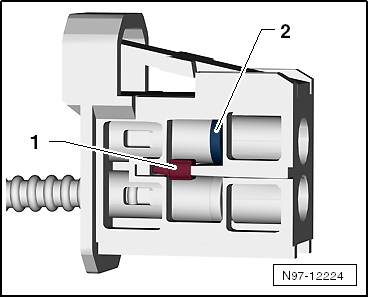
- Release the locking mechanism in the fiber-optic cable connector -1- by pushing on it.
- Release the secondary lock -2- with a small screwdriver.
- Remove the fiber-optic cable.
Caution
- Install the cap on the trunk, in order to protect the fiber-optic cable from dust and dirt.
- Use a new housing since it is likely that the secondary lock was damaged during the removal of the fiber-optic cable.
- Note the arrows for allocation on the base module "IN" and "OUT".
Installing
Install in reverse order of removal. Note the following
- Install the fiber-optic cable according to the markings.
Note
- Push the corrugated tube into the connector housing until it audibly engages.
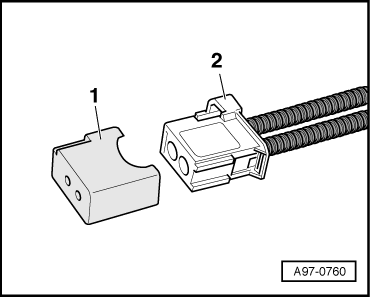
- Cover the open connector -2- for the fiber-optic cable using the Fiber-Optic Repair Set - Connector Protective Caps -VAS6223/9--item 1-.
- The protective cap prevents contamination of or mechanical damage to end face of fiber optic cable which would impair signal transmission.
Test yourself
A quick Volkswagen Tiguan quiz: every answer comes with an explanation and a link to the manual page.