Interior Rearview Mirror
Overview - Manual Dimming Interior Rearview Mirror

- Baseplate
- Baseplate for mirror base
- Bonded to the windshield
- Servicing.
- Interior Rearview Mirror
- Manual dimming
- Removing and Installing.
Manual Dimming Interior Rearview Mirror, Removing and Installing
Removing
- Turn the interior rearview mirror -2- 90º (1/4 rotation) counter-clockwise -arrow-.
- Remove the interior rearview mirror -2- from the bonded baseplate -1-.
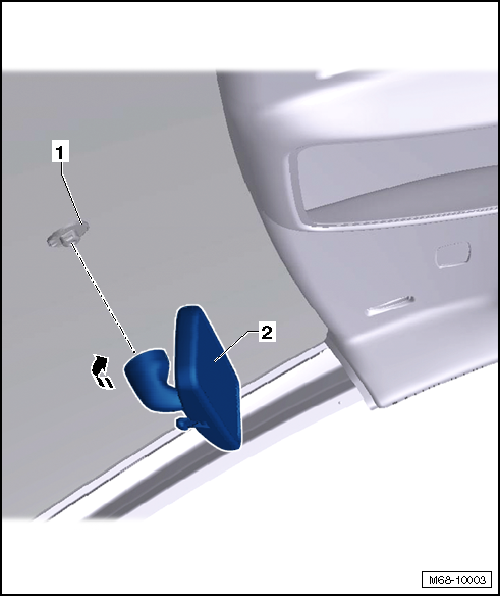
Installing
Note
Check all the fasteners for damage and replace if necessary.
Install in reverse order of removal.
Manual Dimming Interior Rearview Mirror Retaining Plate, Servicing
Materials
- Glass/Metal Adhesive Set -D 000 703 A1-
Special tools and workshop equipment required
- Window scraper (commercially available) -1-
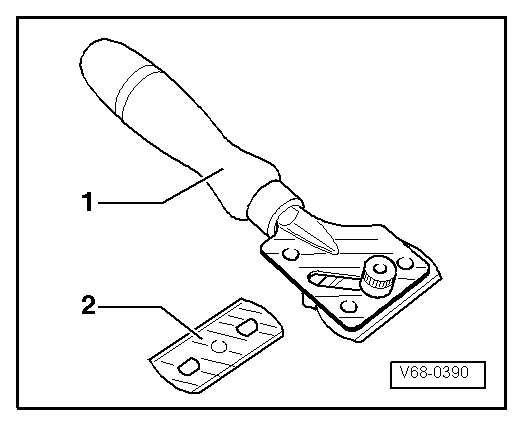
- Blade (commercially available) -2-
Attaching
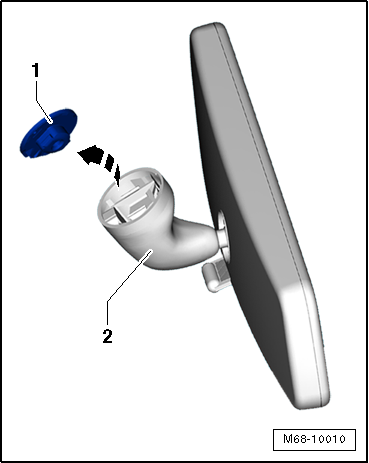
- Remove the baseplate -1- from the mirror base -2- in the direction of the -arrow-.
- Remove the PUR adhesive sealant from the baseplate -1- with a wire brush.
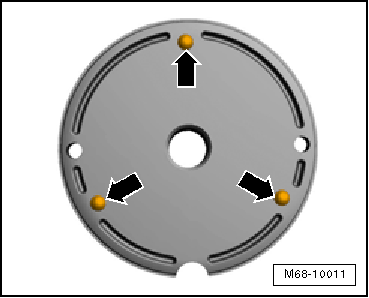
- Sand off the three spacer knobs -arrows- on the adhesive surface. Use 360 - 400 grit sand paper on the flat surface.
- Keep the sanded surface free of dirt and grease.
- Remove the PUR adhesive sealant as well as the old glass/paint primer up to the ceramic layer from the windshield with a scraper.
Caution
Do not damage the ceramic layer. Scratches always remain visible.
- Clean the adhesive surface with Adhesive Remover -D 002 000 10- or Cleaning Solution -D 009 401 04-.
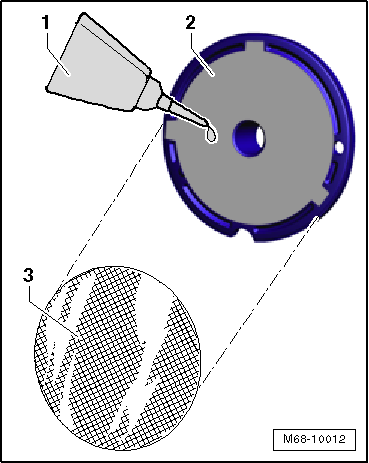
- Cut the nylon mesh -3- taken from the Glass/Metal Adhesive Set -D 000 703 A1- to the exact size of the baseplate -2-.
Note
Protective gloves (rubber gloves) should be worn.
- Apply adhesive -1- from the Glass/Metal Adhesive Set -D 000 703 A1- evenly over the baseplate -2-.
- Place the nylon mesh -3- on the baseplate -2-.
- With the adhesive tube -1- dab more adhesive onto the nylon mesh -3-.
Note
- Pay attention to the adhesive working time.
- 30 seconds are available from laying the nylon mesh on the adhesive to pressing on the windshield.
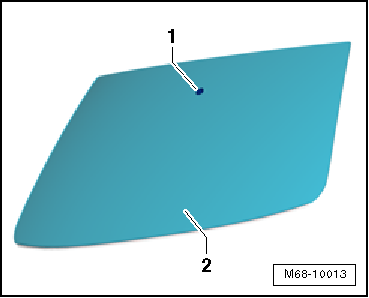
- Press the baseplate -1- onto the windshield -2- and hold for 15 seconds (without using force).
Note
The interior rearview mirror can be installed after 15 minutes.
Overview - Automatic Dimming Interior Rearview Mirror
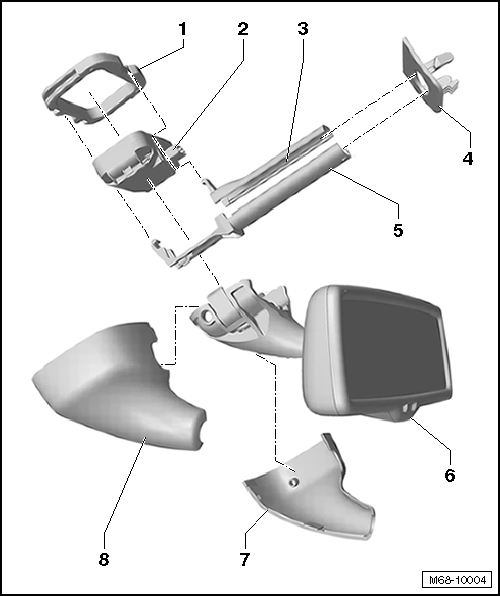
- Baseplate
- Baseplate for mirror base
- Bonded to the windshield
- Interior Rearview Mirror Baseplate, Servicing
- Rain/Light Recognition Sensor -G397-
- Sensor, removing and installing.
- Sensor, coding
- Upper Wiring Guide
- Attached to the retaining plate -item 1-
- Installed in the trim -item 4-
- Trim
- Roof trim panel trim
- Lower Wiring Guide
- Attached to the retaining plate -item 1-
- Installed in the trim -item 4-
- Interior Rearview Mirror
- With automatic dimming function
- Removing and Installing.
- Right Mirror Base Trim
- Left Mirror Base Trim
Automatic Dimming Interior Rearview Mirror, Removing and Installing
Removing
Special tools and workshop equipment required
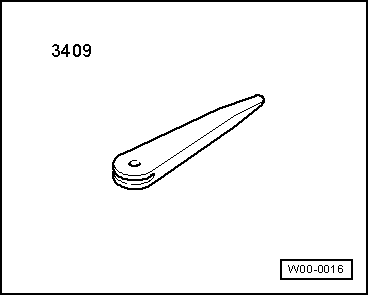
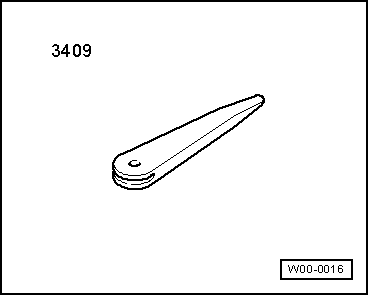
- Trim Removal Wedge -3409-
- Switch off the ignition.
- Loosen the retainers for the caps -3- using the Trim Removal Wedge -3409-.
- Remove the caps -3- from the mirror base -2-.
- Disconnect the connector for the automatic dimming function -5-.
- Loosen the clips -1- on both sides with a screwdriver.
- Push the mirror base with the interior rearview mirror -2- downward off of the baseplate -4-.

- Remove the lower cable guide -4- from the retainer with the baseplate -1-.
- Remove the lower cable guide -4- from the trim for the roof trim panel -3-.
- Disconnect the connector -5- for the rain sensor -6-.
- Remove the rain sensor -6- from the baseplate -1- in the direction of the -arrow-.
- Remove the upper cable guide -2- from the retainer with the baseplate -1-.
- Remove the upper cable guide -2- from the trim for the roof trim panel -3-.
- Remove the trim for the roof trim panel -3- downward from the roof trim panel. Guide the connector and the wiring harness -5- through the trim while doing this.
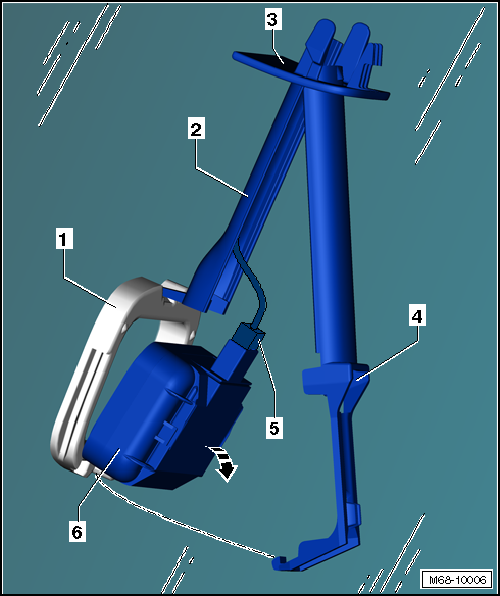
Installing
- Install in reverse order of removal.
Automatic Dimming Interior Rearview Mirror Retaining Plate, Servicing
Note
- Removal of windshield is no longer necessary, as with previous repair procedure.
- At the same time, it is possible to use the old, detached mirror base.
Windshield, Preparing
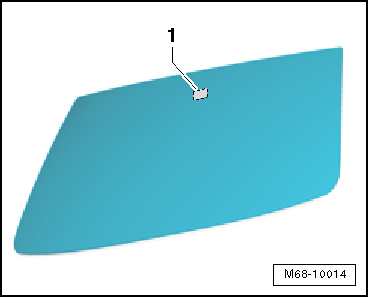
- All adhesive and primer reside must be removed up to ceramic coating -1-.
- Clean the adhesive surface using Cleaning Solution -D 009 401 04-.
- Maintain a "drying time" of at least 10 minutes.
- Apply the Glass/Paint Primer -D 009 200 02- on the ceramic coating -1-.
- Let it dry for 10 minutes to maximum one hour.
Preparing the Fallen Retaining Plate
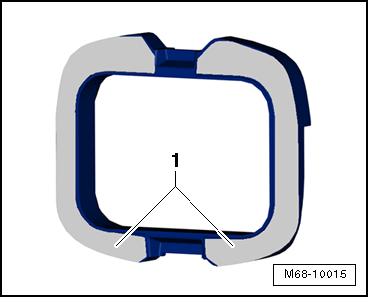
Remove the remaining adhesive:
- Prepare the adhesive surface -1- by "wet-sanding" with fine emery paper (800-1200 grit) until water remains (does not bead and run off) on adhesive surface.
- Then clean using Cleaning Solution -D 009 401 04-.
- Maintain a "drying time" of at least 10 minutes.
Baseplate, Bonding
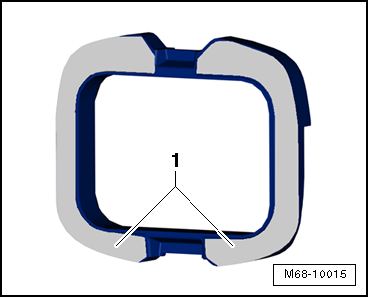
- Apply the Two-Part Polyurethane Adhesive -D 180 KD2 A1- directly onto the sanded and cleaned adhesive surface -1- on the baseplate.
- Adhesive diameter: approximately 2.5 to 3.0 mm.
- Press the baseplate -1- onto the windshield -2- immediately after applying the adhesive.
- Align the baseplate -1- on its designated position on ceramic coating and secure using adhesive tape.

Excess Adhesive, Cleaning and Removing

- Carefully remove the adhesive tape 0.5 to 1 hours after attaching the mirror base.
- Carefully remove the excess soft adhesive -1- all around using spatula.
- Then remove any remaining excess adhesive using a primer applicator or cloth, saturated with Cleaning Solution -D 009 401 04-.
Note
The interior rearview mirror can be installed 2.5 hours after gluing on the retaining plate.
Overview - Interior Rearview Mirror Automatic Dimming Function with Automatic High Beam Assist Control Module -J844- from 05/2011

- Baseplate
- Baseplate for mirror base
- Bonded to the windshield
- Interior Rearview Mirror Baseplate, Servicing
- Rain/Light Recognition Sensor -G397-
- Sensor, removing and installing.
- Sensor, coding.
- Upper Wiring Guide
- Attached to the retaining plate -item 1-
- Installed in the trim -item 4-
- Trim
- Roof trim panel trim
- Lower Wiring Guide
- Attached to the retaining plate -item 1-
- Installed in the trim -item 4-
- Interior Rearview Mirror
- With Driver Assistance Systems Front Camera -R242- and Automatic High Beam Assist Control Module -J844-
- Removing and Installing.
- The Automatic High Beam Assist Control Module -J844- is installed in the interior rearview mirror and cannot be replaced separately. If there is damage, the entire interior rearview mirror must be replaced.
- After installing a new interior rearview mirror the coding must be performed: code the Automatic High Beam Assist Control Module -J844- using the Vehicle Diagnostic Tester.
- Right Mirror Base Trim
- Left Mirror Base Trim
Automatic Dimming Interior Rearview Mirror with Automatic High Beam Assist Control Module -J844-, Removing and Installing
Removing
Special tools and workshop equipment required
- Trim Removal Wedge -3409-
- Switch off the ignition.
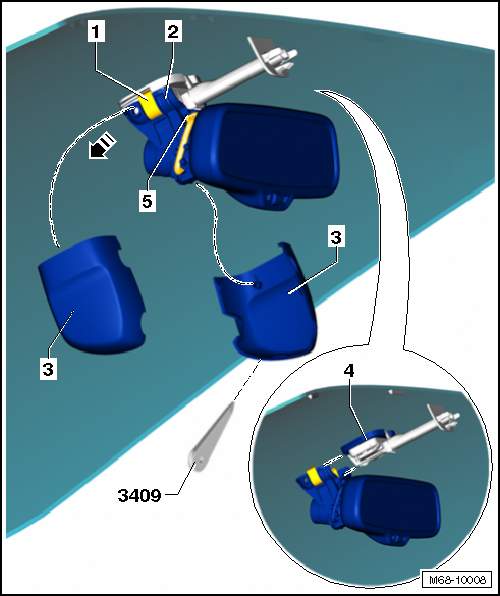
- Loosen the retainers for the caps -3- using the Trim Removal Wedge -3409-.
- Remove the caps -3- from the mirror base -2-.
- Disconnect the connector for the automatic dimming function -5-.
- Loosen the clips -1- on both sides with a screwdriver.
- Push the mirror base with the interior rearview mirror -2- downward off of the baseplate -4-.
- Remove the lower cable guide -4- from the retainer with the baseplate -1-.
- Remove the lower cable guide -4- from the trim for the roof trim panel -3-.
- Disconnect the connector -5- for the rain sensor -6-.
- Remove the rain sensor -6- from the baseplate -1- in the direction of the -arrow-.
- Remove the upper cable guide -2- from the retainer with the baseplate -1-.
- Remove the upper cable guide -2- from the trim for the roof trim panel -3-.
- Remove the trim for the roof trim panel -3- downward from the roof trim panel. Guide the connector and the wiring harness -5- through the trim while doing this.

Installing
- Install in reverse order of removal.
Automatic Dimming Interior Rearview Mirror Baseplate with Automatic High Beam Assist Control Module -J844-, Servicing
Note
- Removal of windshield is no longer necessary, as with previous repair procedure.
- At the same time, it is possible to use the old, detached mirror base.
- The repair is described in → Chapter "Automatic Dimming Interior Rearview Mirror Retaining Plate, Servicing".
Interior Rearview Mirror and Driver Assistance Systems Front Camera -R242- Cap, Removing and Installing
Removing
- Switch off the ignition.
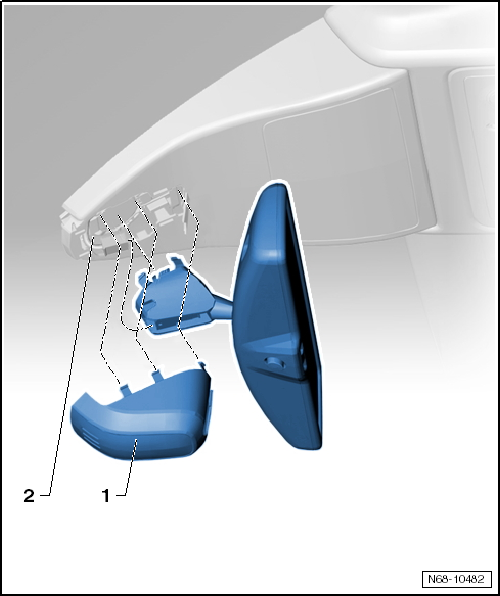
- Press the cap -1- lightly inward on both sides in the region of the latching mechanisms and carefully remove from the retaining plate -2-.
- Disconnect the connector.
- Carefully push the interior rearview mirror with mirror base downward and off from the retaining plate -2-.
- Carefully loosen the Driver Assistance Systems Front Camera -R242- cover from the mounts.
Installing
Note
Check all the fasteners for damage and replace if necessary.
Install in reverse order of removal.
Test yourself
A quick Volkswagen Tiguan quiz: every answer comes with an explanation and a link to the manual page.