Additional Wheel Housing Enlargement, FLAPS
Additional Wheel Housing Enlargement, FLAPS
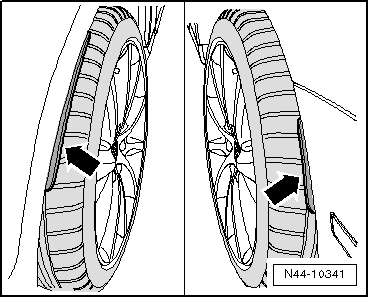
On some vehicles with certain wheel/tire combinations, wheel housing enlargements (FLAPS) must be attached on the fenders or bumper for technical reasons -arrows-.
Please check whether FLAPS must be installed.
The necessary wheel/tire combination information can be found in the overview table for the respective vehicle.
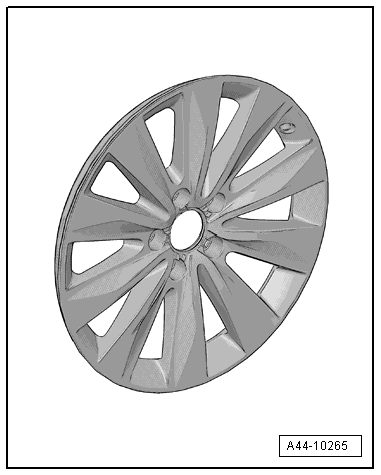
Wheel Rims with Glued-On Wheel Trim
Wheel Rims with Glued-On Wheel Trim
 Note
- Be careful not to scratch off the glued- on wheel trim on these rims.
- The surface of the wheel trim is very sensitive.
- The rim will have be replaced if the wheel trim is damaged.
- The wheel trim cannot be replaced.
Wheel Rims with Replaceable Decorative Trim, Glued
Decorative Trim, Removing
Special tools and workshop equipment required
- Trim Removal Wedge -3409-
- Hot Air Blower -VAG1416-
Note
- It is not possible remove the decorative trim without damaging it.
- Loosen the lock washers -2- from the inside of the light alloy wheel.
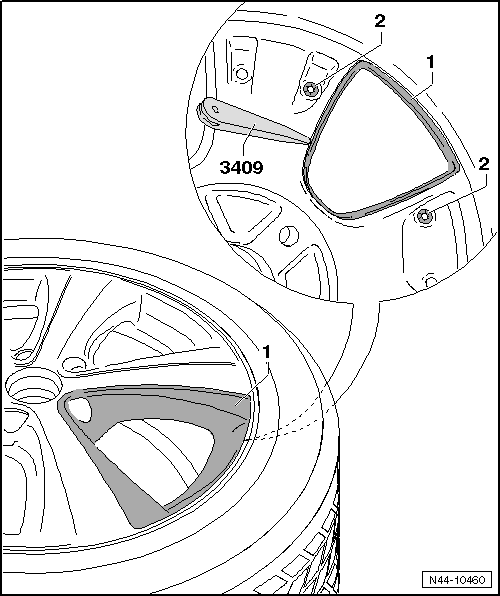
- Warm the decorative trim -1- from the outside using the Hot Air Blower -VAG1416-.
 Caution
Do not overheat tires and light alloy wheels.
- Loosen the decorative trim -1- from the inside of the light alloy wheel using the Trim Removal Wedge -3409-.
- Grab under one corner from the outside and pull the decorative trim -1- off the light alloy wheel.
Note
- The adhesive points for the PUR label are cut into the light alloy wheel.
- The remaining material serves as the adhesive base for the new decorative trim.
- The new decorative trim can be installed immediately. Refer to → Chapter "Decorative Trim, Installing".
Decorative Trim, Installing
Special tools and workshop equipment required
- Cartridge Gun -VAG1628-
- 1K window adhesive 1K Window Adhesive -DH 009 100 A2-
- Silicone remover Silicone Remover -LSE 020 100 A3-
These light alloy wheels are equipped with replaceable decoration elements. Note the following when installing.
- Make sure the adhesion area on the light alloy wheels and decorative trim are free of dust and grease.
- Clean the adhesion area with Silicone Remover -LSE 020 100 A3-.
- Apply 1K Window Adhesive -DH 009 100 A2- on the adhesive surfaces -arrows- using the Cartridge Gun -VAG1628-.
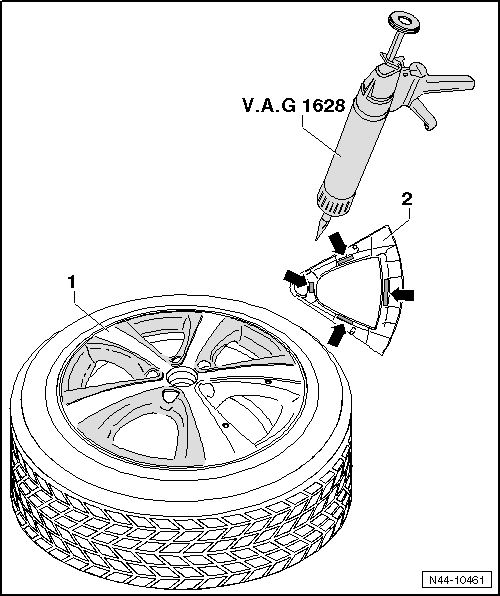
- Adhesive point: length = approximately 25 mm and diameter = approximately 10 mm
- Press the decorative trim -2- into the light alloy wheels -1- using firm pressure.

- Secure the decorative trim -2- to the inside of the light alloy wheel with lock washers -3-.
Minimum curing time: three hours at room temperature of minimum 15º C (59º F).
 WARNING
The light alloy wheel must be balanced again.
Wheel Rims with Replaceable Decorative Trim, Attached with Screws
Wheel Rims with Screw Attached Replaceable Decorative Trim
These disc wheels are equipped with replaceable decoration elements. Note the following when installing.
- Clean the thread in the disc wheel before screwing in the new bolts.
- Always use new bolts.
1 - Decoration element
2 - Hex socket bolts
Tightening Specification
Self-locking hex socket bolts: 5 N·m

Multipart Composite Wheels
Multipart Composite Wheels
Composite wheels consist of various parts.
The primary components are rims and wheel discs. These components are fastened to each other with special screws and a special procedure. This ensures the wheel's function, proper seal, safety and true running. These important requirements cannot be guaranteed under shop conditions and using shop tools.