Door, Removing and Installing
Removing
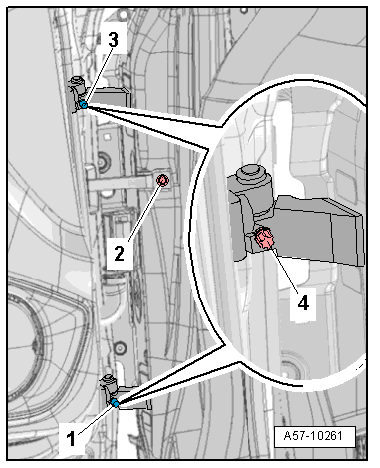
- Disconnect the connector on the A-pillar. Refer to → Electrical Equipment; Rep. Gr.97; Connectors.
- Remove the door arrester bolt -2-.
- Remove the cover caps -1- and -3- from the stud bolts.
- Remove the stud bolts -4- on the upper and lower door hinge.
 Caution
Protect the painted surfaces on the door or on the side panel from damage.
- Carefully remove the door upward out of the door hinges.
Installing
 Note
Do not make any adjustments after installing the door.
Door, Adjusting
Special tools and workshop equipment required
- Gauge - Gap Adjustment -3371-
- Front and Rear Door Template -T40038 /14- and for Avant models the Rear Door Template -T40038 /15-.
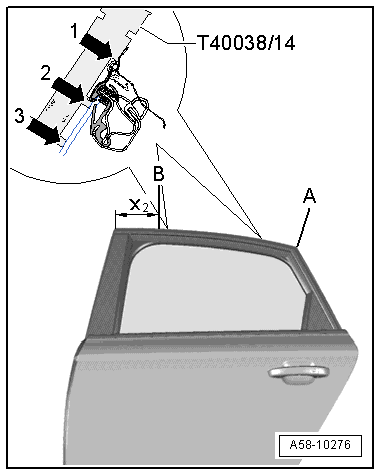
- Use the Front and Rear Door Template -T40038 /14- on the rear door on the Sedan model with the side -B- for the front measuring point on the B-pillar or with the side -A- for the rear measuring point on the C-pillar.
- The "min and max" markings are used to check the lateral adjustment.
- The cut-outs in the template are used for checking height.
- The 0.6 mm graduation on the ends of the template is used for checking the recess of the front door to the fender, or of the rear door to the front door.
Note
Use Rear Door Template -T40038 /15- for determining the rear measuring point on the C-pillar on Avant models.
Height adjustment, checking using the Front and Rear Door Template -T40038 /14-.
- Place the template on the roof on the check points -A- and -B-.
Note
It is necessary to use Rear Door Template -T40038 /15- for the measuring point on the C-pillar on Avant models.
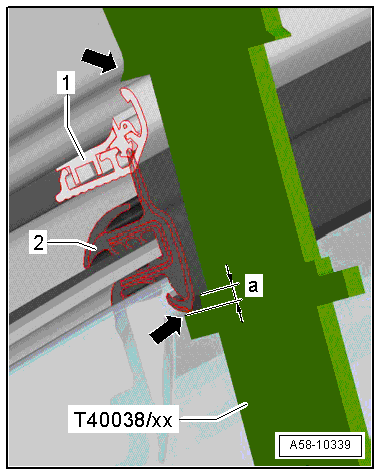
- The template must be touching the top of the roof and the trim molding -1- as illustrated -arrow-.
- The height is adjusted correctly when the bottom of the window guide -2- is inside the cut-out; -a- = 2 mm-arrow-.
Side adjustment, checking using the Front and Rear Door Template -T40038 /14-.
Note
- The template as a groove on the B-side with a 150 mm space for exact positioning.
- The template must be positioned on the check point -B- in this distance as illustrated.
- Place the template on check point -B- at -x2- = 150 mm, or on rear check point -A-.
- The template must be touching points -1- and -3- when the "min" adjustment is correct.
- The template may have a small gap at point -2-.
- The template must be touching points -2- and -3- when the "max" adjustment is correct.
- The template may have a small gap at point -1-.
Note
It is necessary to use Rear Door Template -T40038 /15- for the measuring point on the C-pillar on Avant models.
Gap Dimensions on the Sedan

Note
- All dimensions are given in "mm".
- All dimension tolerances are +-0.5 mm.
- The parallel alignment of the gap must not exceed 0.5 mm.
- Dimension -E- = 3.5 mm
- Dimension -F- = 5.0 mm
- Dimension -G- = 4.5 mm
- Dimension -H- = 3.5 mm
Gap Dimensions on the Avant
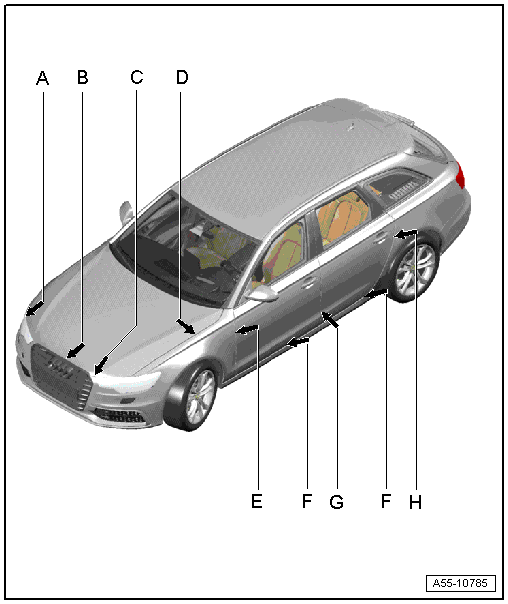
Note
- All dimensions are given in "mm".
- All dimension tolerances are +-0.5 mm.
- The parallel alignment of the gap must not exceed 0.5 mm.
- Dimension -E- = 3.5 mm
- Dimension -F- = 5.0 mm
- Dimension -G- = 4.5 mm
- Dimension -H- = 3.5 mm
- Remove the "B-pillar" trim panel. Refer to → Body Interior; Rep. Gr.70; Passenger Compartment Trim; B-Pillar Trim Panel, Removing and Installing.
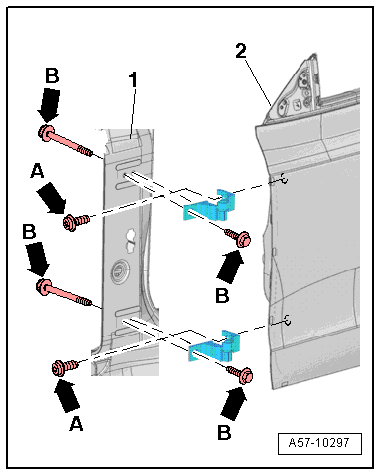
Adjustment in Longitudinal Direction
- Loosen the bolts -B arrows- on the top and bottom of the hinge and on the A-pillar -item 1-.
- Adjust the door -2- lengthwise.
- Tighten the bolts -B arrows-.
Height Adjustment
Note
- The hinge screws on the door are fitting screws, therefore it is not necessary to adjust the door using these screws.
- If it is necessary to make an adjustment using the bolts, the bolt can be replaced with one of the same length and strength category.
Catch, Adjusting
Procedure
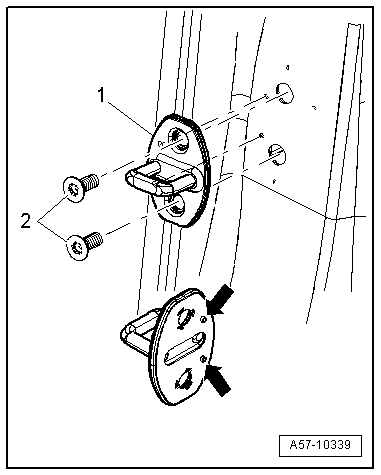
Note- When adjusting the catch, move it only toward the center of the vehicle.
- Do not adjust the door height using the catch because the door lock will be damaged.
- Loosen the bolts -2-.
- Slide the catch -1- until the door is flush with the body contours.
- The catch must align in door lock center for correct adjustment.
- Tighten the bolts -2-.