Removing the Flat Tire and Installing the Spare Tire
1. Do a safety check before proceeding. See If a Tire Goes Flat

2. Use the wrench to loosen all of the wheel nuts. Do not remove them yet.
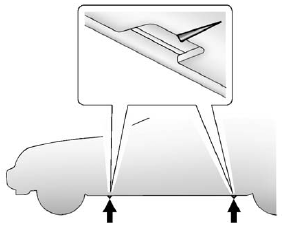
3. Find the jacking location using the diagram above and corresponding V-shaped locating notches located in the plastic molding.
Notice: If you position the jack under the rocker molding and attempt to raise the vehicle, you could break the molding and/or cause other damage to your vehicle. Always position the jack so that when the jack head is raised, it will fit firmly in the notch located inboard from the rocker molding.
4. If you have a coin/pierce jack, attach the jack handle extension to the jack by sliding the hook through the end of the jack and insert the other end of the jack handle into the wrench.
If you have a hex head jack, place the hex tube end of the wrench over the hex head of the jack.
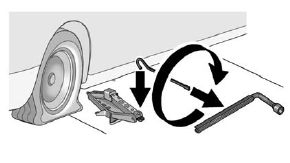
Coin/Pierce Jack and Wrench
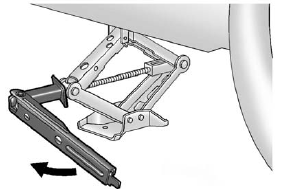
Hex Head Jack and Wrench
5. Turn the wheel wrench counterclockwise to lower the jack lift head until the jack fits under the vehicle.
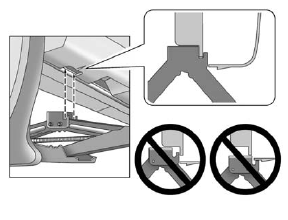
6. Raise the jack by turning the wheel wrench clockwise until the slots in the jack head fit into the metal flange located behind the V–shaped locating notches on the plastic molding as shown.
7. Put the compact spare tire near you.
8. Raise the vehicle by turning the wheel wrench clockwise. Raise the vehicle far enough off the ground for the compact spare tire to fit under the vehicle.
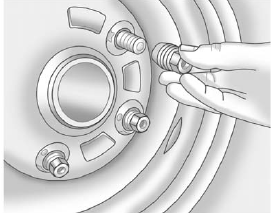
9. Remove all of the wheel nuts and the flat tire.
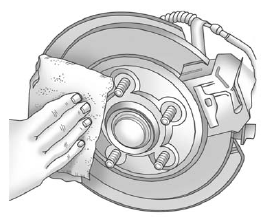
10. Remove any rust or dirt from the wheel bolts, mounting surfaces, and spare wheel.
11. Install the spare tire.
12. Put the wheel nuts back on with the rounded end of the nuts toward the wheel.
13. Tighten each wheel nut by turning it clockwise with your hand until the wheel is held against the hub.
14. Lower the vehicle by turning the wheel wrench counterclockwise. Lower the jack completely.
Notice: Improperly tightened wheel nuts can lead to brake pulsation and rotor damage.
To avoid expensive brake repairs, evenly tighten the wheel nuts in the proper sequence and to the proper torque specification.
See Capacities and Specifications for the wheel nut torque specification.

15. Tighten the wheel nuts firmly in a crisscross sequence as shown.
Test yourself
A quick Cadillac CTS quiz: every answer comes with an explanation and a link to the manual page.