Chevrolet Cruze Repair Manual
Installation Procedure
In this manual: Chevrolet Cruze Repair Manual
7steps
~42min
2/5difficulty
Done 0 of 7
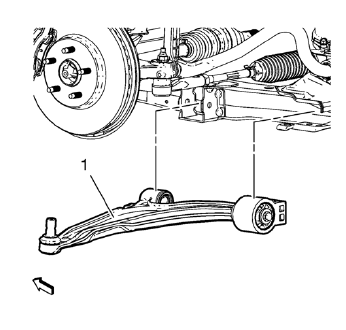
- Position the lower control arm (1) in the cradle.
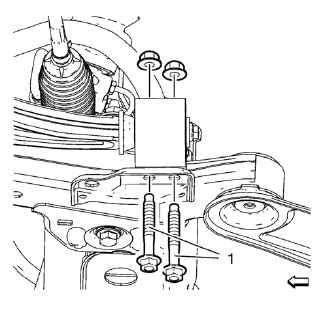
- Install and hand tighten the NEW rear lower control arm bushing nuts and bolts (1).
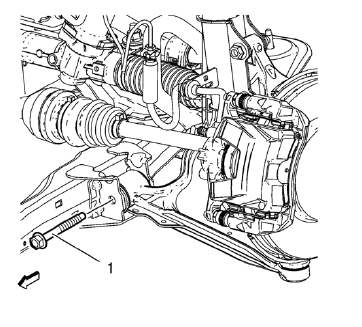
- Install and hand tighten the NEW front lower control arm nut and bolt (1).
Caution: Refer to Fastener Caution in the Preface section.
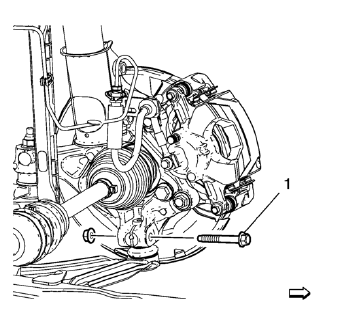
- Support the lower control arm with a hydraulic jack and lift the control arm into the neutral position.
- Tighten the front lower control arm bolt (1) to 70 N·m +75-90 degrees , using EN-45059 kit .
- Tighten the rear bushing to frame bolts to 55 N·m +45-60 degrees , using EN-45059 kit .
- Install the NEW ball joint to knuckle bolt and nut and tighten to 30 N·m +60-75 degrees , using EN-45059 kit .
Lower the vehicle to the ground in order to tighten the control arm fasteners correctly.
Test yourself
A quick Chevrolet Cruze quiz: every answer comes with an explanation and a link to the manual page.
Was this page helpful?