Puncture kit
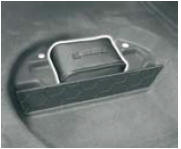
Puncture kit
The puncture repair kit is located in the boot, underneath the tool kit.
The puncture repair kit is a complete system including a compressor and a setting product.
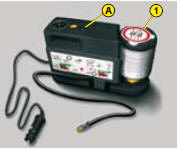
Using the puncture repair kit
1 Remove the sticker found in the kit, then stick it on the steering wheel to remind you that you are driving with a wheel that is only fit for temporary use and that your speed is therefore limited.
2 Connect the flask 1 to the valve of the tyre to be repaired.
3 Connect the electric cable to one of the vehicle's 12V sockets.
4 With the engine running, start the compressor by pressing on button A until the tyre pressure reaches 2,0 bars. If you cannot reach a pressure of 2 bars, the tyre is not repairable.
5 Remove and store the compressor.
6 Drive off immediately, for a few miles at reduced speed, to allow the puncture repair to set.
7 Adjust the tyre pressure using the compressor according to the recommendations for the vehicle, and check that there is no air escaping (no loss of pressure). If you cannot reach a pressure of 2 bars, the tyre is not repairable.
8 Do not exceed 11 0 km/h.
The tyre must be examined, then repaired or replaced as soon as possible by a professional.
Test yourself
A quick Citroen C3 quiz: every answer comes with an explanation and a link to the manual page.