Removal and Installation - Rear Subframe
Special Service Tools / General Equipment
 |
300-OTC1585AE Powertrain Lift |
| Wood block | |
Removal
NOTICE: Suspension fasteners are critical parts that affect the performance of vital components and systems. Failure of these fasteners may result in major service expense. Use the same or equivalent parts if replacement is necessary. Do not use a replacement part of lesser quality or substitute design. Tighten fasteners as specified.
All vehicles
- Remove the wheels and tires.
Refer to: Wheels and Tires (204-04A Wheels and Tires, Removal and Installation). - Both sides.
Remove the rear stabilizer bar link.
Refer to: Rear Stabilizer Bar Link (204-02 Rear Suspension, Removal and Installation). - Remove the muffler and exhaust pipe.
Refer to: Muffler and Exhaust Pipe (309-00A Exhaust System - 1.5 L EcoBoost (132 kW/180 L hp) - I3 (Y1), Removal and Installation).
Refer to: Muffler and Exhaust Pipe - 4WD (309-00A Exhaust System - 1.5 L EcoBoost (132 kW/180 L hp) - I3 (Y1), Removal and Installation).
Refer to: Muffler and Exhaust Pipe (309-00B Exhaust System - 2 L EcoBoost (177 kW/240 L hp) - MI4, Removal and Installation).
Refer to: Muffler and Exhaust Pipe (309-00E). - Both sides.
Remove the springs.
Refer to: Spring (204-02 Rear Suspension, Removal and Installation). - Both sides.
Remove and discard the upper control arm-to-knuckle bolt.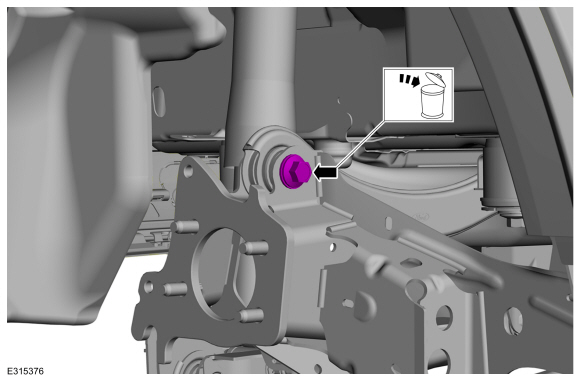
- Both sides.
Remove and discard the front lower control arm-to-knuckle bolt.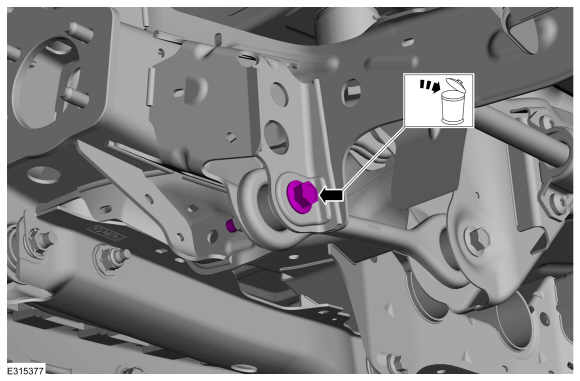
- Remove the underbody shields and brackets.
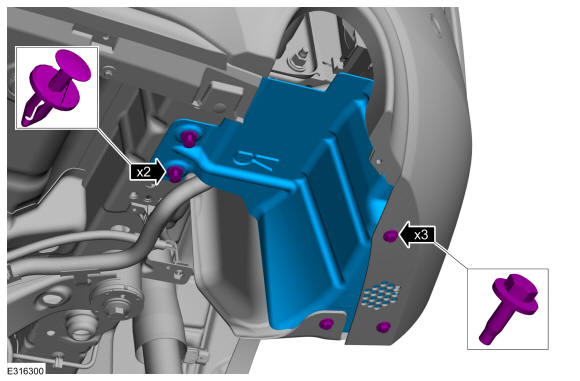
- Disconnect the electrical connector and wire harness clips.
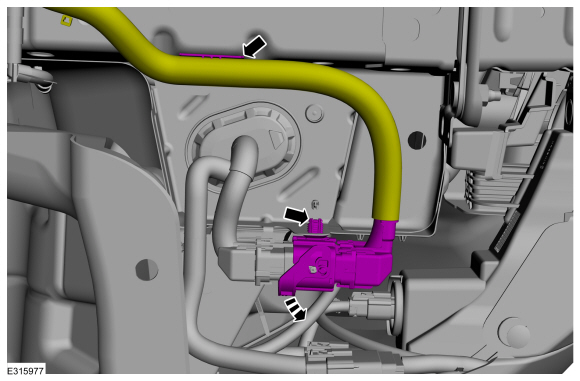
All-Wheel Drive (AWD) Vehicles
- Remove the rear driveshaft.
Refer to: Rear Driveshaft (205-01 Driveshaft, Removal and Installation). - Both sides.
Remove the rear axle shaft.
Refer to: Rear Axle Shaft (205-05 Rear Axle Shafts, Removal and Installation).
- Disconnect the breather hose.
- Remove the bolt.
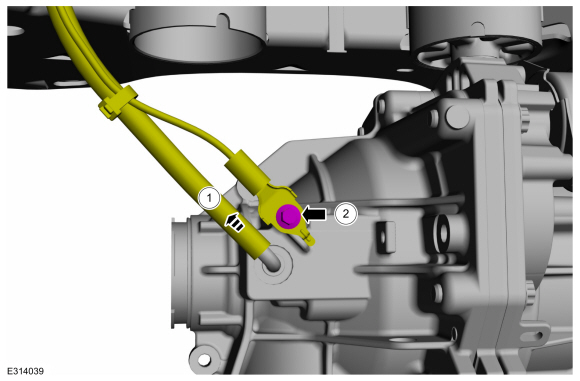
- Remove the hose clips and position the breather hose clear of the rear subframe.
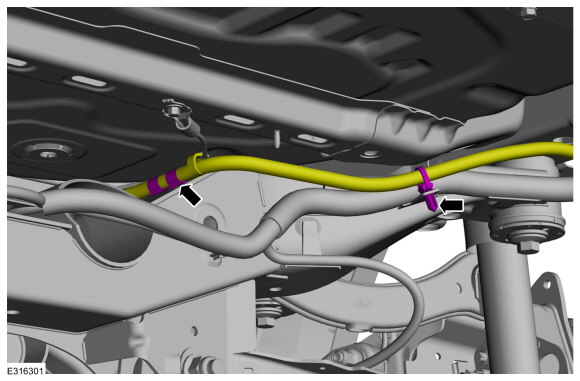
All vehicles
- Both sides
Mark the subframe-to-body location with alignment marks.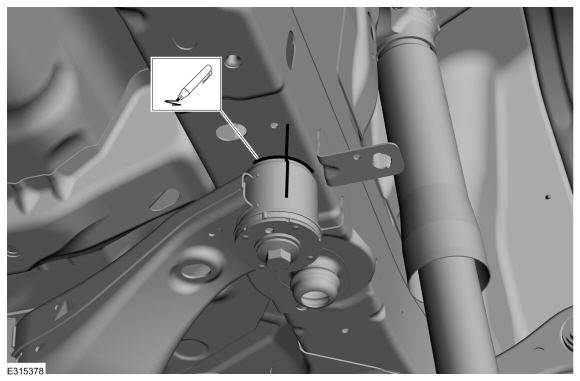
- Both sides
Mark the subframe-to-body location with alignment marks.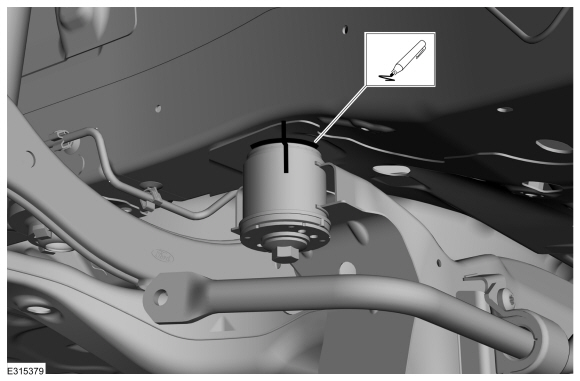
- Position a transmission jack under the rear subframe.
Use the Special Service Tool: 300-OTC1585AE Powertrain Lift.
Use common shop equipment: wood block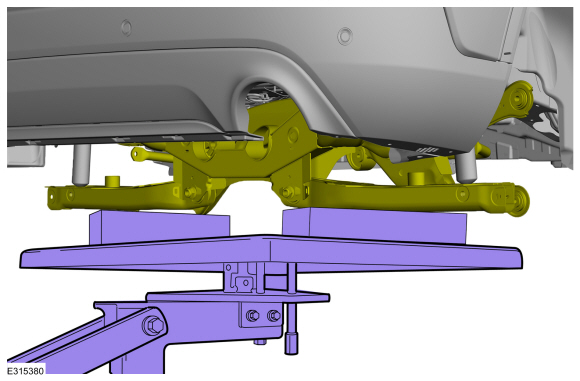
- Remove and discard the rear subframe bolts.
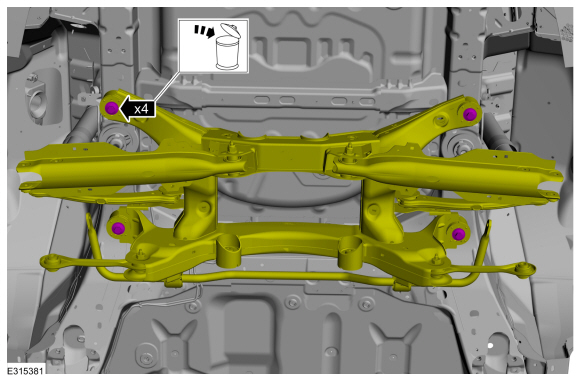
- Lower the rear subframe.
Use the Special Service Tool: 300-OTC1585AE Powertrain Lift.
Use common shop equipment: wood block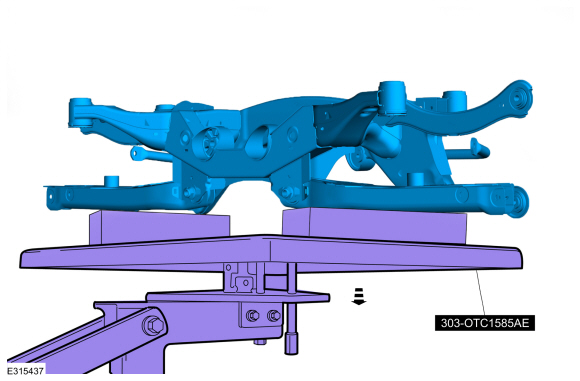
Installation
All vehicles
- Raise the rear subframe and position it on the vehicle.
Use the Special Service Tool: 300-OTC1585AE Powertrain Lift.
Use common shop equipment: wood block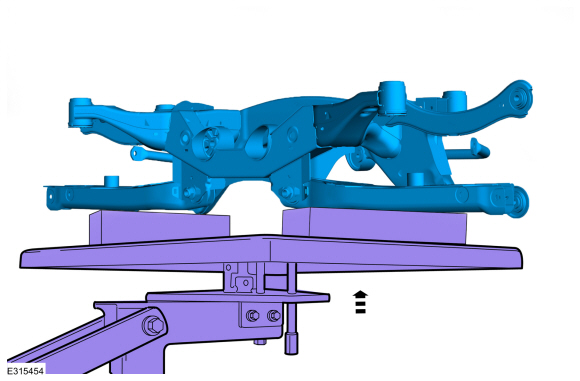
- Both sides.
Align the mark made during removal.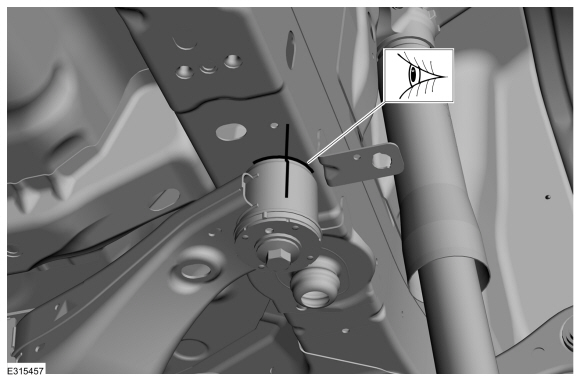
- Both sides.
Align the mark made during removal.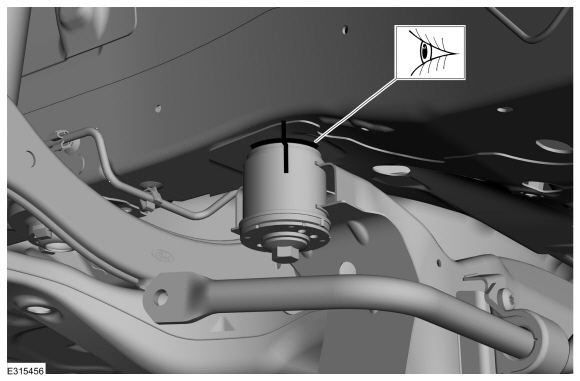
- Install the bolts.
Torque: 85 lb-ft (115 N·m)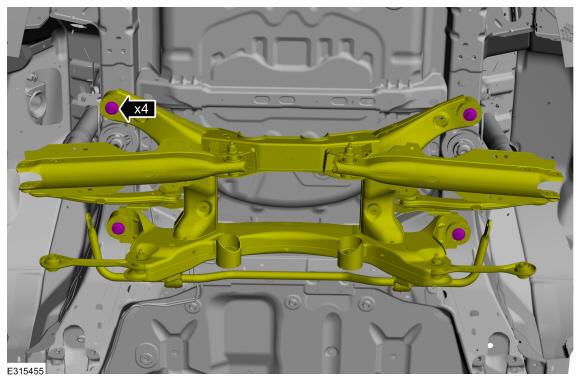
All-Wheel Drive (AWD) Vehicles
- Remove the hose clips and position the breather hose clear of the rear subframe.
- Connect the breather hose.
- Install the bolt.
Torque: 106 lb-in (12 N·m)
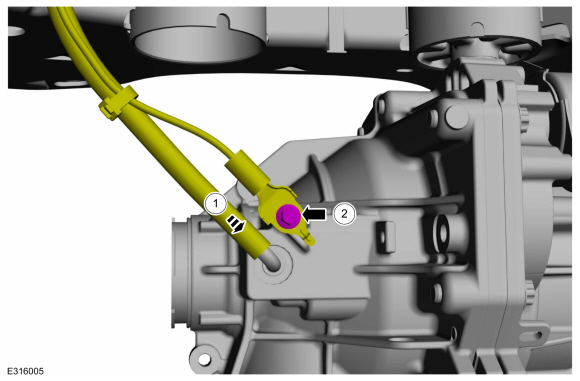
- Both sides.
Install the rear axle shaft.
Refer to: Rear Axle Shaft (205-05 Rear Axle Shafts, Removal and Installation). - Install the rear driveshaft.
Refer to: Rear Driveshaft (205-01 Driveshaft, Removal and Installation).
All vehicles
- Connect the electrical connector and wire harness clip.
- Install the underbody shields and brackets.
Torque: 17 lb-in (1.9 N·m) - Both sides.
Install a new front lower control arm-to-knuckle bolt.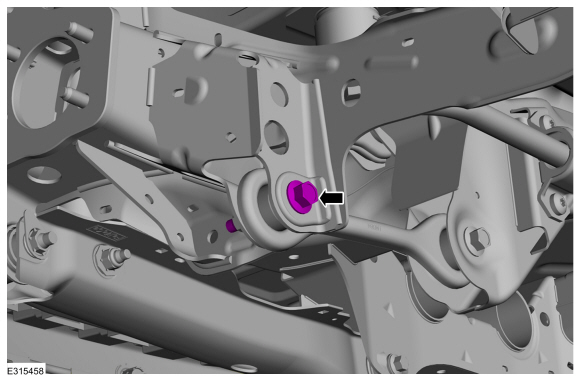
- Both sides.
Install a new upper control arm-to-knuckle bolt.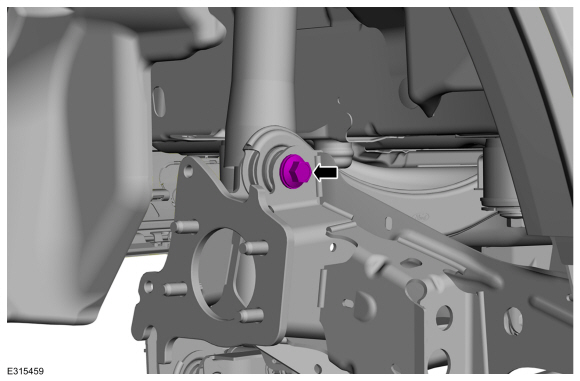
- Both sides.
Install the rear spring.
Refer to: Spring (204-02 Rear Suspension, Removal and Installation). NOTICE: Tighten the suspension bushing fasteners with the suspension loaded, or with the vehicle weight resting on the wheels and tires. Otherwise, incorrect clamp load and bushing damage may occur.
Both sides.
Tighten the front lower control arm-to-knuckle bolt.
Torque: 85 lb-ft (115 N·m)NOTICE: Tighten the suspension bushing fasteners with the suspension loaded, or with the vehicle weight resting on the wheels and tires. Otherwise, incorrect clamp load and bushing damage may occur.
Both sides.
Tighten the upper control arm-to-knuckle bolt.
Torque: 85 lb-ft (115 N·m)- Both sides. Install the rear stabilizer bar link.
Refer to: Rear Stabilizer Bar Link (204-02 Rear Suspension, Removal and Installation). - Install the muffler and exhaust pipe.
Refer to: Muffler and Exhaust Pipe (309-00A Exhaust System - 1.5 L EcoBoost (132 kW/180 L hp) - I3 (Y1), Removal and Installation).
Refer to: Muffler and Exhaust Pipe - 4WD (309-00A Exhaust System - 1.5 L EcoBoost (132 kW/180 L hp) - I3 (Y1), Removal and Installation).
Refer to: Muffler and Exhaust Pipe (309-00B Exhaust System - 2 L EcoBoost (177 kW/240 L hp) - MI4, Removal and Installation).
Refer to: Muffler and Exhaust Pipe (309-00E). - Install the wheels and tires.
Refer to: Wheels and Tires (204-04A Wheels and Tires, Removal and Installation). - Check and, if necessary, adjust the rear wheel toe.
Refer to: Rear Wheel Toe Adjustment (Suspension System 204-00 - General Information, General Procedures).
Test yourself
A quick Ford Escape quiz: every answer comes with an explanation and a link to the manual page.