Powertrain
Engine - Manual Transaxle - Installation
In this manual: Powertrain
25steps
~165min
5/5difficulty
3special tools
Done 0 of 25
Special Tool(s)
Material
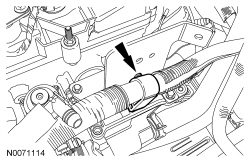
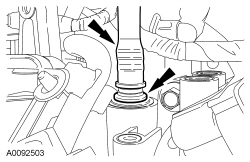
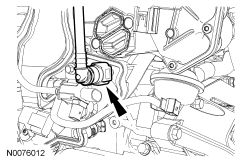
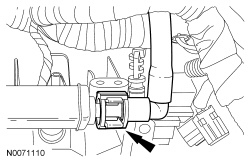
 |
2,200# Floor Crane, Fold Away 300-OTC1819E or equivalent |
 |
Lifting Bracket, Engine 303-050 (T70P-6000) |
 |
Powertrain Lift 300-OTC1585AE or equivalent |
 |
Spreader Bar 303-D089 (D93P-6001-A3) or equivalent |
 |
Adjustable Grip Arm, 1735A 014-00001 or equivalent |
Material
| Item | Specification |
|---|---|
| Motorcraft® SAE 5W-20 Premium Synthetic Blend Motor Oil (US); Motorcraft® SAE 5W-20 Super Premium Motor Oil (Canada) XO-5W20-QSP (US); CXO-5W20-LSP12 (Canada) | WSS-M2C945-A |
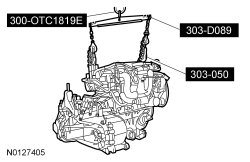
- Using the Floor Crane and Spreader Bar, position the engine and transaxle together. Install the 7 bellhousing-to-engine fasteners.
- Tighten to 48 N·m.
- Using the Floor Crane, Engine Lifting Bracket and Spreader Bar, raise the engine and transaxle assembly onto the lift table.
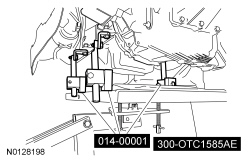
- Using the Powertrain Lift and Adjustable Grip Arm, secure the engine and transaxle assembly to the lift table.
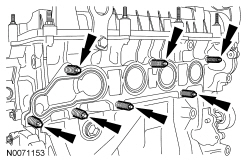
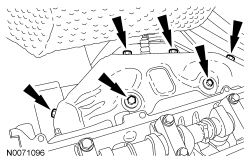
- Install the 7 new catalytic converter manifold studs.
- Tighten to 17 N·m.
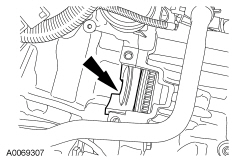
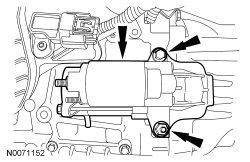
- Install the starter motor isolator.
- Install the starter motor, stud bolt and the bolt.
- Install the upper bolt and lower stud bolt finger-tight.
- Tighten the upper bolt to 35 N·m.
- Tighten the lower stud bolt to 35 N·m.
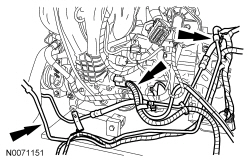
- Position the 2 power steering tubes and the wiring harness as an assembly on the engine.
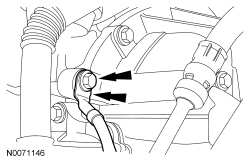
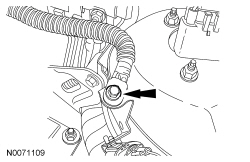
- Install the engine ground wire and the bolt.
- Tighten to 48 N·m.
- Install the power steering tube bracket on the starter motor stud bolt and install the nut.
- Tighten to 20 N·m.
- Attach the starter wire harness retainer to the starter motor stud bolt.
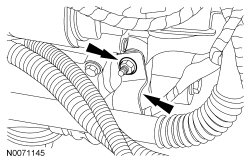
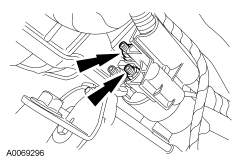
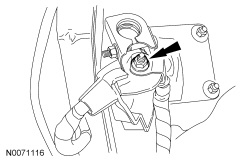
- Connect the starter motor electrical terminals and install the 2 nuts.
- Tighten the small nut to 5 N·m.
- Tighten the large nut to 12 N·m.
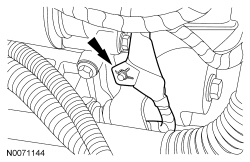
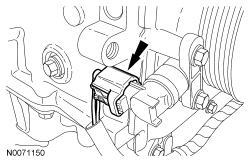
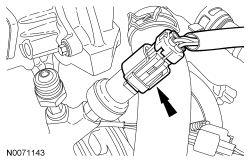
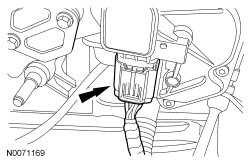
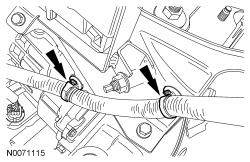
- Connect the Crankshaft Position (CKP) sensor electrical connector.
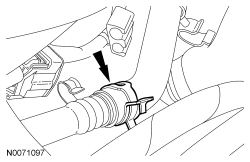
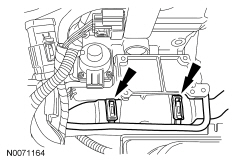
- Attach the 2 CKP sensor wire harness retainers.
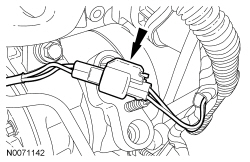
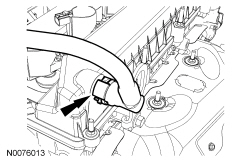
- Connect the Power Steering Pressure (PSP) switch electrical connector.
- Connect the A/C compressor electrical connector.
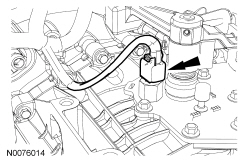
- Connect the reversing lamp switch electrical connector.
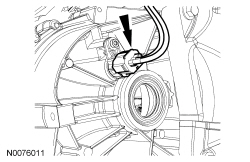
- Connect the Vehicle Speed Sensor (VSS) electrical connector.
- Position the Heated Oxygen Sensor (HO2S) and Catalyst Monitor Sensor (CMS) wire connector bracket and install the nut.
- Tighten to 25 N·m.
- Install the nut for the HO2S and CMS wire connector bracket.
- Tighten to 25 N·m.
- Using the lift table, position the engine and transaxle assembly in the vehicle.
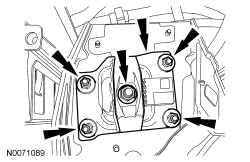
- Install the transaxle mount plate and the 5 nuts.
- Tighten the center nut to 150 N·m.
- Tighten the 4 outer nuts to 48 N·m.
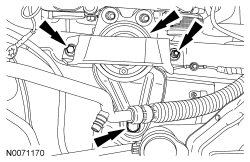
- Install the engine mount and the 2 bolts and the stud bolt.
- Tighten to 48 N·m.
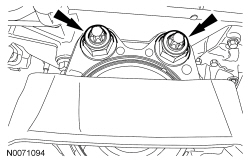
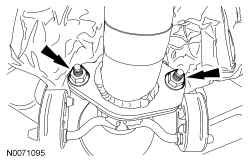
- Install the 2 motor mount nuts.
- Tighten to 90 N·m.
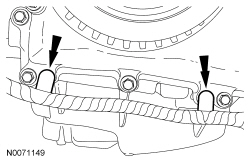
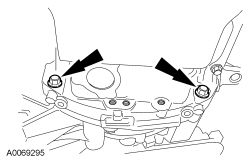
- Install the 2 oil pan-to-bellhousing bolts.
- Tighten to 48 N·m.
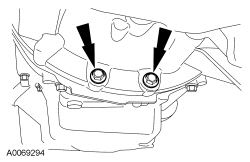
- Install the 2 lower bellhousing-to-oil pan bolts.
- Tighten to 48 N·m.
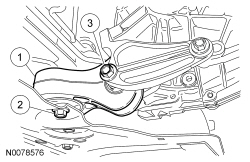
- NOTE: The bolts are different lengths, make sure the bolts are in the correct location.
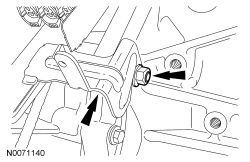
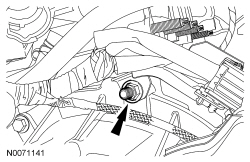
Install the transaxle roll restrictor and the 2 bolts.
- Install the transaxle roll restrictor.
- Install the short bolt.
- Install the long bolt.
- Tighten to 70 N·m.
- Connect the throttle control electrical connector.
- Connect the heater hose to the coolant tube.
- Connect the upper radiator hose and the heater hose to the coolant bypass.
- Install the power steering pump. For additional information, refer to Section 211-02.
- Clean and inspect the catalytic converter flange. Refer to Exhaust Manifold Cleaning and Inspection in Section 303-00.
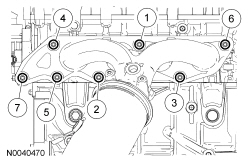
- NOTICE: Failure to tighten the catalytic converter nuts to specification before installing the converter bracket bolts will cause the converter to develop an exhaust leak. NOTICE: Failure to tighten the catalytic converter nuts to specification a second time will cause the converter to develop an exhaust leak. Using a new gasket and 7 new nuts, install the catalytic converter and tighten in 2 stages in the sequence shown.
- Stage 1: Tighten to 55 N·m.
- Stage 2: Tighten to 55 N·m.
- Install the heat shield and 6 bolts.
- Tighten to 11 N·m.
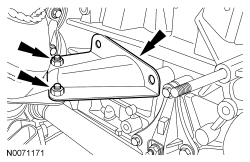
- Install the catalytic converter support bracket and the 2 bolts.
- Tighten to 22 N·m.
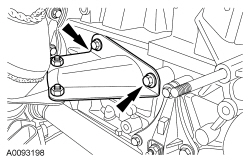
- Install the 2 catalytic converter support bracket-to-engine bolts.
- Tighten to 48 N·m.
- NOTE: Clean the mating surfaces of the muffler assembly and catalytic converter.
Using a new gasket and 2 new nuts, connect the flexpipe to the catalytic converter.
- Tighten to 48 N·m.
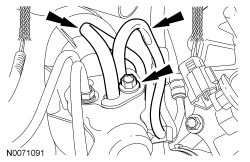
- Install 2 new O-ring seals and install the power steering tubes to the steering gear and install the bolt.
- Tighten to 18 N·m.
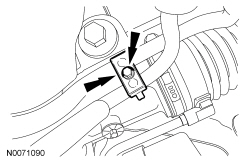
- Install the power steering tube clip and the bolt.
- Tighten to 10 N·m.
- Install the LH halfshaft. For additional information, refer to Section 205-04.
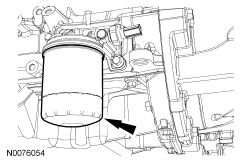
- NOTE: Lubricate the engine oil filter gasket with clean engine oil prior to installing the oil filter.
Install a new engine oil filter.
- Tighten the oil filter three-fourths turn after the oil filter gasket makes contact with the oil filter adapter.
- Connect the lower radiator hose to the radiator.
- Install the cooling fan motor and shroud. For additional information, refer to Section 303-03.
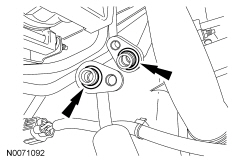
- Using 2 new O-ring seals, connect the A/C tubes to the A/C compressor.
- Install the A/C tube bracket to the A/C compressor stud bolt and install the nut.
- Tighten to 10 N·m.
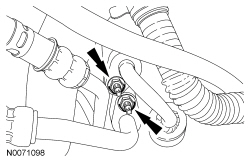
- Install the 2 A/C tube nuts.
- Tighten to 15 N·m.
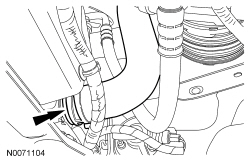
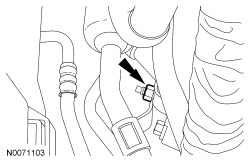
- Position and attach the 4 B+ battery cable wire harness retainers (2 shown).
- Install the generator. For additional information, refer to Section 414-00.
- Install the accessory drive belt and tensioner. For additional information, refer to Section 303-05.
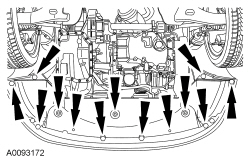
- Install the splash shield and the retainers.
- Install the 2 front wheels and tires. For additional information, refer to Section 204-04.
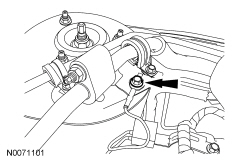
- Install the radio capacitor ground cable and the bolt.
- Tighten to 10 N·m.
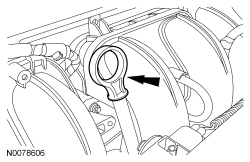
- Install the engine oil level indicator.
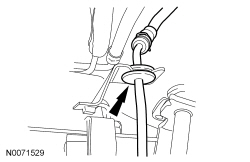
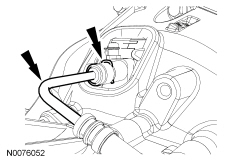
- Connect the hydraulic clutch line and grommet to the retaining bracket.
 WARNING: Carefully
read cautionary information on product label. For emergency medical information seek medical advice. In the USA or Canada on Ford/Motorcraft products call: 1-800-959-3673. For additional information, consult the product Material Safety Data Sheet (MSDS) if available. Failure to follow these instructions may result in serious personal injury. NOTICE: Do not spill brake fluid on painted or plastic surfaces or damage to the surface may occur. If brake fluid is spilled onto a painted or plastic surface, immediately wash the surface with water. Connect the clutch slave cylinder supply tube.- Install the clip.
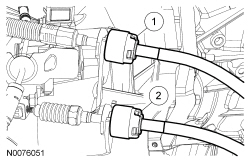
- NOTE: The shift cable abutment sleeve is colored white. NOTE:
The selector cable abutment sleeve is colored black.
Attach the transaxle cables to the bracket.- Attach the shifter cable to the bracket, turning the abutment sleeves counterclockwise to open. Position the cables into the metal holders.
- Attach the selector cable to the bracket, turning the abutment sleeves counterclockwise to open. Position the cables into the metal holders.
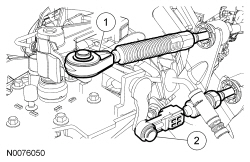
- Attach the gearshift cables.
- Attach the shifter cable to the shift mass.
- Attach the selector cable to the selector lever.
- Adjust the gearshift cables. For additional information, refer to Section 308-00.
- Connect the HO2S and CMS electrical connectors and attach the wire harness retainer.
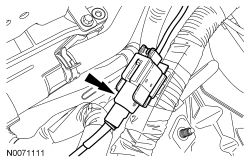
- Connect the starter wire harness electrical connector.
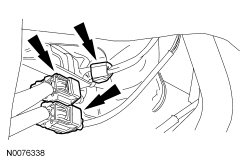
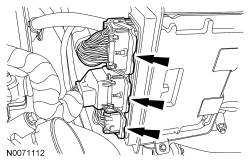
- Connect the 3 PCM electrical connectors.
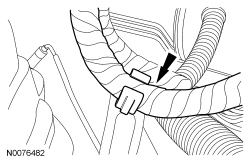
- Attach the engine harness to the coolant outlet bracket harness retainer.
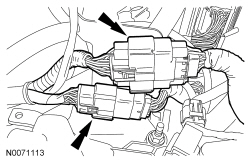
- Connect and attach the 2 engine harness electrical connectors.
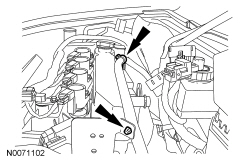
- Attach the brake booster vacuum hose retainer.
- Install the power brake booster vacuum tube into the quick connect fitting.
- Position and connect the Evaporative Emission (EVAP) tube. For additional information, refer to Section 310-00.
- Connect the fuel tube quick connect coupling to the fuel rail. For additional information, refer to Section 310-00.
- Install the negative battery cable ground and the bolt.
- Tighten to 6 N·m.
- Attach the 2 positive battery cable wire harness retainer.
- Connect the positive battery cable nut.
- Tighten to 10 N·m.
- Install the battery tray. For additional information, refer to Section 414-01.
- Connect the crankcase vent tube to the valve cover.
- Install the Air Cleaner (ACL) and ACL outlet pipe. For additional information, refer to Section 303-12.
- Fill the engine with clean engine oil.
- Fill and bleed the cooling system. For additional information, refer to Section 303-03.
- Bleed the clutch system. For additional information, refer to Section 308-00.
- Evacuate and charge the A/C system. For additional information, refer to Section 412-00.
Test yourself
A quick Ford Focus quiz: every answer comes with an explanation and a link to the manual page.
Was this page helpful?