Body and Paint
Headliner. Removal and Installation
In this manual: Body and Paint
21steps
~126min
4/5difficulty
Done 0 of 21
Materials
| Name | Specification |
|---|---|
| 3M™ Super Fast Repair Adhesive 04747 |
- |
Removal
NOTICE: Take care not to crease the headliner during removal and installation, otherwise damage to the headliner may occur.
Vehicles equipped with rain sensor or automatic-dimming mirror
- Remove the glove compartment.
Refer to: Glove Compartment (501-12 Instrument Panel and Console, Removal and Installation). - Disconnect the headliner wiring harness electrical connector.

All vehicles
- Both sides, remove the front pillar trim panel.
Refer to: Front Pillar Trim Panel (501-05 Interior Trim and Ornamentation, Removal and Installation). - Both sides, remove the center pillar trim panel.
Refer to: Center Pillar Trim Panel (501-05 Interior Trim and Ornamentation, Removal and Installation). - Remove the rear pillar upper trim panels on both sides.
Refer to: Rear Pillar Upper Trim Panel (501-05 Interior Trim and Ornamentation, Removal and Installation). - Position both front seats to the full rearward and fully reclined position.

- Remove the BCM.
Refer to Body Control Module (BCM) (419-10 Multifunction Electronic Modules, Removal and Installation). - Remove the BCM fasteners and bracket.

- Disconnect the headliner wiring harness electrical connectors and position the wiring harness aside.
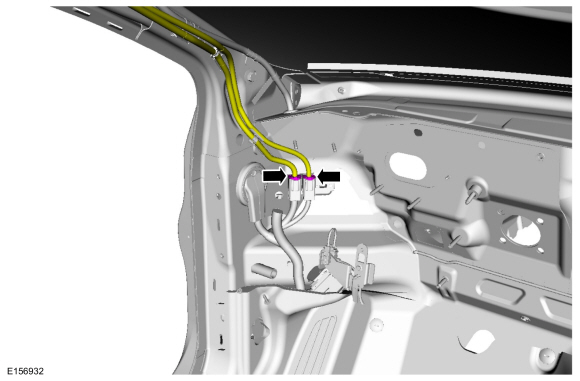
- Remove the floor console.
Refer to: Floor Console (501-12 Instrument Panel and Console, Removal and Installation). - If equipped.
Remove the rearview mirror upper cover.
- If equipped.
Remove the rearview mirror lower cover.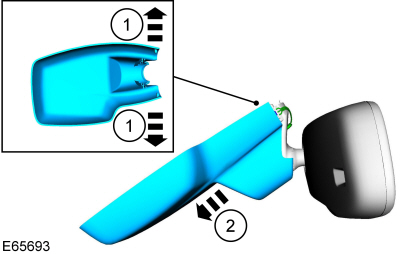
- If equipped.
Disconnect the electrical connectors.
- Both sides.
Remove the sun visor.- Remove the retainer cover.
- Release the clip.
- Remove the sun visor.
- If equipped.
Disconnect the electrical connector.

- Both sides.
Remove the retainer and sun visor clip.
- All.
Remove the fastener covers and fasteners and remove the assist handles.
- If equipped.
On the left side, release the clips and position the wiring harness aside.
Vehicles equipped with rain sensor or automatic-dimming mirror
- On the right side, release the clips and position the headliner wiring harness aside.
 |
All vehicles
- If equipped with sunroof panel, release the seven magnets and two locating pins and magnets.

- Remove the headliner.

Installation
- Using tape, mark the wire at the exit points for the correct length from the headliner connectors to the body/roof.
- Carefully remove the wire harness from the original headliner.
- Using a marking tool, mark the new headliner with the routing location and the wiring harness exit points from the original headliner.
NOTICE: Do not damage the wiring harness when cutting off the excess adhesive from the wiring harness.
Cut and remove the excess adhesive from the wiring harness.
- Position the wire harness on the new headliner, make sure the straps are long enough to connect to the body/roof connectors at the previous tape attachment points. Apply tape to temporarily hold the wire harness on the headliner.
- Apply adhesive in the same location as the factory adhesive along the entire length of the wire harness suspension to the headliner, to avoid NVH issues.
Material: 3M™ Super Fast Repair Adhesive / 04747
NOTICE: On vehicles with microphone noise cancellation, the brackets must be bonded flush to the new headliner and a bead of adhesive applied around the bracket to ensure proper sealing and correct system operation.
To install, reverse the removal procedure.
Test yourself
A quick Ford Fusion quiz: every answer comes with an explanation and a link to the manual page.
Was this page helpful?