Powertrain
Clutch Pressure Plate Removal and Installation (K24Z7)
Tightening torque found on this page

Removal
- Pressure Plate
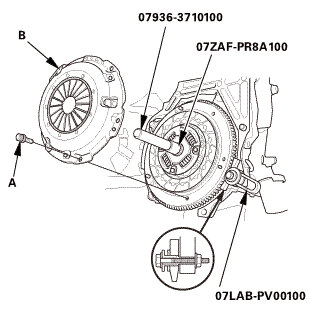 |
|
1. |
Install the ring gear holder. |
|
2. |
Install the clutch alignment shaft and the remover handle. |
|
3. |
To prevent warping, loosen the pressure plate mounting bolts (A) in a crisscross pattern in several steps. |
|
4. |
Remove the pressure plate (B). |
|

Installation
- Pressure Plate
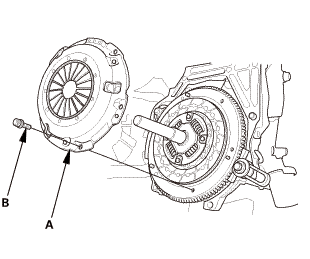 |
|
1. |
Install the pressure plate (A) and the mounting bolts (B) finger-tight. |
|
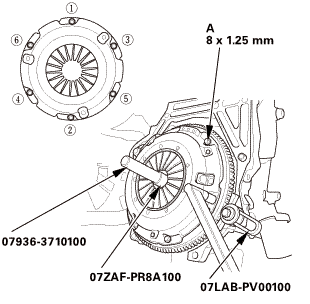 lx125mm
|
|
2. |
Torque the pressure plate mounting bolts (A) in a crisscross pattern. |
|
NOTE: |
|
 |
Tighten the bolts in several steps to prevent warping the diaphragm spring. |
|
|
|
Make sure that there is no clearance between the pressure plate and the flywheel. |
|
|
|
|
|
3. |
Remove the ring gear holder. |
|
4. |
Remove the clutch alignment shaft and the remover handle. |
|
5. |
Make sure the diaphragm spring fingers are all the same height. |
|
?
Test yourself
A quick Honda Civic quiz: every answer comes with an explanation and a link to the manual page.
Was this page helpful?