Drive Belt Auto-Tensioner Inspection (Except K24Z7)
In this manual: Powertrain
~1min read
Drive Belt Auto-Tensioner -Position Check
1.
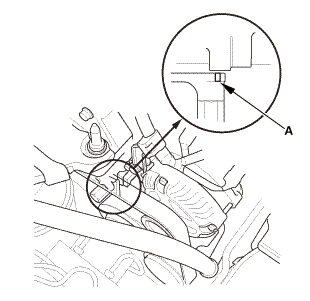
Turn the ignition switch to ON (II), and make sure to turn the A/C switch OFF, then turn the ignition switch to LOCK (0).
2.
Check the position of the auto-tensioner indicator pointer (A).
3.
Start the engine, then check the position again with the engine idling. If the position of the indicator moves or fluctuates a lot, replace the auto-tensioner.
4.
Check for abnormal noise from the tensioner pulley. If you hear any abnormal noise, replace the auto-tensioner.
Drive Belt
1.
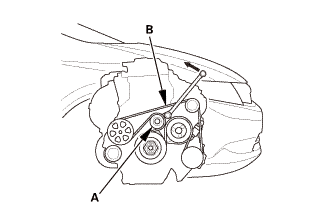
Move the auto-tensioner (A) counterclockwise to relieve tension from the drive belt (B).
2.
Remove the drive belt.
Drive Belt Auto-Tensioner - Inspection
1.
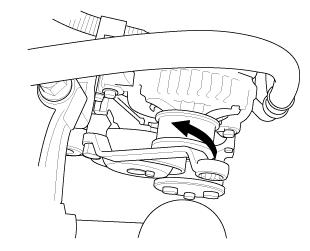
Set a long-handled, boxed-end wrench on the drive belt auto-tensioner from above the engine. Slowly turn the wrench in the direction of the arrow. Check that the auto-tensioner moves smoothly and without any abnormal noise. If the auto-tensioner does not move smoothly, or you hear any abnormal noise, replace the auto-tensioner.
NOTE: This is a hydraulic type auto-tensioner; you must turn the wrench slowly.
Drive Belt
1.
Move the auto-tensioner (A) counterclockwise.
2.
Install the drive belt (B).
?
Test yourself
A quick Honda Civic quiz: every answer comes with an explanation and a link to the manual page.