Powertrain
Shift Lock Unit Removal and Installation (A/T, CVT)
7431A1

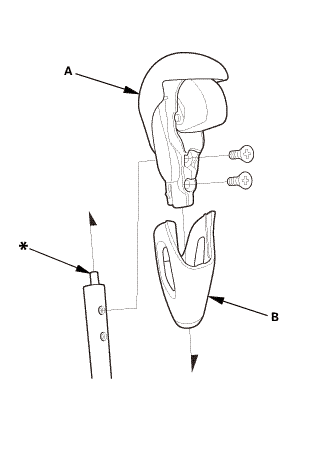
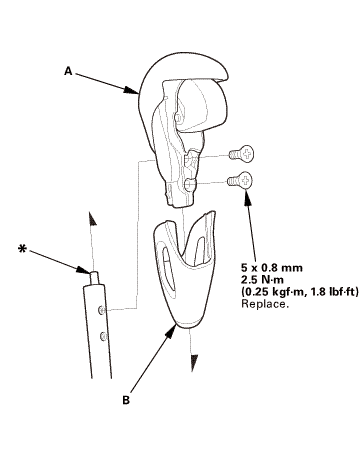
NOTE: Do not wipe off the special grease applied to the area of the shift lever marked with an asterisk (*) when you disassemble it.
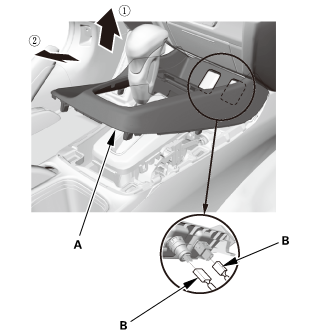
- Center Console Panel Assembly (Except '12M M/T)
 |
|
2. |
Remove the center console panel (A). |
|
3. |
For some models: Disconnect the connector(s) (B). |
|
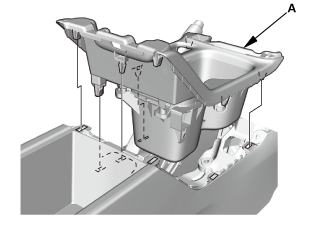
- Cup Holder Panel Assembly
 |
|
1. |
Remove the cup holder panel assembly (A). |
|
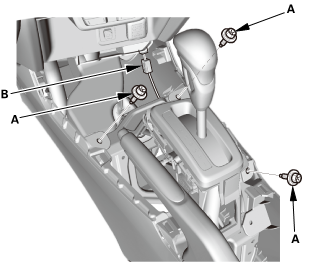
- Center Console Assembly
 |
|
2. |
Disconnect the connector (B). |
|
 |
|
3. |
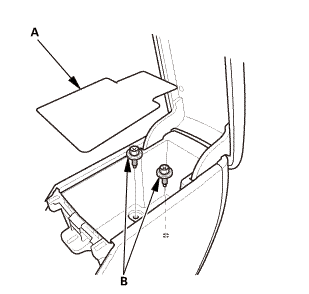
Remove the console box mat (A). |
|
 |
|
5. |
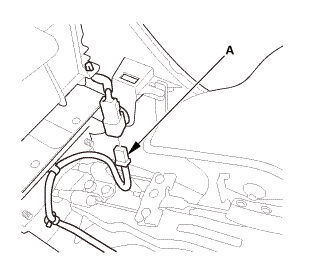
Disconnect the connector (A). |
|
 |
|
6. |
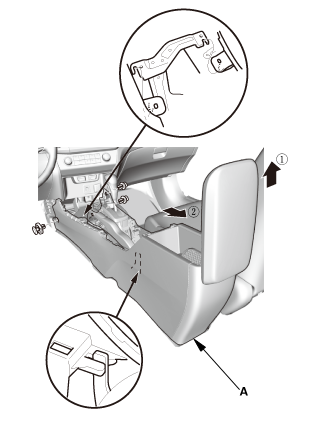
Remove the center console (A), in the numbered sequence shown. |
|
- Shift Lever Knob and Shift Lever Knob Ring
 |
|
1. |
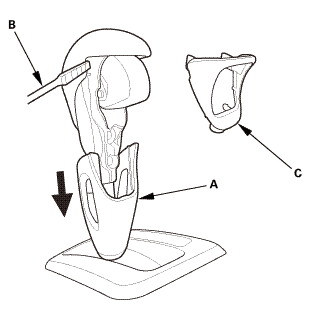
Pull down the shift lever ring (A). |
|
2. |
Wrap the end of a flat-tip screwdriver (B) with tape, remove the shift lever knob ring (C). |
|
 |
|
3. |
Remove the shift lever knob (A) and the shift lever ring (B). |
|
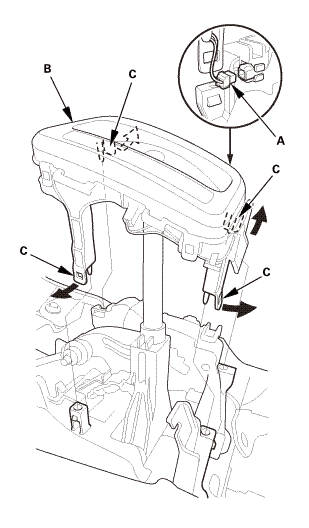
- A/T Gear Position Indicator Panel Assembly (Type A Shift Lever)
 |
|
1. |
Disconnect the connector (A). |
|
2. |
Remove the A/T gear position indicator panel assembly (B) by expanding the four lock tabs (C). |
|
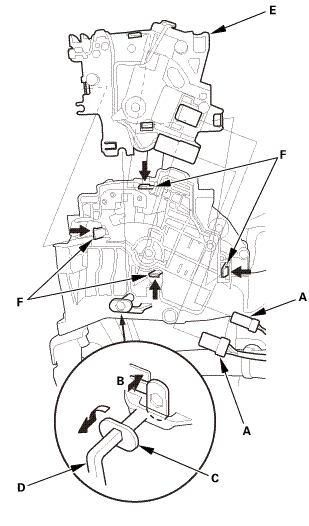
- Shift Lock Unit Assembly (Type A Shift Lever)
 |
|
1. |
Disconnect the connectors (A). |
|
2. |
Release the lock tab (B) and turn the pivot pin (C) counterclockwise using a hex wrench (D) as shown, and pull it. |
|
3. |
Remove the shift lock unit (E) while releasing the four lock tabs (F). |
|

NOTE: Do not wipe off the special grease applied to the area of the shift lever marked with an asterisk (*) when you assemble it.
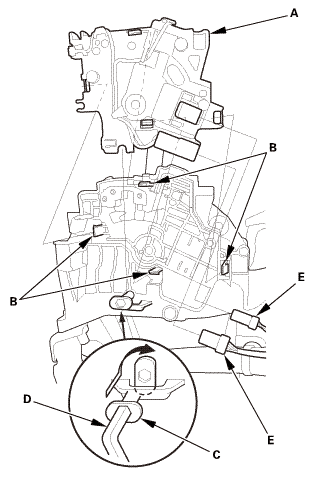
- Shift Lock Unit Assembly (Type A Shift Lever)
 |
|
1. |
Install the shift lock unit (A) by aligning the four lock tabs (B). |
|
2. |
Push the pivot pin (C), and turn it clockwise using a hex wrench (D) as shown. |
|
3. |
Connect the connectors (E). |
|
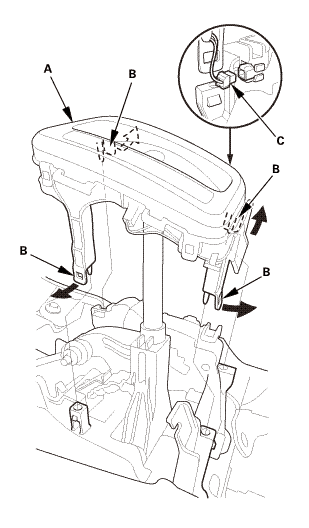
- A/T Gear Position Indicator Panel Assembly (Type A Shift Lever)
 |
|
1. |
Install the A/T gear position indicator panel assembly (A) by aligning the four lock tabs (B). |
|
2. |
Connect the connector (C). |
|
- Shift Lever Knob and Shift Lever Knob Ring
|
1. |
Install the shift lever knob (A) and the shift lever ring (B). |
 mm
 |
|
2. |
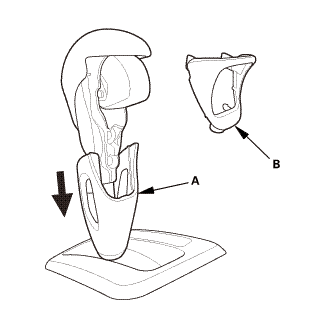
Pull down the shift lever ring (A) if necessary, and install the shift lever knob ring (B). |
|
3. |
Pull up the shift lever ring to secure the knob ring. |
|
- Center Console Assembly
 |
|
1. |
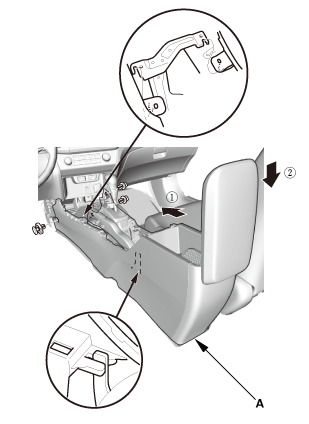
Install the center console (A), in the numbered sequence shown. |
|
|
|
2. |
Connect the connector (A). |
|
 |
|
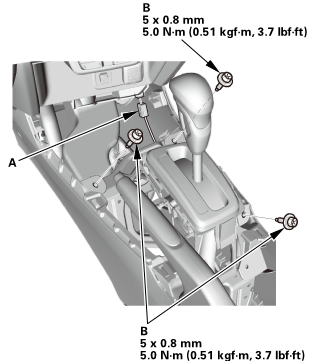
3. |
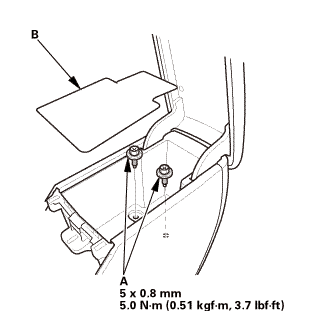
Install the bolts (A). |
|
4. |
Install the console box mat (B). |
|
 mms.n
|
|
5. |
Connect the connector (A). |
|
6. |
Install the bolts (B). |
|
- Cup Holder Panel Assembly
|
|
1. |
Install the cup holder panel assembly (A). |
|
- Center Console Panel Assembly (Except '12M M/T)
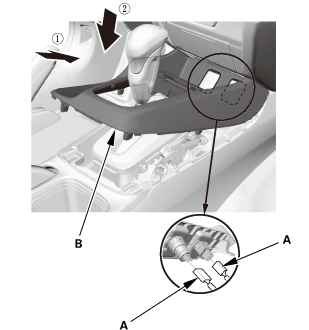 |
|
1. |
For some models: Connect the connector(s) (A). |
|
2. |
Install the center console panel (B). |
|
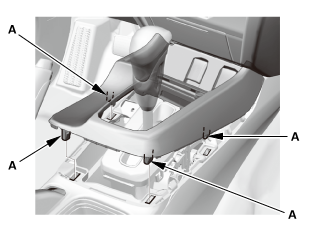 |
|
3. |
Install the clips (A). |
|
?
Test yourself
A quick Honda Civic quiz: every answer comes with an explanation and a link to the manual page.
Was this page helpful?