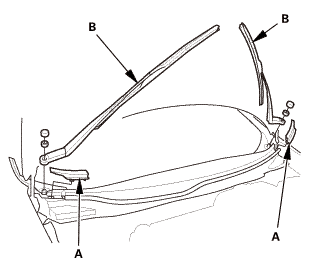
NOTE: Set the wiper arms to the auto-stop position before removal.
1.
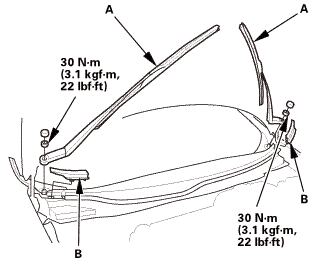
Remove the cowl top wiper covers (A).
2.
Remove the wiper arms (B).
Both Side Cowl Covers
1.
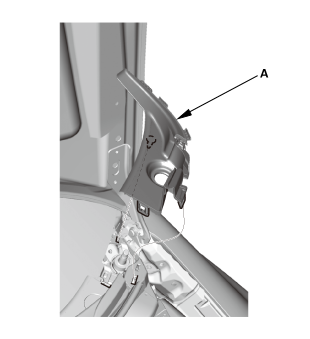
Remove the side cowl cover (A).
2.
The left side is shown; repeat on the right side.
Center Cowl Cover
1.
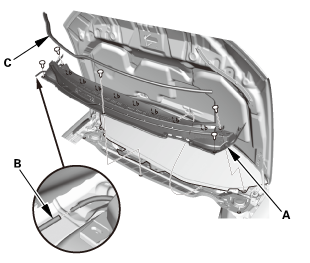
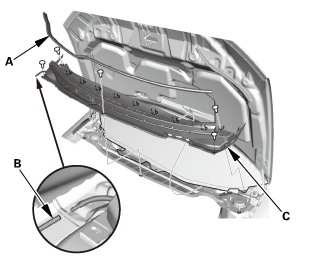
Remove the center cowl cover (A).
2.
Disconnect the windshield washer tube (B).
3.
If necessary, remove the hood rear seal (C).
Under Cowl Panel
1.
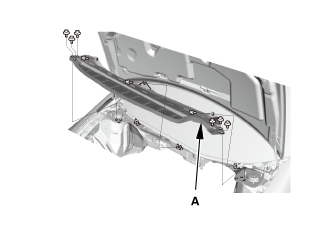
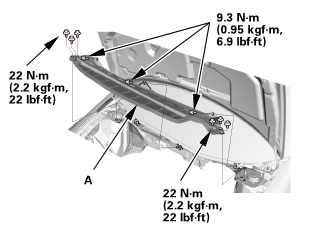
Remove the under cowl panel (A).
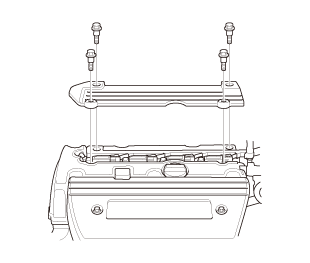
Ignition Coil Cover
1.
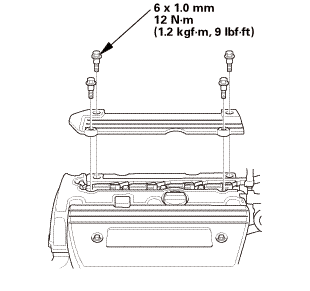
Remove the ignition coil cover.
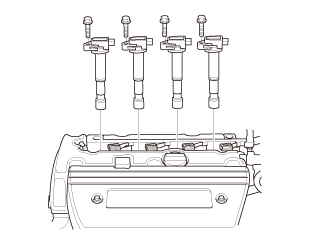
Ignition Coil
1.
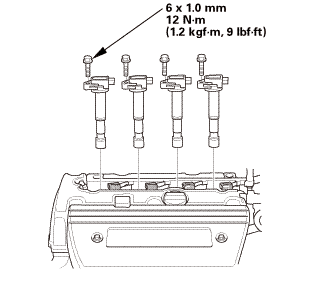
Remove the ignition coils.
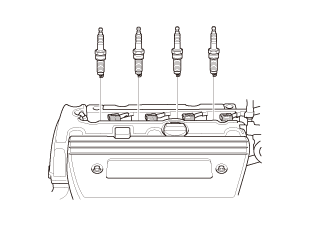
Spark Plug
1.
Remove the spark plugs.
Inspection
Spark Plug - Inspection
wan:avla:1
1.
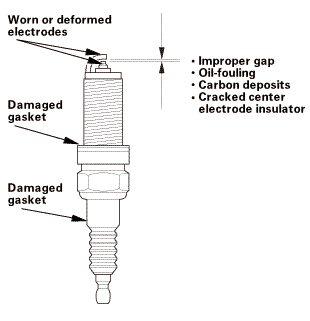
Inspect the electrodes and the ceramic insulator.
Burned or worn electrodes may be caused by these conditions:
-
Advanced ignition timing
-
Loose spark plug
-
Plug heat range too hot
-
Insufficient cooling
Fouled plugs may be caused by these conditions:
-
Retarded ignition timing
-
Oil in combustion chamber
-
Incorrect spark plug gap
-
Plug heat range too cold
-
Excessive idling/low speed running
-
Clogged air cleaner element
-
Deteriorated ignition coils
2.
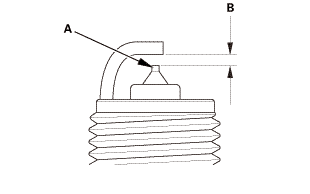
Replace the plug at the specified interval, or if the center electrode (A) is rounded, or if the spark plug gap (B) is out of specification, or if the spark plug electrode is dirty or contaminated. Use only the spark plugs listed.
NOTE:
Do not adjust the gap of iridium tip plugs.
Do not use a plug cleaner.
Spark Plugs
NGK:
ILZKR7B-11S
DENSO:
SXU22HCR11S
Electrode Gap
Standard (New):
1.0-1.1 mm (0.039-0.043 in)
Installation
Spark Plug
1.
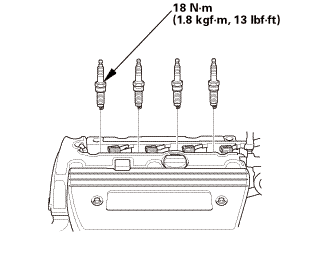
Apply a small amount of anti-seize compound to the plug threads, and screw the plugs into the cylinder head, finger tight, then tighten the plugs to the specified torque.
Specified Torque:
18 N·m
Ignition Coil
1.
Install the ignition coils.
Ignition Coil Cover
1.
Install the ignition coil cover.
Under Cowl Panel
22mm)2222
1.
Install the under cowl panel (A).
Center Cowl Cover
1.
If necessary, install the hood rear seal (A).
2.
Connect the windshield washer tube (B).
3.
Install the center cowl cover (C).
Both Side Cowl Covers
1.
Install the side cowl cover (A).
2.
The left side is shown; repeat on the right side.
Wiper Arm Assembly
1.122
NOTE: Set the wiper arms to the auto-stop position before installation.
1.
Install the wiper arms (A).
2.
Install the cowl top wiper covers (B).
?
Test yourself
A quick Honda Civic quiz: every answer comes with an explanation and a link to the manual page.

 Inspection
 wan:avla:1


 22mm)2222
 1.122