Subframe Removal and Installation

- Front Subframe - Torque
NOTE:
|
|||
|

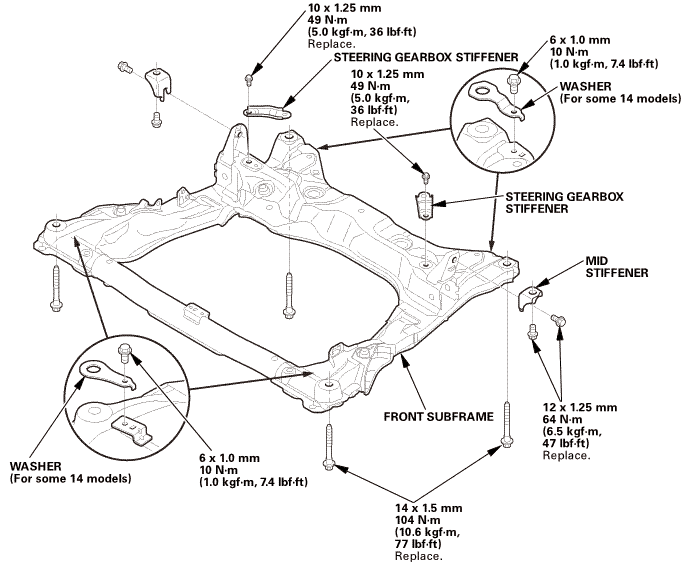 10mmsteeringgeareoxstiffeneru.owashermid25fronyat(5,..,..mm(in77
- Front Subframe - Alignment
NOTE:
|
|||
|
1. |
Lift the front subframe (A) up to the body, and loosely install the new subframe mounting bolts (B). |
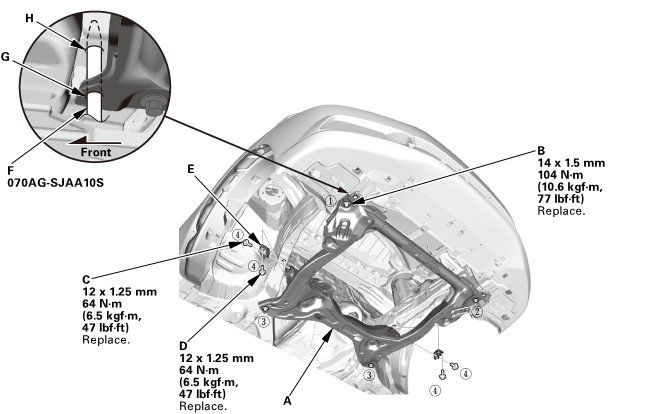 12xmmmmn-m77mm
2. |
Loosely install the new mid stiffener mounting bolts (C, D) securing the mid stiffeners (E). |
3. |
Insert the subframe alignment pin (F) through the positioning hole (G) on the right front subframe, and into the positioning hole (H) on the body, then loosely tighten the subframe right front mounting bolt. |
4. |
Insert the subframe alignment pin through the positioning hole on the left front subframe, and into the positioning hole on the body, then loosely tighten the subframe left front mounting bolt. |
5. |
Tighten the subframe mounting bolts to the specified torque values starting with the right front subframe mounting bolt. |
6. |
Check all of the subframe mounting bolts, and retighten if necessary. |
|
NOTE: Tighten the bolts in the sequence shown. |
||
7. |
Tighten the mid stiffener mounting bolts to the specified torque. |
Test yourself
A quick Honda Civic quiz: every answer comes with an explanation and a link to the manual page.