Body (Interior and Exterior)
Main Crash Pad Assembly Repair Procedures
In this manual: Body (Interior and Exterior)
21steps
~126min
4/5difficulty
Done 0 of 21
Replacement
|

|
- Disconnect the negative (-) battery terminal.
- Remove the floor console assembly. (Refer to Floor Console - "Floor Console Assembly")
- Remove the crash pad lower panel. (Refer to Crash Pad - "Crash Pad Lower Panel")
- Remove the instrument cluster fascia. (Refer to Instrument Cluster - "Center Fascia Panel")
- Remove the heater and A/C control unit. (Refer to Heating, Ventilation, Air Conditioning - "Heater and A/C Control Unit (Manual)") (Refer to Heating, Ventilation, Air Conditioning - "Heater and A/C Control Unit (DATC)")
- Remove the glove box upper cover assembly. (Refer to Crash Pad - "Crash Pad Center Panel")
- Remove the steering wheel. (Refer to Steering System - "Steering Wheel")
- Remove the steering column cover lower panel. (Refer to Crash Pad - "Steering Column Cover Panel")
- Remove the multifunction switch unit. (Refer to Body Electrical System - "Multifunction Switch")
- Remove the instrument cluster. (Refer to Body Electrical System - "Instrument Cluster")
- Disconnect the airbag warning lamp connector (A).

- Using a flat-tip screwdriver or trim removal tool, remove the center under cover [LH] (A).

- Disconnect the start button connector (A).
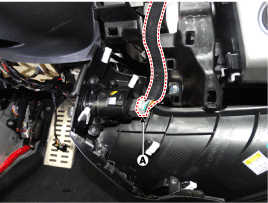
- Loosen the mounting screws and remove the side garnish assembly [LH] (A).
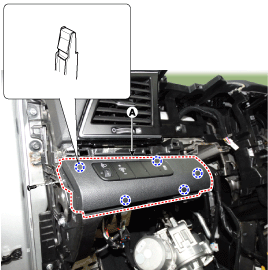
- Disconnect the airbag side garnish connector (A).

- Loosen the mounting screws and remove the center garnish (A).

- Disconnect the center speaker connector (A).

- Loosen the mounting bolts (A).
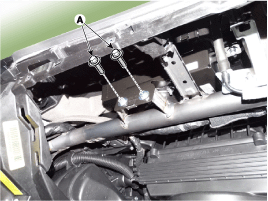
- Loosen the mounting bolts and nuts, then remove the main airbag assembly (A).
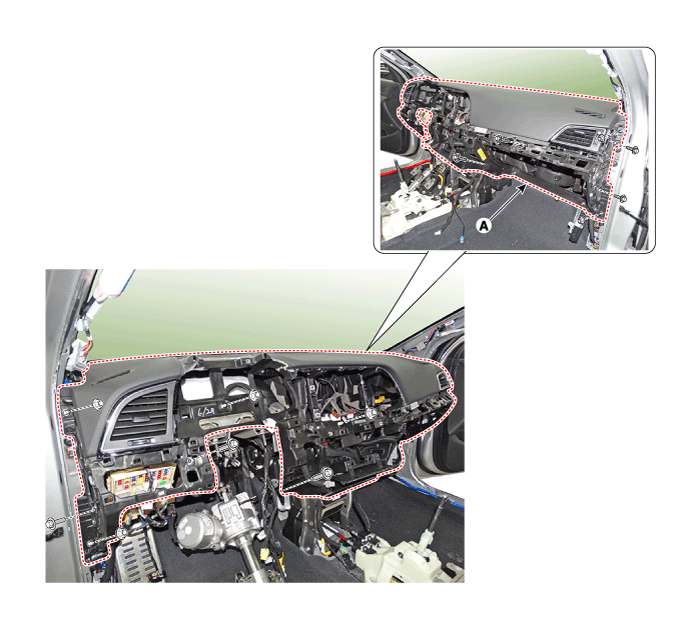
- Disconnect the passenger airbag connectors (A).

- To install, reverse the removal procedure.

- Make sure the crash pad cover is correctly installed on the guide pins.
- Before tightening the bolts, make sure the airbag wire harness is not pinched.
- Make sure the connectors are connected correctly and the antenna wire is connected properly.
- Make sure each component of the assembly operates correctly.
- Replace any damaged clips (or pin-type retainers).
Test yourself
A quick Hyundai Elantra AD quiz: every answer comes with an explanation and a link to the manual page.
Was this page helpful?