Body (Interior and Exterior)
Trunk Lid Lock Repair Procedures
In this manual: Body (Interior and Exterior)
24steps
~144min
4/5difficulty
Done 0 of 24
Replacement
[Trunk Lid Latch]
|

|
- Remove the rear trunk lid trim. (Refer to Trunk Lid - "Trunk Lid Trim")
- Disconnect the connector (A) and cable (B), then loosen the bolt and remove the trunk lid latch (C).

- To install, reverse the removal procedure.

- Make sure the trunk lid locks/unlocks and opens/closes properly.
- Adjust the alignment of the rear door.
- Make sure the connectors are connected correctly.
[Trunk Lid Cable]
- Remove the front seat assembly. (Refer to Front Seat - "Front Seat Assembly")
- Remove the rear seat assembly. (Refer to Rear Seat - "Rear Seat Assembly")
- Remove the floor console assembly. (Refer to Floor Console - "Floor Console Assembly")
- Remove the lower center pillar trim. (Refer to Interior Trim - "Center Pillar Trim")
- Remove the side cowl trim. (Refer to Interior Trim - "Side Cowl Trim")
- Remove the side trunk trim. (Refer to Interior Trim - "Side Cowl Trim")
- Remove the floor carpet. (Refer to "Floor Carpet")
- Remove the rear trunk lid trim. (Refer to Trunk Lid - "Trunk Lid Trim")
- Loosen the bolt securing the trunk lid latch (A).
Tightening torque: 7.8 ~ 11.8 N·m

- Disconnect the cable (A) and remove the trunk lid latch (B).

- Remove the cable (B) from the trunk lid latch (A).

- Remove the trunk lid cable (A).
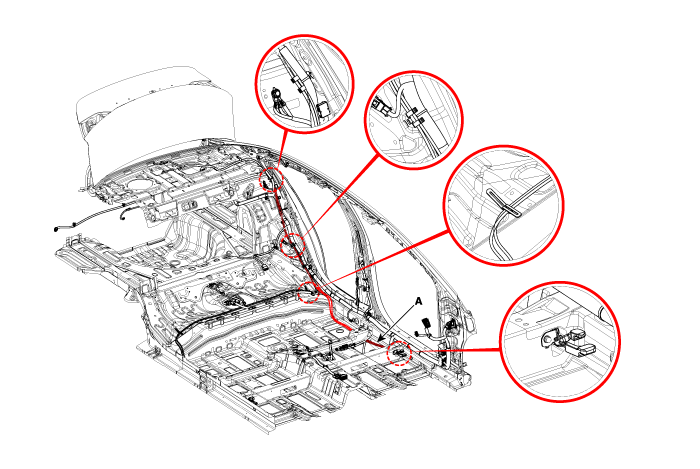

- To install, reverse the removal procedure.

- Make sure the trunk lid locks/unlocks and opens/closes properly.
[Trunk Lid Latch]
- Remove the front seat assembly [LH]. (Refer to Front Seat - "Front Seat Assembly")
- Remove the front door sill trim [LH]. (Refer to Interior Trim - "Front Door Scuff Trim")
- Remove the side cowl trim [LH]. (Refer to Interior Trim - "Side Cowl Trim")
- Remove the floor console assembly. (Refer to Floor Console - "Floor Console Assembly")
- Separate the floor covering to make room for removing the rear heater duct.
- Loosen the bolt securing the trunk lid latch (A).
Tightening torque: 7.8 ~ 11.8 N·m
- Disconnect the cable (A) and remove the trunk lid latch (B).
- To install, reverse the removal procedure.
- Make sure the trunk lid locks/unlocks and opens/closes properly.
Test yourself
A quick Hyundai Elantra AD quiz: every answer comes with an explanation and a link to the manual page.
Was this page helpful?